SIDE TURN SIGNAL LIGHT ASSEMBLY INSTALLATION

Tech Tips
-
Use the same procedure for the RH and LH sides.
-
The procedure listed below is for the LH side.
-
INSTALL SIDE TURN SIGNAL LIGHT ASSEMBLY LH
-
Connect the connector.
-
Install the side turn signal light assembly LH with the 2 screws.
-
-
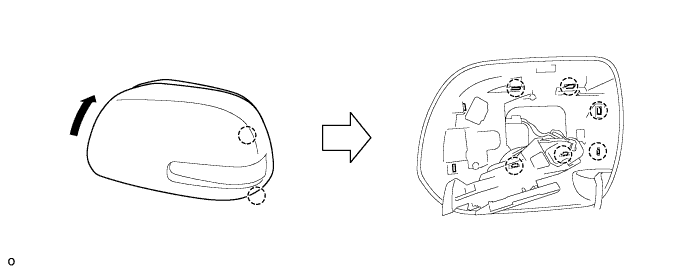
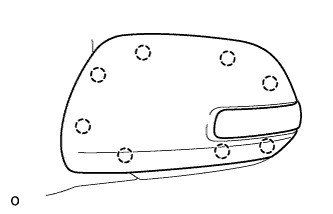
INSTALL OUTER MIRROR COVER LH
-
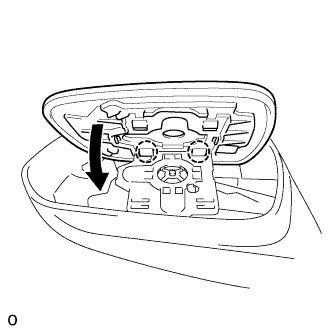
Attach the 2 claws as shown in the illustration.
-
Attach the 6 claws to install the outer mirror cover LH.
-
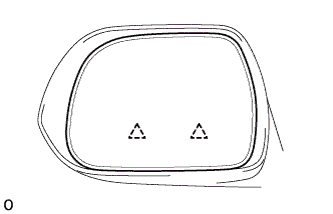
After installing the outer mirror cover, check that there is no gap between the cover and mirror body.
If there is a gap between the cover and body, noise will occur during driving.
-
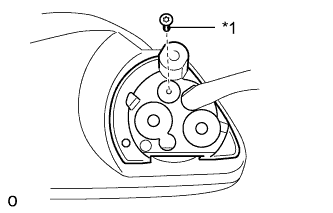
Text in Illustration *1 Adhesive Using a T25 "TORX" socket wrench, install the screw.
Tech Tips
-
Clean the threads of the screw with non-residue solvent.
-
Apply adhesive to the threads of the screw.
Adhesive Toyota Genuine Adhesive 1324, Three Bond 1324 or equivalent
-
-
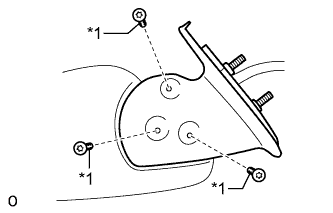
Text in Illustration *1 Adhesive Using a T25 "TORX" socket wrench, install the screws.
Tech Tips
-
Clean the threads of the screws with non-residue solvent.
-
Apply adhesive to the threads of the screws.
Adhesive Toyota Genuine Adhesive 1324, Three Bond 1324 or equivalent
-
-
Attach the 5 claws.
-
Install the rubber base with the screw.
-
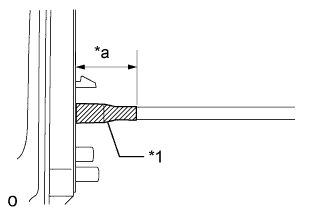
Text in Illustration *1 Tape *a 40 mm (1.58 in.) Apply new tape as shown in the illustration.
-
-
INSTALL OUTER MIRROR LH
-
Attach the 2 claws as shown in the illustration.
-
Attach the 2 clips to install the outer mirror LH.
Note
Do not push in the glass with excessive force. Doing so may break the mirror surface.
-
-
INSTALL OUTER REAR VIEW MIRROR ASSEMBLY LH