FRONT SEAT OUTER BELT ASSEMBLY INSTALLATION

Tech Tips
-
Use the same procedure for the RH and LH sides.
-
The procedure listed below is for the LH side.
-
A bolt without a torque specification is shown in the standard bolt chart Click here.
-
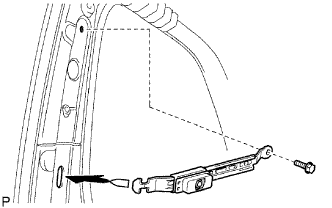
INSTALL FRONT SHOULDER BELT ANCHOR ADJUSTER ASSEMBLY
-
Insert the tip of the front shoulder belt anchor adjuster assembly to the body as shown in the illustration.
-
Install the front shoulder belt anchor adjuster assembly with the bolt.
- Torque:
- 42 N*m { 428 kgf*cm, 31 ft.*lbf }
-
-
INSTALL SHOULDER BELT ANCHORAGE PLATE COVER
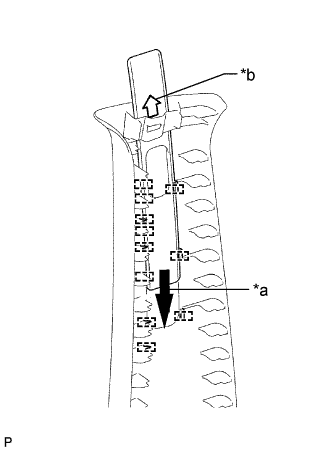
Text in Illustration *a Slide *b Mark
-
Install the shoulder belt anchorage plate cover as shown in the illustration.
Tech Tips
Make sure the shoulder belt anchorage plate cover is firmly set into the guides.
-
-
INSTALL CENTER PILLAR GARNISH LH
-
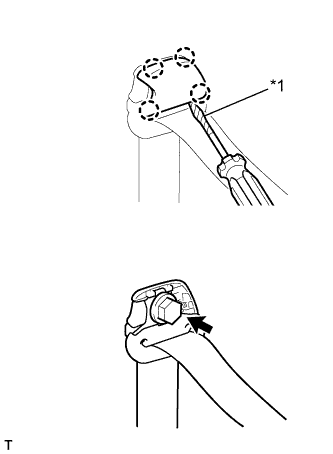
Using a screwdriver, detach the 4 claws and remove the front seat belt shoulder anchor cover.
Tech Tips
Tape the screwdriver tip before use.
Text in Illustration *1 Protective Tape -
Remove the bolt and disconnect the front seat belt shoulder anchor.
-
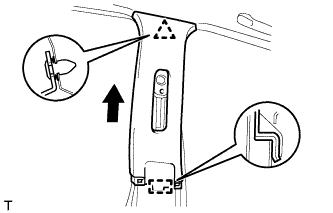
Detach the clip.
-
Pull the center pillar garnish in the direction indicated by the arrow in the illustration to detach the guide and remove the center pillar garnish.
-
-
INSTALL FRONT SEAT OUTER BELT ASSEMBLY LH
Note
Do not disassemble the retractor.
-
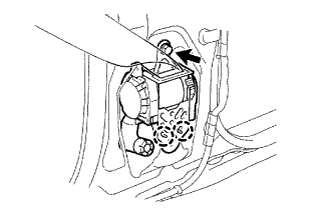
Align the front seat outer belt assembly LH positioning holes with the 2 claws and install the retractor of the front seat outer belt assembly LH with the bolt.
- Torque:
- 4.8 N*m { 49 kgf*cm, 42 in.*lbf }
-
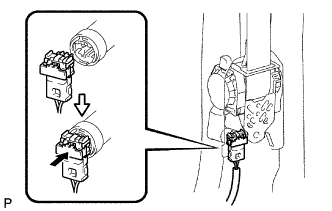
Connect the pretensioner connector as shown in the illustration.
-
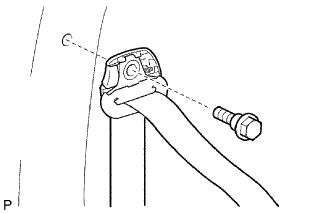
Connect the front seat outer belt shoulder anchor with the bolt.
- Torque:
- 42 N*m { 428 kgf*cm, 31 ft.*lbf }
-
-
INSTALL SEAT BELT ANCHOR COVER CAP
-
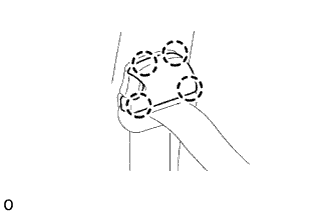
Attach 4 claws to install the seat belt anchor cover cap.
-
-
INSTALL LOWER CENTER PILLAR GARNISH LH
-
Attach the 2 clips and 2 claws to install the lower center pillar garnish LH.
-
Connect the front seat outer belt floor anchor with the bolt.
- Torque:
- 42 N*m { 428 kgf*cm, 31 ft.*lbf }
-
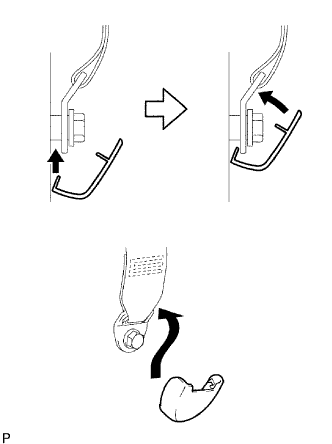
Attach the 2 claws to install the outer lap belt outer anchor cover.
-
-
INSTALL REAR DOOR OPENING TRIM WEATHERSTRIP LH
-
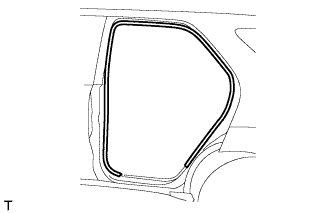
Remove the rear door opening trim weatherstrip.
-
-
INSTALL REAR DOOR SCUFF PLATE LH
Text in Illustration *1 Protective Tape
-
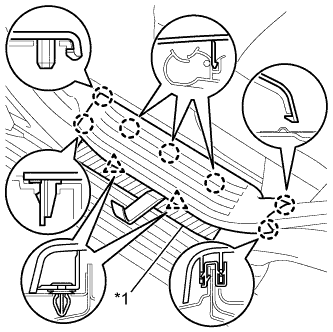
Put protective tape around the rear door scuff plate.
-
Using a moulding remover, detach the 7 claws and 2 clips and remove the rear door scuff plate.
-
-
INSTALL FRONT DOOR OPENING TRIM LH
-
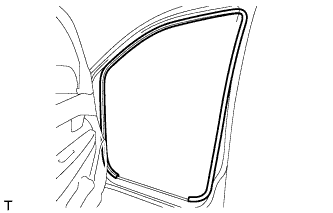
Remove the front door opening trim.
-
-
INSTALL FRONT DOOR SCUFF PLATE LH
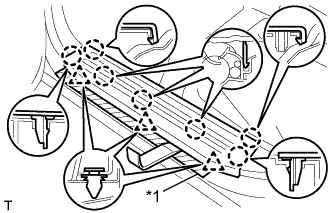
Text in Illustration *1 Protective Tape
-
Put protective tape around the front door scuff plate.
-
Using a moulding remover, detach the 7 claws and 3 clips and remove the front door scuff plate.
-
-
INSTALL FRONT SEAT ASSEMBLY LH
-
Place the seat in the cabin.
Note
Be careful not to damage the vehicle body.
-
w/ Seat belt warning, w/ occupant detection sensor:
Connect the connector under the seat.
-
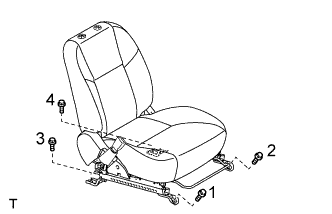
Install the seat with the 4 bolts.
- Torque:
- 37 N*m { 377 kgf*cm, 27 ft.*lbf }
Tech Tips
Tighten the bolts in the order indicated in the illustration.
-
-
CONNECT CABLE TO NEGATIVE BATTERY TERMINAL
Note
When disconnecting the cable, some systems need to be initialized after the cable is reconnected Click here.