AIR CONDITIONING PANEL (for Automatic Air Conditioning System) REMOVAL

-
REMOVE CENTER INSTRUMENT CLUSTER FINISH PANEL ASSEMBLY
-
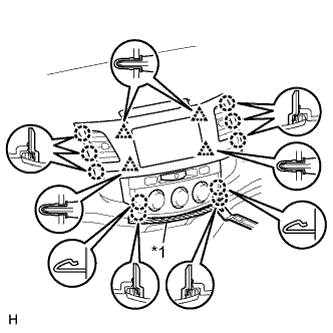
for Manual Air Conditioning System:
-
Put protective tape around the center instrument cluster finish panel.
-
Using a moulding remover, detach the 10 claws and 4 clips.
-
Text in Illustration *1 Protective Tape Detach the 4 claws and disconnect the air conditioner control.
-
Disconnect the connectors and remove the center instrument cluster finish panel.
-
-
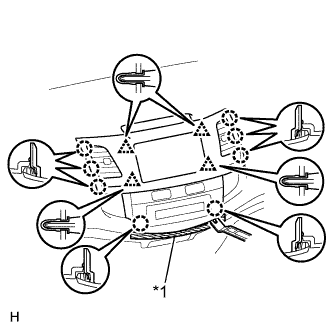
Text in Illustration *1 Protective Tape for Automatic Air Conditioning System:
-
Put protective tape around the center instrument cluster finish panel.
-
Using a moulding remover, detach the 8 claws and 4 clips.
-
Disconnect the connectors and remove the center instrument cluster finish panel.
-
-
-
REMOVE INTEGRATION PANEL SUB-ASSEMBLY
-
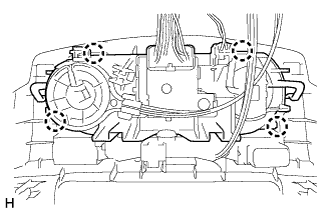
Remove the 4 screws.
-
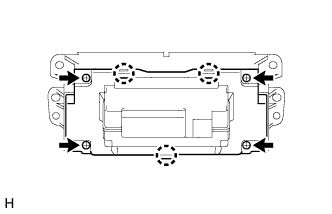
Remove the 4 screws.
-
Detach the 3 claws and disconnect the lower heater control base.
-
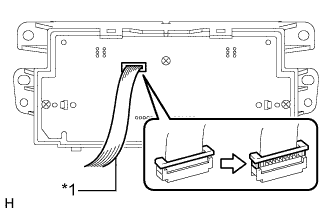
Text in Illustration *1 No. 1 Cooler Wire Disconnect the No. 1 cooler wire from the integration panel sub-assembly (air conditioning panel) as shown in the illustration.
Note
Before performing the procedure above, the hazard switch must be turned off. If the switch is on while the base is removed, damage to the switch will occur.
-
-
REMOVE HEATER CONTROL BASE
-
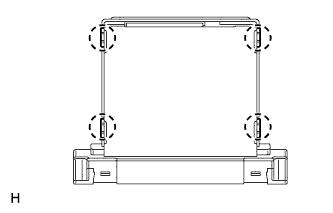
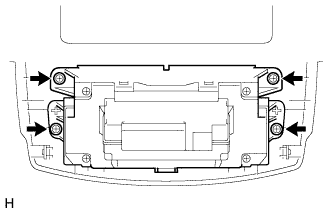
Detach the 4 claws and remove the heater control base.
-
-
REMOVE AIR CONDITIONING AMPLIFIER ASSEMBLY
-
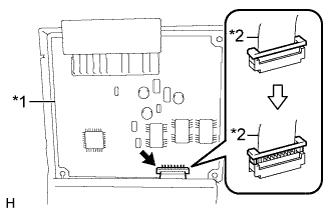
Text in Illustration *1 Air Conditioning Amplifier Assembly *2 No. 1 Cooler Wire Disconnect the No. 1 cooler wire from the air conditioning amplifier assembly as shown in the illustration.
-
Remove the air conditioning amplifier assembly.
-