FRONT SPEED SENSOR (for 4WD and Pre-Runner) INSTALLATION

Tech Tips
-
The procedures listed below are for the LH side.
-
Other than areas where instructions are provided, use the same procedures for the LH side and RH side.
-
INSTALL SKID CONTROL SENSOR CLAMP LH
-
Install the skid control sensor clamp with the bolt.
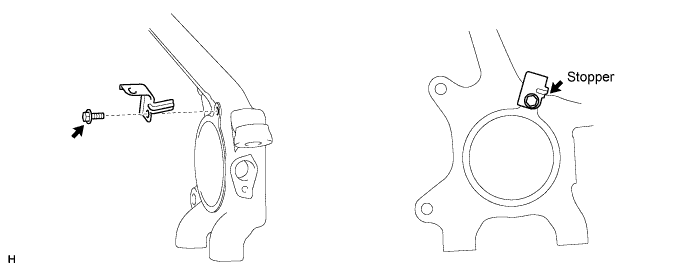
- Torque:
- 14 N*m { 138 kgf*cm, 10 ft.*lbf }
Note
Install the clamp so that the rotation stopper touches the knuckle.
-
-
INSTALL SKID CONTROL SENSOR CLAMP RH
-
Install the skid control sensor clamp with the bolt.
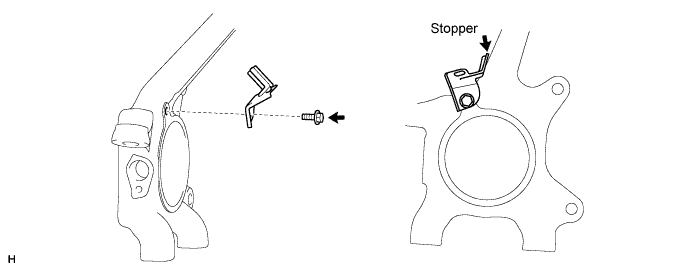
- Torque:
- 14 N*m { 138 kgf*cm, 10 ft.*lbf }
Note
Install the clamp so that the rotation stopper touches the knuckle.
-
-
INSTALL FRONT SPEED SENSOR LH
-
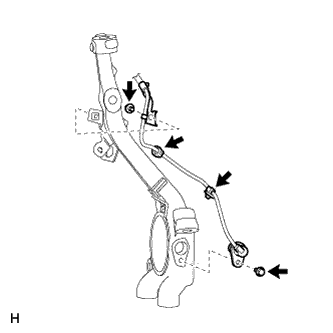
Install the speed sensor with the bolt.
- Torque:
- 8.5 N*m { 87 kgf*cm, 75 in.*lbf }
Note
-
Make sure there are no pieces of iron or other foreign matter attached to the sensor tip.
-
While inserting the speed sensor into the knuckle hole, do not strike or damage the sensor tip.
-
After installing the speed sensor, make sure there is no clearance or foreign matter between the sensor stay part and the knuckle.
-
When installing the sensor, do not twist the wire harness.
-
Install the harness clamp with the bolt.
- Torque:
- 32 N*m { 326 kgf*cm, 24 ft.*lbf }
Note
-
When installing the clamp, do not twist the wire harness.
-
Make sure the clamp rotation stopper touches the installation position.
-
Attach the 2 clamps.
-

Attach the clamp.
-
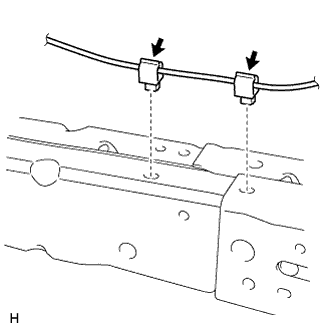
Install the 2 harness clamps with the 2 bolts.
- Torque:
- 32 N*m { 326 kgf*cm, 24 ft.*lbf }
Note
-
When installing the clamps, do not twist the wire harness.
-
Make sure the clamp rotation stopper touches the installation position.
-
Attach the 2 clamps.
Note
When attaching the clamps, do not twist the wire harness.
-
Connect the connector.
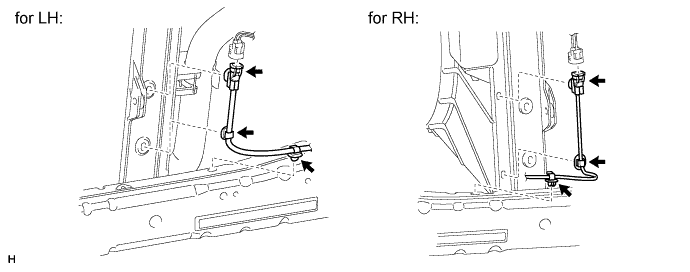
Note
-
Do not attach the connector to the radiator fan shroud before connecting the connector.
-
Securely connect the connector.
-
-
Attach the 2 clamps and connector.
Note
When attaching the clamps, do not twist the wire harness.
-
-
INSTALL FRONT WHEEL
- Torque:
- 105 N*m { 1071 kgf*cm, 77 ft.*lbf }
-
CONNECT CABLE TO NEGATIVE BATTERY TERMINAL
Note
When disconnecting the cable, some systems need to be initialized after the cable is reconnected Click here.
-
CHECK SPEED SENSOR SIGNAL
-
w/ Rear Differential Lock:
Check the speed sensor signal Click here.
-
w/o Rear Differential Lock:
Check the speed sensor signal Click here.
-