AUTOMATIC TRANSMISSION ASSEMBLY REMOVAL

-
DISCONNECT CABLE FROM NEGATIVE BATTERY TERMINAL
CAUTION:
Wait at least 90 seconds after disconnecting the cable from the negative (-) battery terminal to prevent airbag and seat belt pretensioner activation.
-
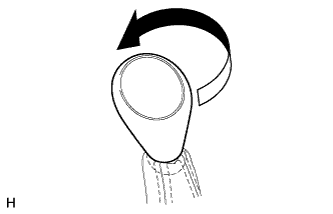
REMOVE SHIFT LEVER KNOB SUB-ASSEMBLY
-
Twist the shift lever knob in the direction indicated by the arrow and remove it.
-
-
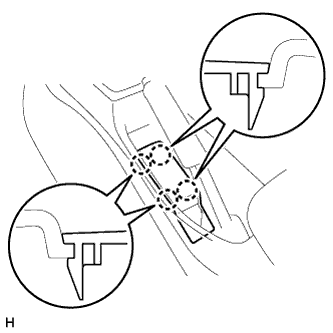
REMOVE PARKING BRAKE HOLE COVER SUB-ASSEMBLY
-
Detach the 4 claws and remove the parking brake hole cover.
-
-
REMOVE UPPER CONSOLE PANEL SUB-ASSEMBLY
-
Detach the 12 claws and remove the upper console panel.
Note
Be careful not to damage the instrument panel and console box with the claws of the upper console panel.
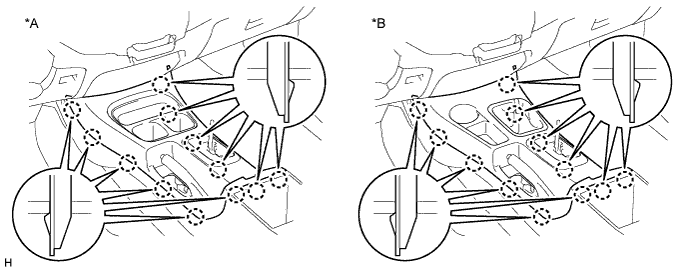
Text in Illustration *A for 2WD *B for 4WD
-
-
REMOVE CONSOLE BOX ASSEMBLY
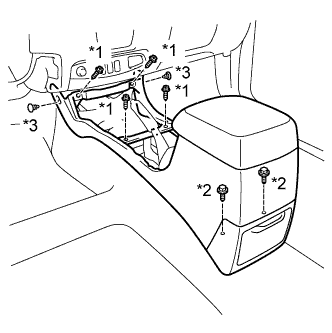
Text in Illustration *1 Screw *2 Bolt *3 Clip
-
Remove the 4 screws and 2 bolts.
-
Using a clip remover, remove the 2 clips and console box.
-
-
REMOVE SHIFT LEVER BOOT ASSEMBLY
-
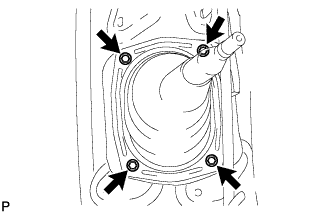
Remove the 4 screws and shift lever boot.
-
-
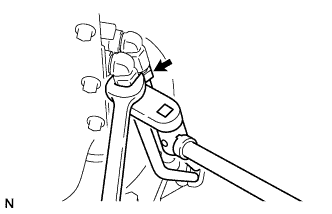
REMOVE TRANSFER HIGH AND LOW SHIFT LEVER ASSEMBLY
-
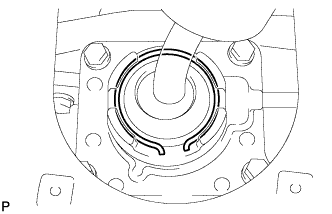
Fold back the transfer front drive shift boot.
-
Using needle-nose pliers, remove the snap ring and pull out the shift lever.
Tech Tips
Move the transfer shift lever to the H4 position.
-
-
REMOVE NO. 1 ENGINE UNDER COVER
-
REMOVE NO. 2 ENGINE UNDER COVER
-
REMOVE TRANSFER CASE LOWER PROTECTOR
-
Remove the 4 bolts and transfer case lower protector.
-
-
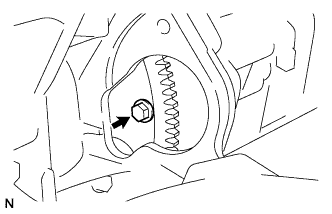
DRAIN AUTOMATIC TRANSMISSION FLUID
-
Remove the drain plug and gasket, and drain ATF.
-
Install a new gasket and the drain plug.
- Torque:
- 28 N*m { 285 kgf*cm, 21 ft.*lbf }
-
-
DRAIN TRANSFER OIL
-
DISCONNECT HEATED OXYGEN SENSOR
-
REMOVE EXHAUST PIPE
-
Remove the exhaust pipe Click here.
-
-
REMOVE FRONT PROPELLER SHAFT ASSEMBLY
-
Remove the front propeller shaft assembly Click here.
-
-
REMOVE REAR PROPELLER SHAFT ASSEMBLY
-
Remove the rear propeller shaft assembly Click here.
-
-
REMOVE MANIFOLD STAY
-
Remove the 3 bolts and manifold stay.
-
-
REMOVE NO. 2 MANIFOLD STAY
-
Remove the 3 bolts and manifold stay.
-
-
REMOVE EXHAUST MANIFOLD SUB-ASSEMBLY LH
-
Remove the 6 nuts, exhaust manifold and gasket.
-
-
REMOVE EXHAUST MANIFOLD SUB-ASSEMBLY RH
-
Remove the 6 nuts, exhaust manifold and gasket.
-
-
DISCONNECT OIL COOLER TUBE
-
Using a union nut wrench, disconnect the tube outlet and tube inlet.
-
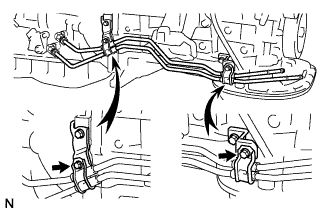
Remove the 2 bolts and 2 clamps.
-
-
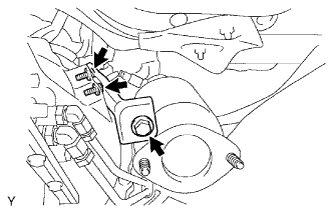
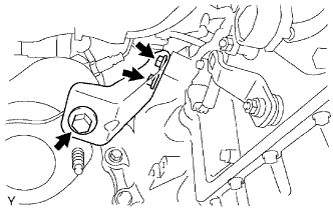
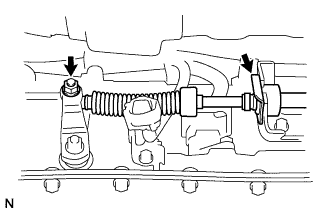
DISCONNECT TRANSMISSION CONTROL CABLE ASSEMBLY
-
Remove the nut and disconnect the control cable.
-
Remove the clip and disconnect the control cable.
-
-
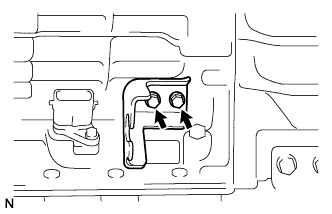
REMOVE NO. 1 TRANSMISSION CONTROL CABLE BRACKET
-
Remove the 2 bolts and control cable bracket from the transmission.
-
-
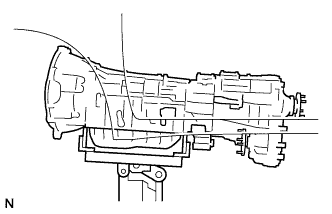
SUPPORT AUTOMATIC TRANSMISSION ASSEMBLY
-
Support the transmission with a transmission jack.
-
-
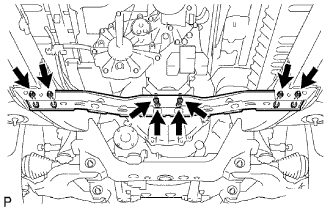
REMOVE NO. 3 FRAME CROSSMEMBER SUB-ASSEMBLY
-
Remove the 4 set bolts of the No. 1 engine mounting insulator rear.
-
Remove the 4 nuts, 4 bolts and frame crossmember.
-
-
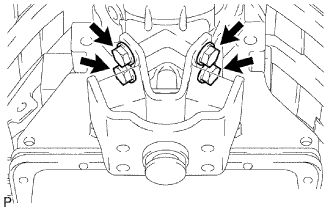
REMOVE NO. 1 ENGINE MOUNTING INSULATOR REAR
-
Remove the 4 bolts and engine mounting insulator rear from the automatic transmission.
-
-
DISCONNECT CONNECTOR

-
Tilt the transmission downward.
Note
Make sure the cooling fan does not contact the fan shroud.
-
Transmission side:
Disconnect the connectors.
-
Disconnect the park/neutral position switch connector.
-
Disconnect the transmission wire connector.
-
Disconnect the 2 speed sensor connectors.
-
-
Transfer side:
Disconnect the connectors.
-
Disconnect the No. 1 indicator switch connector.
-
Disconnect the No. 2 indicator switch connector.
-
Disconnect the speed sensor connector.
-
-
-
DISCONNECT WIRE HARNESS
-
REMOVE STARTER ASSEMBLY
-
Remove the starter assembly Click here.
-
-
REMOVE FLYWHEEL HOUSING SIDE COVER

-
Remove the flywheel housing side cover from the cylinder block.
-
-
REMOVE AUTOMATIC TRANSMISSION ASSEMBLY
-
Turn the crankshaft to gain access to each bolt.
-
Hold the crankshaft pulley bolt with a wrench and remove the 6 torque converter clutch mounting bolts.
-
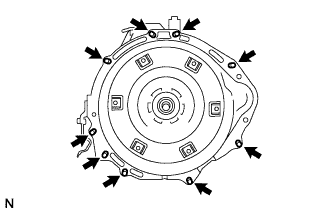
Remove the 9 bolts.
-
Separate and remove the automatic transmission assembly.
-
-
REMOVE TRANSFER ASSEMBLY
-
Remove the 8 bolts and 2 clamps.
-
Remove the transfer from the transmission.
-
-
REMOVE TORQUE CONVERTER CLUTCH ASSEMBLY