FRONT WIPER MOTOR REMOVAL
PROCEDURE
-
REMOVE FRONT WIPER ARM HEAD CAP
-
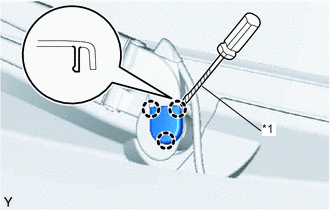
Text in Illustration *1 Protective Tape Using a screwdriver with its tip wrapped in protective tape, disengage the 3 claws and remove the front wiper arm head cap.
-
-
REMOVE FRONT WIPER ARM AND BLADE ASSEMBLY
-
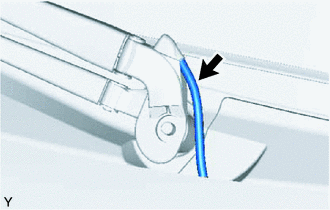
Disconnect the washer hose.
-
Text in Illustration *1 Front Wiper Main Arm Remove the nut and the front wiper main arm.
-
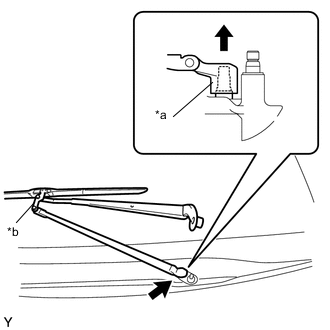
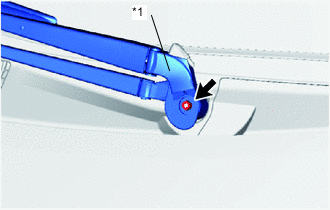
Text in Illustration *a Head of the Front Wiper Sub Arm *b Joint Section on the End of the Front Wiper Arm Remove the front wiper sub arm and the front wiper arm and blade as shown in the illustration.
Note
-
Disengage the head of the front wiper sub arm while holding down the periphery of the front wiper sub arm installation section with your hands.
-
If you forcibly disengage the front wiper sub arm in the incorrect direction, it could be deformed or damaged.
-
If you forcibly pry off the front wiper main arm or front wiper sub arm, the joint section on the end of the front wiper arm could be deformed or damaged.
-
-
-
REMOVE FRONT FENDER TO COWL SIDE SEAL LH
-
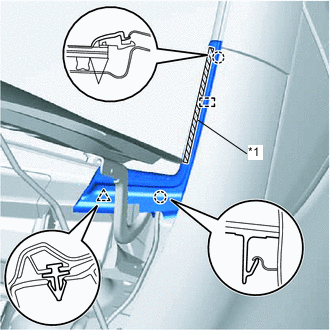
Text in Illustration *1 Double-sided Tape Peel off the double-sided tape and disengage the claw and guide.
-
Disengage the clip and claw and remove the front fender to cowl side seal.
-
-
REMOVE FRONT FENDER TO COWL SIDE SEAL RH
Tech Tips
Use the same procedure as for the LH side.
-
REMOVE COWL TOP VENTILATOR LOUVER SUB-ASSEMBLY
-
Disconnect the washer hose.
-
Disengage the 2 clamps.
-
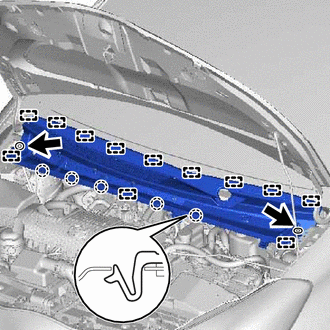
Remove the 2 clips.
-
Disengage the 5 claws and 3 guides.
-
Disengage the 9 guides and remove the cowl top ventilator louver.
-
-
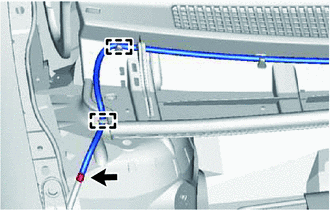
REMOVE WINDSHIELD WIPER MOTOR AND LINK ASSEMBLY
-
Remove the 2 bolts.
-
Disengage the grommet and remove the windshield wiper motor and link as shown in the illustration.
-
Disconnect the connector.
-
-
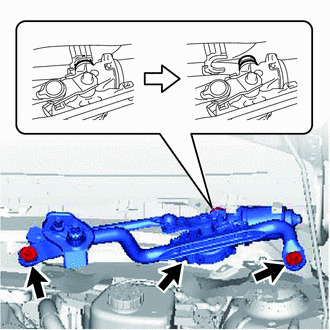
REMOVE WINDSHIELD WIPER MOTOR ASSEMBLY
-
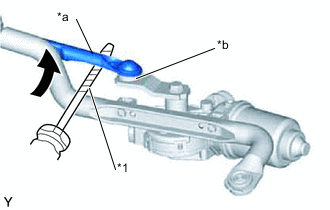
Text in Illustration *1 Protective Tape *a Windshield Wiper Link Rod *b Crank Arm Pivot of the Windshield Wiper Motor Assembly Using a screwdriver with its tip wrapped in protective tape, disengage the windshield wiper link rod from the crank arm pivot of the windshield wiper motor as shown in the illustration.
-
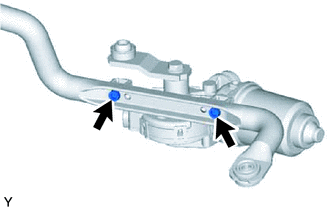
Using a T30 "TORX" socket wrench, remove the 2 bolts and the windshield wiper motor from the windshield wiper link.
-