REAR DOOR LOCK REMOVAL
CAUTION / NOTICE / HINT
Tech Tips
-
Use the same procedure for both the RH and LH sides.
-
The procedure described below is for the RH side.
PROCEDURE
-
REMOVE REAR DOOR FRAME GARNISH
-
REMOVE REAR DOOR WINDOW REGULATOR HANDLE ASSEMBLY (w/o Power Window)
-
REMOVE REAR DOOR ARMREST BASE UPPER PANEL (w/ Power Window)
-
REMOVE REAR DOOR ARMREST BASE UPPER PANEL (w/o Power Window)
-
REMOVE REAR DOOR TRIM BOARD SUB-ASSEMBLY
-
REMOVE REAR DOOR SERVICE HOLE COVER
-
REMOVE REAR DOOR WINDOW DIVISION BAR SUB-ASSEMBLY
-
REMOVE REAR DOOR GLASS SUB-ASSEMBLY
-
REMOVE REAR DOOR GLASS RUN
-
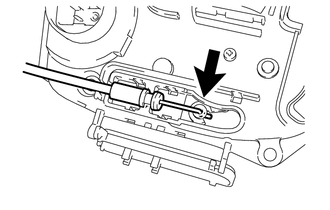
REMOVE REAR DOOR LOCK ASSEMBLY
-
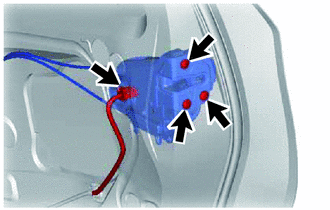
Disconnect the connector.
-
Using a T30 "TORX" socket wrench, remove the 3 screws.
-
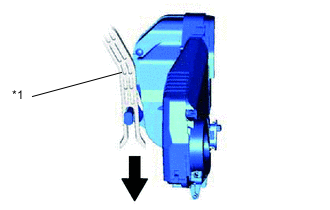
Text in Illustration *1 Release Plate 
Slide Direction Slide the rear door lock assembly downward, and remove the rear door lock from the release plate.
-
Remove the door lock wire harness seal from the rear door lock.
-
-
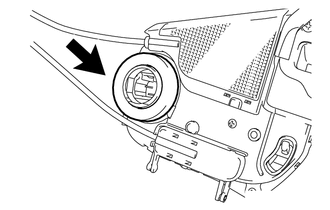
REMOVE REAR DOOR LOCK REMOTE CONTROL CABLE ASSEMBLY
-
Text in Illustration *1 Protective Tape Using a screwdriver with its tip wrapped in protective tape, disengage the 2 claws.
-
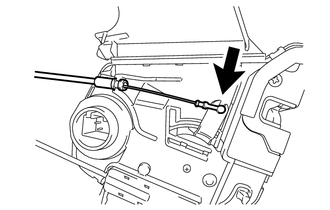
Remove the rear door lock remote control cable assembly from the rear door lock.
-
-
REMOVE REAR DOOR INSIDE LOCKING CABLE ASSEMBLY
-
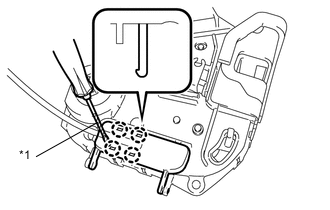
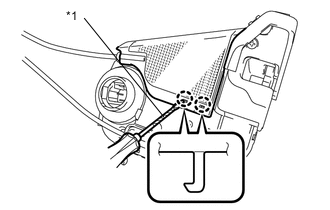
Text in Illustration *1 Protective Tape Using a screwdriver with its tip wrapped in protective tape, disengage the 4 claws.
-
Remove the rear door inside locking cable assembly from the rear door lock.
-