PARKING BRAKE SYSTEM ADJUSTMENT
PROCEDURE
-
INSPECT PARKING BRAKE LEVER TRAVEL
-
Slowly pull the parking brake lever to the fully applied position, counting the number of clicks.
Parking brake lever travel at 200 N (20 kgf, 45 lbf) 4 to 6 clicks
-
-
ADJUST PARKING BRAKE LEVER TRAVEL
-
Remove the rear console box Click here.
-
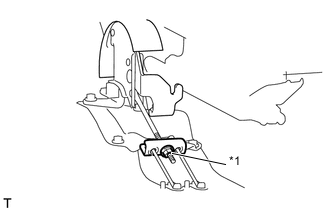
Text in Illustration *1 Lock Nut Turn the lock nut until the parking brake lever travel is corrected to within the specified range.
Parking brake lever travel at 200 N (20 kgf, 45 lbf) 4 to 6 clicks Note
-
If the lock nut needs to be loosened, replace the lock nut with a new one.
-
If the lock nut needs to be tightened, the lock nut does not need to be replaced.
-
-
Operate the parking brake lever 3 to 4 times, and check the parking brake lever travel.
-
Check whether the parking brake drags or not.
-
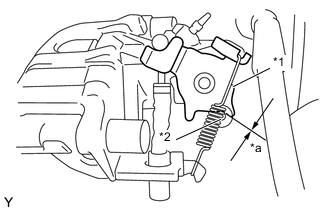
Text in Illustration *1 Operation Lever *2 Stopper *a 0 to 0.5 mm Release the parking brake lever and check that the clearance measurement between the rear disc brake cylinder operation lever and the stopper is within the specified range.
Clearance 0 to 0.5 mm (0 to 0.0197 in.) -
Install the rear console box Click here.
-
-
INSPECT BRAKE WARNING LIGHT
-
When operating the parking brake lever, check that the brake warning light illuminates.
OK Brake warning light always illuminates at the first click.
-