REAR COIL SPRING REMOVAL
PROCEDURE
-
PRECAUTION
Note
After turning the ignition switch off, waiting time may be required before disconnecting the cable from the negative (-) auxiliary battery terminal. Therefore, make sure to read the disconnecting the cable from the negative (-) auxiliary battery terminal notice before proceeding with work Click here.
-
DISABLE BRAKE CONTROL
-
REMOVE REAR WHEELS
-
DRAIN BRAKE FLUID
Note
Immediately wash off any brake fluid that comes into contact with any painted surfaces.
-
SEPARATE SKID CONTROL SENSOR WIRE LH
-

Using a screwdriver, disengage the claw of the connector lock portion and disconnect the skid control sensor wire LH connector.
Note
Do not remove the connector cover from the connector because the skid control sensor wire may be damaged.
-
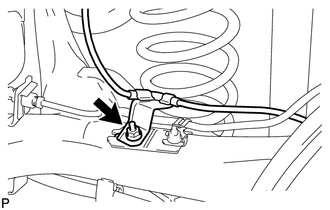
Remove the nut and separate the skid control sensor wire LH.
-
-
SEPARATE SKID CONTROL SENSOR WIRE RH
Tech Tips
Use the same procedure as for the LH side.
-
SEPARATE REAR FLEXIBLE HOSE LH
-
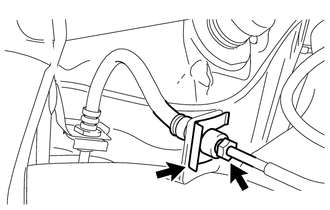
Using a union nut wrench 10 mm, separate the brake tube while holding the rear flexible hose LH with a wrench.
Note
-
Do not kink or damage the brake line.
-
Do not allow any foreign matter such as dirt and dust to enter the brake line.
-
-
Remove the clip and separate the rear flexible hose LH from the rear axle beam assembly.
-
-
SEPARATE REAR FLEXIBLE HOSE RH
Tech Tips
Use the same procedure as for the LH side.
-
LOOSEN REAR AXLE BEAM ASSEMBLY
-
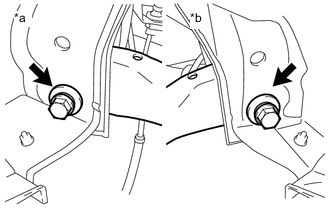
Text in Illustration *a LH Side *b RH Side Loosen the 2 bolts.
Note
Do not remove the bolts.
-
-
REMOVE REAR COIL SPRING LH
-
Support the spring seat of the rear axle beam assembly using 2 jacks and 2 wooden blocks.
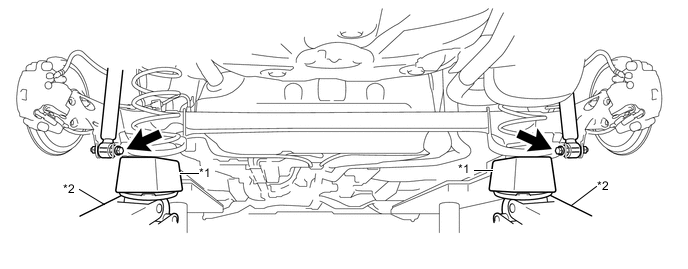
Text in Illustration *1 Wooden Block *2 Jack -
Remove the 2 bolts while holding the 2 nuts and separate the rear axle beam assembly from the rear shock absorber assemblies LH and RH.
Note
Since stopper nuts are used, turn the bolts.
-
Slowly lower the rear axle beam assembly using 2 jacks and 2 wooden blocks.
-
Remove the rear coil spring LH, rear upper coil spring insulator LH and the rear lower coil spring insulator LH.
-
Slowly jack up the rear axle beam assembly using 2 jacks and 2 wooden blocks, and temporarily tighten the rear axle beam assembly to the rear shock absorber assemblies LH and RH with the 2 bolts and 2 nuts.
Note
Since stopper nuts are used, turn the bolts.
-
-
REMOVE REAR COIL SPRING RH
Tech Tips
Use the same procedure as for the LH side.