FRONT CRANKSHAFT OIL SEAL REMOVAL

PROCEDURE
-
REMOVE FRONT WHEEL RH
-
REMOVE ENGINE UNDER COVER RH
-
SEPARATE NO. 2 ENGINE ROOM RELAY BLOCK AND NO. 2 JUNCTION BLOCK ASSEMBLY
-
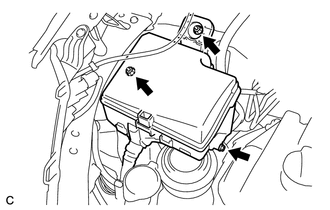
Remove the bolt and 2 nuts, and separate the No. 2 engine room relay block and No. 2 junction block assembly.
-
-
REMOVE ENGINE MOUNTING INSULATOR SUB-ASSEMBLY RH
-
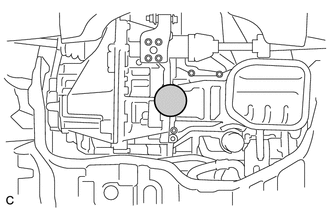
Place a jack underneath the engine, then put a wooden block on the jack.
Text in Illustration 
Jack Position Note
To prevent the No. 2 oil pan from deforming, do not place any attachments onto the No. 2 oil pan.
-
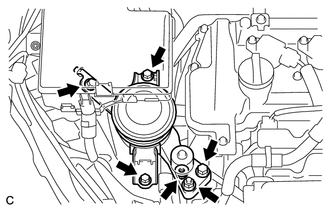
Remove the 4 bolts, 2 nuts and engine mounting insulator sub-assembly RH.
-
-
REMOVE CRANKSHAFT DAMPER SUB-ASSEMBLY
-
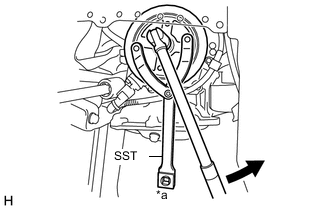
Text in Illustration *a Hold 
Turn Using SST, hold the crankshaft damper sub-assembly in place and loosen the bolt.
- SST
- 09960-10010 ( 09962-01000, 09963-01000 )
Note
When installing SST, be careful that the bolt which holds SST does not interfere with the timing chain cover.
-
Remove the crankshaft damper sub-assembly and bolt.
-
-
REMOVE OIL PUMP SEAL
-
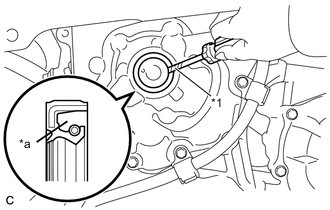
Text in Illustration *1 Protective Tape *a Cut Position Using a knife, cut off the lip of the oil pump seal.
-
Using a screwdriver with its tip wrapped with tape, pry out the oil seal.
Note
Do not damage the surface of the oil seal press fit hole or the crankshaft.
Tech Tips
-
Wrap the screwdriver tip with protective tape before use.
-
After removing, check the crankshaft for damage. If damaged, smooth the surface with 400-grit sandpaper.
-
-