HV BATTERY REMOVAL

PROCEDURE
-
PRECAUTION
-
CHECK FOR DTCS
-
Check for DTCs Click here.
Note
Confirm that P0AA6 (Hybrid Battery Voltage System Isolation Fault) is not output before removing or installing the HV battery. If this DTC is output, perform troubleshooting for this DTC first.
-
-
REMOVE FRONT FLOOR COVER RH (for Front Floor Cover Type A)
-
REMOVE FRONT FLOOR COVER LH (for Front Floor Cover Type A)
-
REMOVE CENTER FRONT FLOOR COVER (for Front Floor Cover Type A)
-
REMOVE CENTER FRONT FLOOR COVER (for Front Floor Cover Type B)
-
REMOVE FRONT FLOOR COVER RH (for Front Floor Cover Type B)
-
REMOVE FRONT FLOOR COVER LH (for Front Floor Cover Type B)
-
DISCONNECT CABLE FROM NEGATIVE AUXILIARY BATTERY TERMINAL
-
REMOVE SERVICE PLUG GRIP
-
REMOVE BENCH TYPE REAR SEAT CUSHION ASSEMBLY
-
REMOVE REAR SEAT CUSHION LEG SUB-ASSEMBLY
-
REMOVE HOOD STAY HOLDER
-
REMOVE INVERTER TERMINAL COVER
-
REMOVE INVERTER COVER
-
CHECK TERMINAL VOLTAGE
-
INSTALL INVERTER COVER
-
INSTALL INVERTER TERMINAL COVER
-
INSTALL HOOD STAY HOLDER
-
REMOVE NO. 2 INDOOR ELECTRICAL KEY ANTENNA ASSEMBLY (w/ Smart Entry)
-
REMOVE NO. 1 HYBRID BATTERY EXHAUST DUCT
-
REMOVE BATTERY COOLING BLOWER ASSEMBLY
Note
-
Be sure not to touch the fan part of the battery cooling blower assemblies.
-
Do not lift the battery cooling blower assemblies using the wire harness.
-
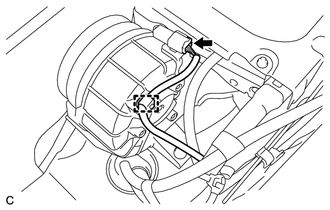
Disconnect the battery cooling blower assembly connector.
-
Disconnect the wire harness clamp from the battery cooling blower assembly.
-
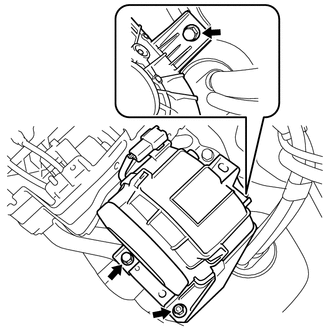
Remove the 2 bolts, nut and battery cooling blower assembly.
-
-
REMOVE NO. 1 HYBRID VEHICLE BATTERY COVER PANEL LH
-
DISCONNECT WIRE HARNESS
-
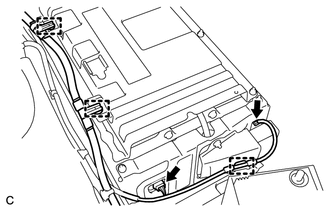
Disconnect the 2 connectors and 3 clamps.
-
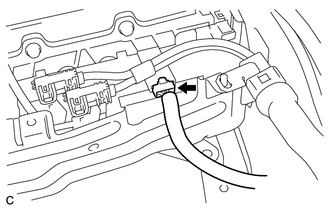
Disconnect the connector.
-
-
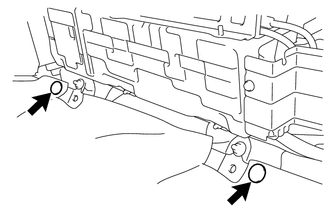
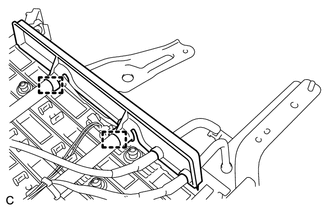
DISCONNECT FRAME WIRE
-
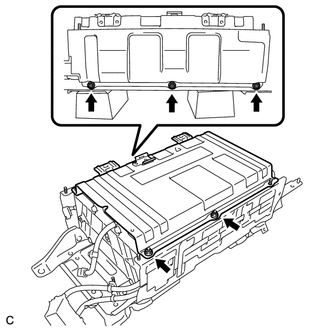
REMOVE HV BATTERY
CAUTION:
Wear insulating gloves.
Note
When removing/installing/moving the HV battery, make sure not to tilt it more than 80°.
-
Using a clip remover, remove the 2 clips.
-

Remove the 2 bolts and 2 nuts.
-
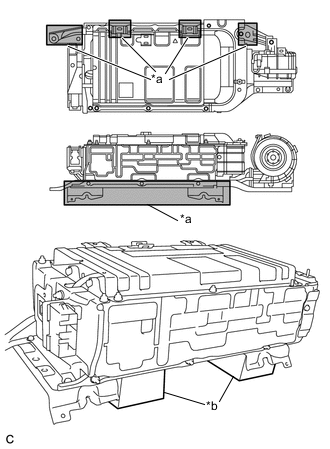
Text in Illustration *a Area A *b Attachment Remove the HV battery.
Note
-
When moving the HV battery, be sure to hold area A shown in the illustration.
-
Place the HV battery on the attachment.
-
-
-
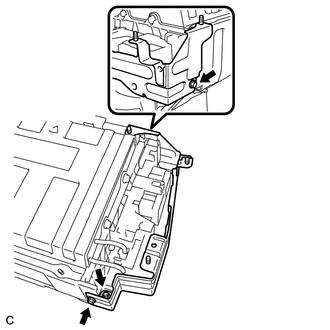
REMOVE HYBRID BATTERY SERVICE PLUG COVER
-
REMOVE NO. 1 HYBRID BATTERY SHIELD SUB-ASSEMBLY
-
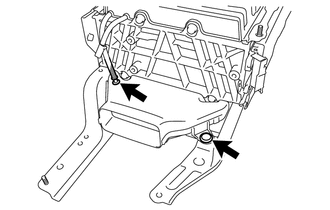
REMOVE NO. 2 HYBRID VEHICLE BATTERY CARRIER BRACKET SUB-ASSEMBLY
-
REMOVE BATTERY SMART UNIT (BATTERY VOLTAGE SENSOR)
-
REMOVE NO. 2 HYBRID BATTERY SHIELD SUB-ASSEMBLY
CAUTION:
Wear insulating gloves.
-
Remove the 2 bolts, nut and No. 2 hybrid battery shield sub-assembly.
-
-
REMOVE HYBRID BATTERY JUNCTION BLOCK ASSEMBLY
-
REMOVE NO. 1 HYBRID BATTERY COVER INTAKE DUCT
CAUTION:
Wear insulating gloves.
-
Disconnect the HV battery thermistor.
-
Remove the clip and No. 1 hybrid battery cover intake duct.
-
-
REMOVE UPPER HYBRID BATTERY COVER SUB-ASSEMBLY
CAUTION:
Be sure to wear insulated gloves and protective goggles.
-
Remove the 5 nuts and upper hybrid battery cover sub-assembly.
-
-
DISCONNECT NO. 1 HYBRID BATTERY PACKING
CAUTION:
Be sure to wear insulated gloves and protective goggles.
-
Disconnect the 2 clamps.
-

Disconnect the 2 wire harnesses and remove the No. 1 hybrid battery packing.
-