FRONT WIPER MOTOR REMOVAL

-
REMOVE ENGINE ROOM SIDE COVER
-
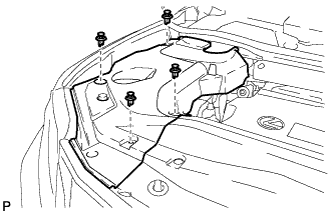
Remove the 4 clips and engine room side cover.
-
-
REMOVE ENGINE ROOM SIDE COVER LH
-
Remove the 4 clips.
-
Disengage the guide and remove the engine room side cover LH.
-
-
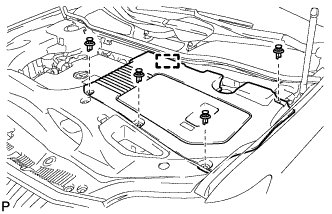
REMOVE COOL AIR INTAKE DUCT SEAL
-
Remove the 6 clips and cool air intake duct seal.
-
-
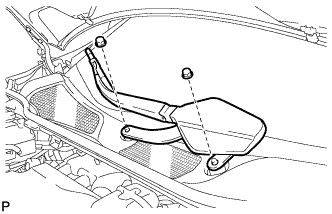
REMOVE FRONT FENDER TOP REINFORCEMENT SUB-ASSEMBLY LH
-
Text in Illustration *1 Hood to Cowl Top Seal Disengage the clip and the hood to cowl top seal from the front fender top reinforcement sub-assembly LH.
-
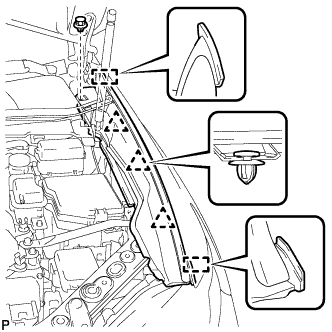
Remove the clip.
-
Disengage the 3 clips and 2 guides, and remove the front fender top reinforcement sub-assembly LH.
-
-
REMOVE FRONT FENDER TOP REINFORCEMENT SUB-ASSEMBLY RH
Tech Tips
Use the same procedure for the RH side and LH side.
-
REMOVE FRONT FENDER TO COWL SIDE SEAL LH
-
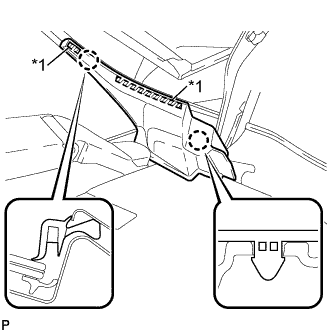
Text in Illustration *1 Double-sided Tape Disengage the 2 claws and remove the front fender to cowl side seal LH.
-
-
REMOVE FRONT FENDER TO COWL SIDE SEAL RH
Tech Tips
Use the same procedure for the RH side and LH side.
-
REMOVE FRONT WIPER ARM HEAD CAP
-
Text in Illustration *1 Protective Tape Using a screwdriver, disengage the 3 claws and remove the front wiper arm head cap.
Tech Tips
Tape the screwdriver tip before use.
-
-
REMOVE FRONT WIPER ARM AND BLADE ASSEMBLY LH
-
Remove the nut and the front wiper arm and blade assembly LH.
-
-
REMOVE FRONT WIPER ARM AND BLADE ASSEMBLY RH
-
Remove the 2 nuts and the front wiper arm and blade assembly RH.
-
-
REMOVE COWL TOP VENTILATOR LOUVER SUB-ASSEMBLY
-
Remove the 2 clips.
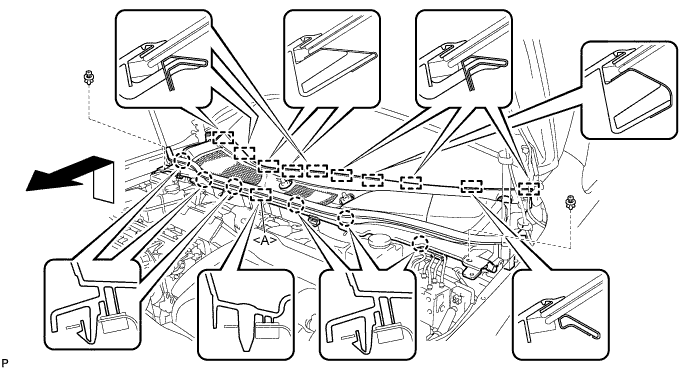
-
Disengage the 6 claws and guide <A>.
-
Disengage the 10 guides and pull out the cowl top ventilator louver sub-assembly as shown in the illustration.
-
-
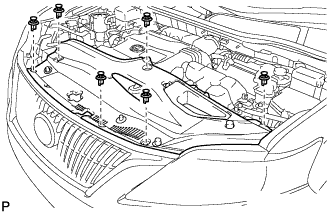
REMOVE WINDSHIELD WIPER MOTOR AND LINK ASSEMBLY
-
Operate the wiper and stop the windshield wiper motor at the automatic stop position.
-
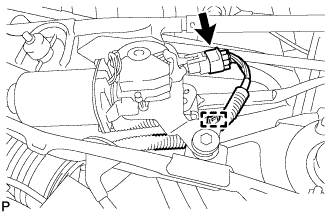
w/o Deicer:
-
Disconnect the connector.
-
Disengage the clamp.
-
-
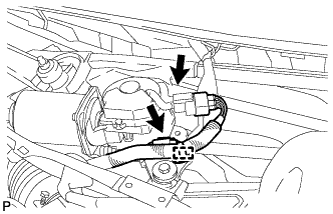
w/ Deicer:
-
Disconnect the 2 connectors.
-
Disengage the clamp.
-
-
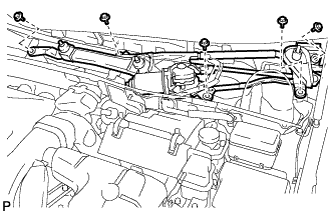
Remove the 5 bolts and the windshield wiper motor and link assembly.
Note
Be careful not to damage the windshield when removing the windshield wiper motor and link assembly.
-
-
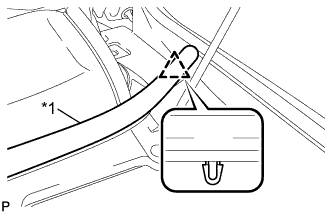
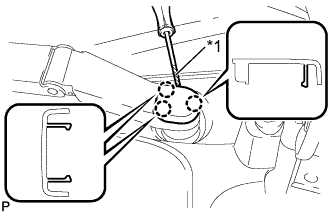
REMOVE FRONT WIPER CRANK SUB-ASSEMBLY
-
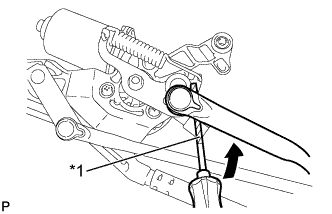
Text in Illustration *1 Protective Tape Using a screwdriver, separate the windshield wiper link rod from the crank arm pivot of the front wiper crank sub-assembly as shown in the illustration.
Tech Tips
Tape the screwdriver tip before use.
-
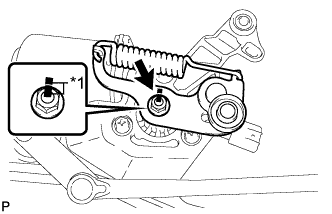
Text in Illustration *1 Matchmark Place matchmarks on the windshield wiper link assembly and front wiper crank sub-assembly.
-
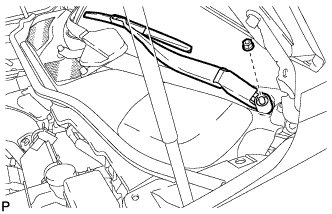
Remove the nut and the front wiper crank sub-assembly.
-
-
REMOVE WINDSHIELD WIPER MOTOR ASSEMBLY
-
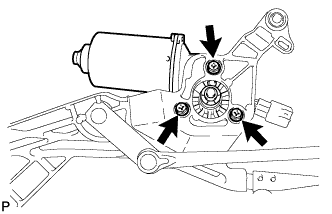
Remove the 3 bolts and remove the windshield wiper motor assembly.
-