FRONT POWER SEAT MOTOR ASSEMBLY REMOVAL

-
REMOVE FRONT SEAT ASSEMBLY
-
REMOVE POWER SEAT SLIDE MOTOR ASSEMBLY
-
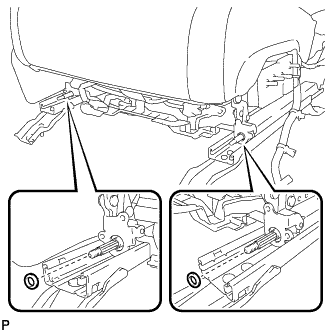
Put matchmarks on the seat track rails (upper rail and lower rail).
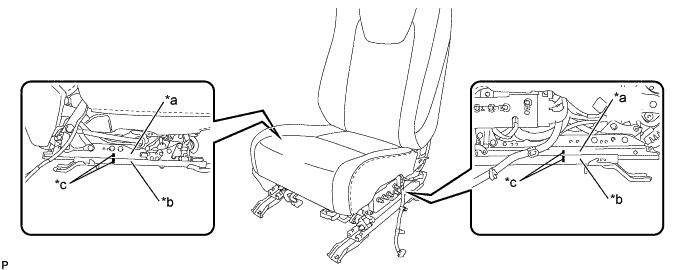
Text in Illustration *a Upper Rail *b Lower Rail *c Matchmarks - - -
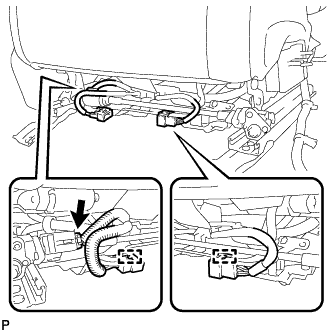
Disengage the 2 clamps.
-
Disconnect the connector.
-
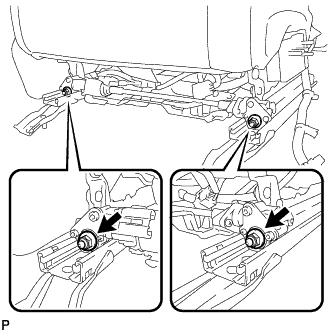
While keeping the matchmarks on the seat track rails aligned, remove the 2 nuts by hand.
Note
-
Make sure that the front seat assembly is in the rearmost position before removing the nuts.
-
If the matchmarks become misaligned, tighten the 2 nuts to the specified torque, place the front seat assembly in the cabin and perform the removal procedure for the power seat slide motor assembly from step (a) again.
-
If a tool is used to remove the nuts, the left and right sides of the seat track rail may become misaligned when removing the sliding motor assembly, resulting in a malfunction of the slide function.
-
-
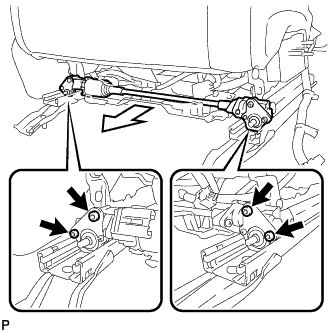
Using a 4 mm hexagon wrench, remove the 4 bolts and power seat slide motor assembly as shown in the illustration.
Note
-
Do not apply excessive force to the slide cable.
-
Do not bend the slide cable more than 60 degrees.
-
Make sure that the washers have not fallen off.
-
-
Remove the 2 washers.
-