FRONT SEAT SIDE AIRBAG ASSEMBLY REMOVAL

CAUTION:
-
Be sure to read Precaution thoroughly before servicing Click here.
-
If the front seat side airbag assembly was deployed, replace the front seat side airbag assembly, front seat frame assembly with adjuster, separate type front seatback cover and separate type front seatback pad with the necessary parts in accordance with the extent of the collision damage Click here.
-
Wear protective gloves. Sharp areas on the seat frame and adjuster may injure your hands.
-
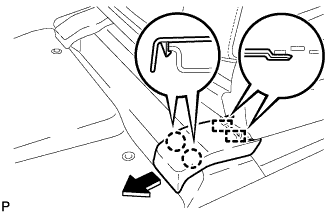
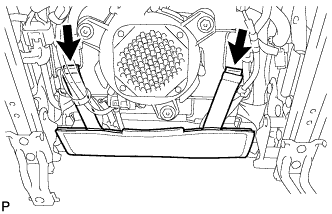
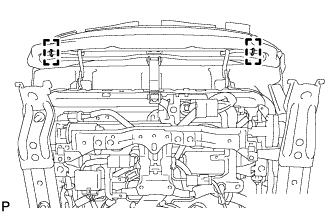
REMOVE REAR DECK FLOOR BOX
-

Remove the 3 clips and the rear deck floor box.
-
-
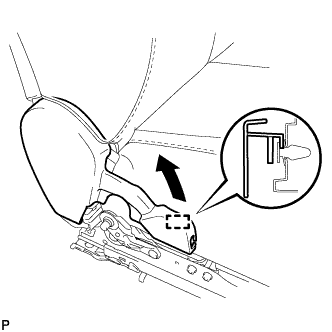
REMOVE FRONT SEAT HEADREST ASSEMBLY
-

Press the headrest support button and pull up the headrest as shown in the illustration to remove it.
-
-
REMOVE FRONT OUTER SEAT TRACK BRACKET COVER
-
Operate the slide and vertical power seat switch knob and move the front seat assembly to the rearmost position.
-
Disengage the 2 claws and 2 guides, and remove the front outer seat track bracket cover as shown in the illustration.
-
-
REMOVE FRONT INNER SEAT TRACK BRACKET COVER
-

Disengage the 2 claws and 2 guides, and remove the front inner seat track bracket cover as shown in the illustration.
-
-
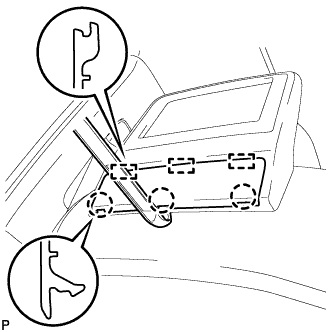
REMOVE REAR OUTER SEAT TRACK BRACKET COVER
-

Disengage the 4 claws and remove the rear outer seat track bracket cover as shown in the illustration.
-
-
REMOVE REAR INNER SEAT TRACK BRACKET COVER
-

Disengage the 4 claws and remove the rear inner seat track bracket cover as shown in the illustration.
-
-
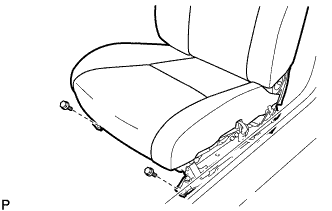
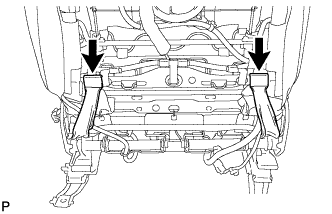
REMOVE FRONT SEAT ASSEMBLY
-
Operate the slide and vertical power seat switch knob and move the front seat assembly to the foremost position.
-

Remove the 2 bolts on the rear side of the front seat assembly.
-
Operate the slide and vertical power seat switch knob and move the front seat assembly to the rearmost position.
-

Remove the 2 bolts on the front side of the front seat assembly.
-
Operate the slide and vertical power seat switch knob and move the front seat assembly to the uppermost position.
-
Operate the reclining power seat switch knob and move the seatback to the upright position.
-
When not removing the power seat slide motor assembly:
-
Operate the slide and vertical power seat switch knob and move the front seat assembly to the center position.
-
-
When removing the power seat slide motor assembly:
-
Recline the front seat assembly to the position where the front seat cushion shield assembly screw can be removed.
-
Remove the reclining power seat switch knob Click here.
-
Remove the slide and vertical power seat switch knob Click here.
-
Remove the front seat cushion shield assembly Click here.
-
Temporarily install the front seat assembly with the 2 bolts.
-
Operate the slide and vertical power seat switch and move the front seat assembly to the foremost position.
-

Remove the 2 nuts.
Note
Make sure that the front power seat assembly is in the foremost position before removing the 2 nuts, otherwise the left and right sides of the seat track rail may become misaligned.
-
Clean the threads of the nuts with a piece of cloth.
-
Clean the threaded part of the front seat adjuster sliding screws with a piece of cloth.
Text in Illustration *a Threaded part of front seat adjuster sliding screw - - Note
Do not contaminate the front seat assembly or interior parts with adhesive residue.
-
Temporarily install the 2 nuts, tighten the nuts by hand until they contact the power seat slide motor assembly.
Note
-
As the nuts will be removed in a later step. Do not tighten the nuts using a tool.
-
If a tool is used to tighten the nuts, the left and right sides of the seat track rail may become misaligned when removing the slide motor assembly, resulting in a malfunction of the slide function.
Tech Tips
If it is difficult to tighten the nuts by hand, clean the threads of the nuts or the threaded part of the front seat adjuster sliding screws again.
-
-
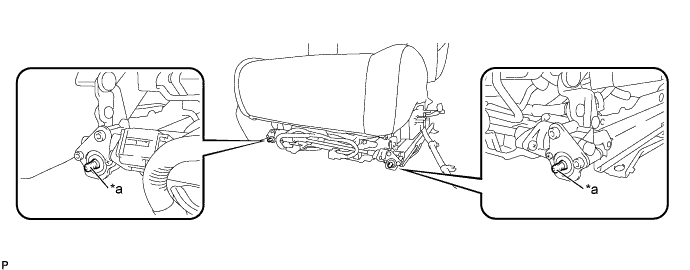
Operate the slide and vertical power seat switch and move the front seat assembly to the rearmost position.
-
Remove the 2 bolts on the front side of the front seat assembly.
-
-
w/ Navigation System for HDD:
Note
After the power switch is turned off, the display and navigation module display (HDD navigation system) records various types of memory and settings. As a result, after turning the power switch off, make sure to wait at least 60 seconds before disconnecting the cable from the negative (-) battery terminal.
Waiting Time before Disconnecting Cable from Negative (-) Battery Terminal Specification Waiting Time w/o Telematics transceiver 60 sec. w/ Telematics transceiver 120 sec. -
Disconnect the cable from the negative (-) battery terminal.
CAUTION:
Wait at least 90 seconds after disconnecting the cable from the negative (-) battery terminal to disable the SRS system Click here.
Note
When disconnecting the cable, some systems need to be initialized after the cable is reconnected Click here.
-
Disconnect each connector under the front seat assembly.
-
Remove the front seat assembly.
Note
Be careful not to damage the front seat assembly and vehicle body.
-
-
REMOVE FRONT SEAT INNER BELT ASSEMBLY
-
Disconnect each connector and clamp.
-
Remove the nut and the front seat inner belt assembly.
-
-
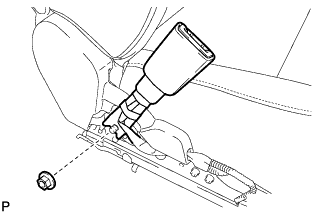
REMOVE RECLINING POWER SEAT SWITCH KNOB
-

Using a moulding remover, disengage the 4 claws and remove the reclining power seat switch knob.
-
-
REMOVE SLIDE AND VERTICAL POWER SEAT SWITCH KNOB
-

Using a moulding remover, disengage the 2 claws as shown in the illustration.
-

Using a moulding remover, disengage the 2 claws and remove the slide and vertical power seat switch knob.
-
-
REMOVE FRONT SEAT CUSHION SHIELD ASSEMBLY
-
Disengage the 2 hooks and remove the 2 rubber bands of the front seatback board from the front seat frame.
-
Remove the 5 screws.
-
Disengage the claw and guide.
-
Disconnect the connector from the front power seat lumbar switch.
-
w/ Seat Cushion Front Edge Adjustment Function:
-
Disengage the 2 clamps.
-
Disconnect the connector from the seat variable cushion switch.
-
-
Remove the front seat cushion shield assembly.
-
-
REMOVE FRONT SEAT CUSHION INNER SHIELD
-
Remove the screw.
-
Disengage the claw.
-
Separate the guide and remove the front seat cushion inner shield as shown in the illustration.
-
-
REMOVE POWER SEAT SWITCH
-

Remove the 3 screws.
-
Disengage the guide.
-
Disconnect the 2 connectors and remove the power seat switch.
-
-
REMOVE FRONT SEAT CUSHION COVER WITH PAD (w/o Seat Cushion Front Edge Adjustment Function)
-
Disengage the 6 hooks.
-
w/o Climate Control Seat System:
-
Disengage the 5 clamps.
-
-
w/ Climate Control Seat System:
-
Disconnect the 2 connectors.
-
Disengage the 6 clamps.
-
-
Using a clip remover, remove the 2 clips.
for Front Passenger Side:
-
Disengage the 2 clamps and separate the occupant detection sensor connector.
-
-
Disengage each hook and remove the front seat cushion cover with pad.
-
-
REMOVE FRONT SEAT CUSHION COVER WITH PAD (w/ Seat Cushion Front Edge Adjustment Function)
-
Disengage the 6 hooks.
-
w/o Climate Control Seat System:
-
Disengage the 5 clamps.
-
-
w/ Climate Control Seat System:
-
Disconnect the 2 connectors.
-
Disengage the 6 clamps.
-
-
Using a clip remover, remove the 2 clips.
-
for Front Passenger Side:
-
Disengage the 2 clamps and separate the occupant detection sensor connector.
-
-
Disengage each hook.
-
Disengage the 4 hooks.
-
Remove the 2 hog rings.
-
Remove the front seat cushion cover with pad.
-
-
REMOVE TELEVISION BASE COVER CAP (w/ Rear Seat Entertainment System)
-
Using a moulding remover, disengage the 3 claws and 3 guides, and remove the television base cover cap.
-
-
REMOVE TELEVISION DISPLAY ASSEMBLY WITH COVER (w/ Rear Seat Entertainment System)
-
Disconnect the connector.
-
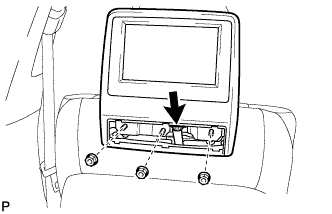
Remove the 3 nuts and television display assembly.
-
-
REMOVE NO. 2 TELEVISION BASE (w/ Rear Seat Entertainment System)
-
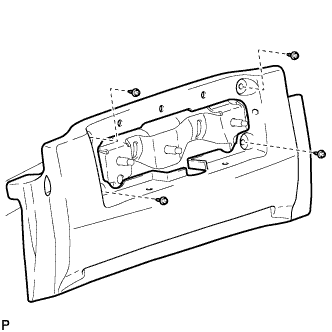
Remove the 4 screws.
-
Using a clip remover, remove the 5 clips.
-
Disengage the 2 guides and remove the No. 2 television base.
-
-
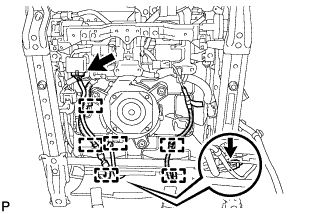
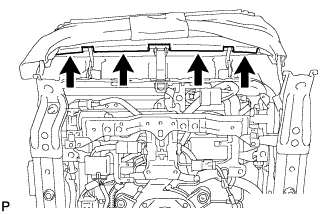
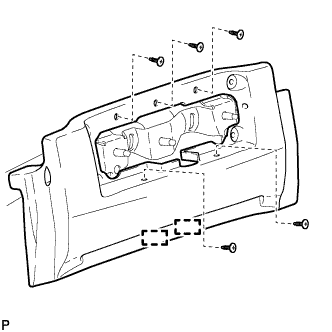
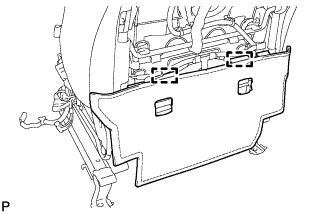
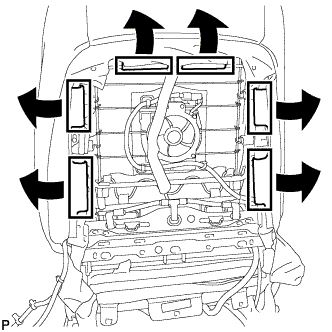
REMOVE FRONT SEATBACK BOARD SUB-ASSEMBLY
-
Remove the 2 screws.
-
Disengage the 2 guides and remove the front seatback board sub-assembly as shown in the illustration.
-
-
REMOVE FRONT SEATBACK BOARD COVER SUB-ASSEMBLY
-
Disengage the 2 guides and remove the front seatback board cover sub-assembly.
-
-
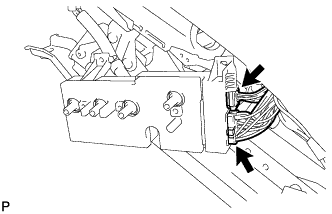
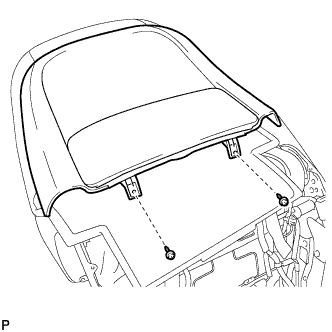
REMOVE FRONT SEAT HEADREST SUPPORT
-
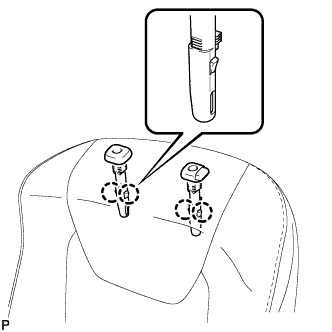
Disengage the 4 claws and remove the 2 headrest supports.
-
-
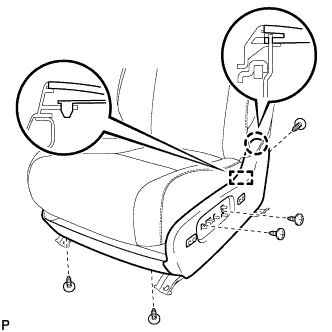
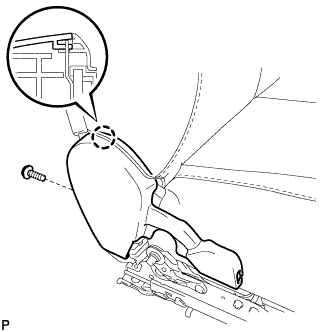
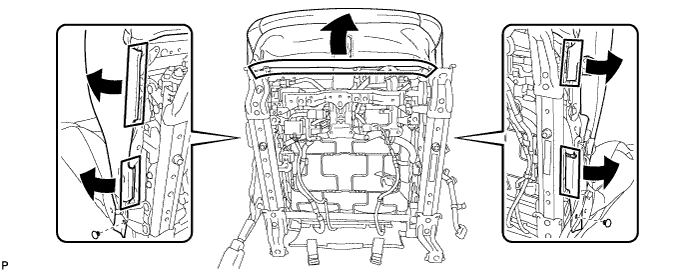
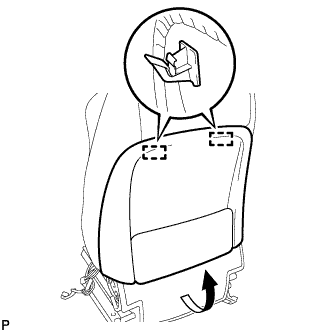
REMOVE FRONT SEATBACK COVER WITH PAD
-
Disengage the 2 hooks.
-
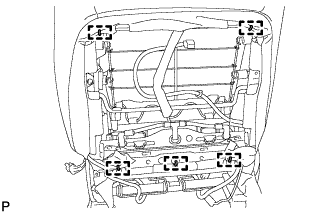
Remove the 5 hog rings.
-
Disengage the 6 hooks as shown in the illustration.
-

Remove the nut.
-
Disengage the guide and remove the seatback cover bracket.
-
Remove the front seatback cover with pad from the seatback frame.
-
-
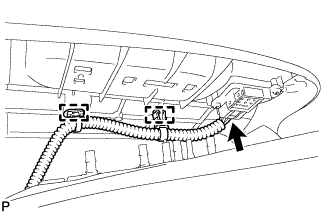
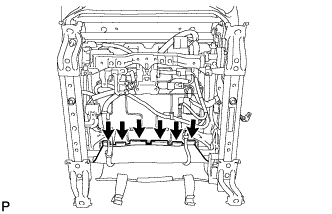
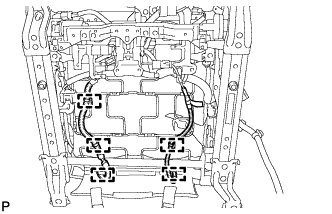
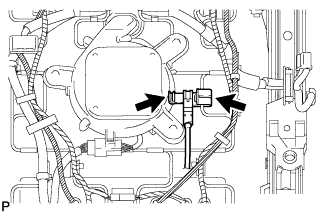
REMOVE FRONT SEAT SIDE AIRBAG ASSEMBLY
-

Disengage the 3 clamps to separate the wire harness.
-

Disengage the 2 clamps.
-
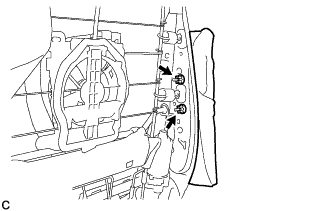
Remove the 2 nuts and front seat side airbag assembly.
CAUTION:
-
The nuts must not be reused.
-
Make sure that the front seat frame assembly with adjuster is not deformed. If it is, replace it with a new one.
-
-