HOOD DISASSEMBLY

-
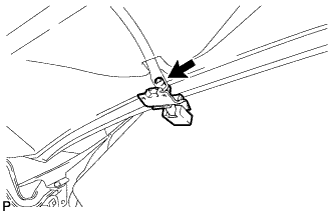
REMOVE HOOD AUXILIARY CATCH HOOK ASSEMBLY
-
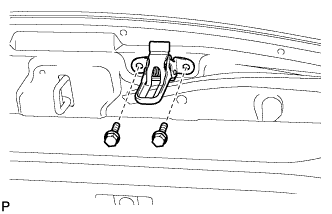
Remove the 2 bolts and hood auxiliary catch hook assembly.
-
-
REMOVE HOOD TO RADIATOR SUPPORT SEAL
-
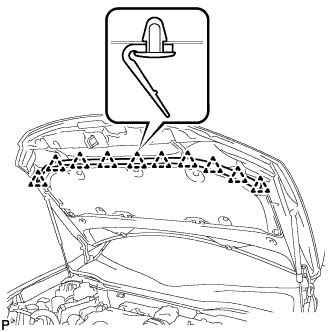
Using a clip remover, disengage the 10 clips and remove the hood to radiator support seal.
-
-
REMOVE HOOD INSULATOR
-
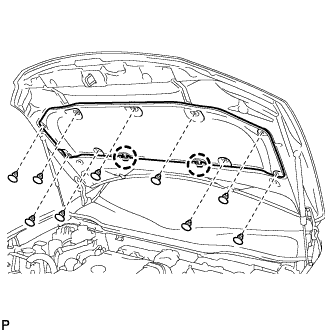
Using a clip remover, remove the 9 clips.
-
Disengage the 2 claws and remove the hood insulator.
-
-
REMOVE WASHER NOZZLE SUB-ASSEMBLY
-
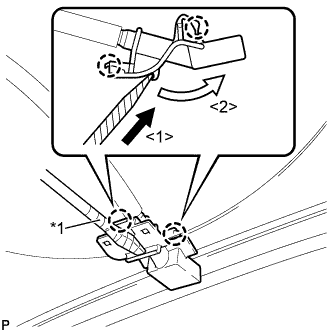
Text in Illustration *1 Protective Tape Using a screwdriver, disengage the 2 claws and separate the washer nozzle sub-assembly as shown in the illustration.
Note
Be careful not to damage the windshield.
Tech Tips
Tape the screwdriver tip before use.
-
Remove the washer nozzle sub-assembly from the washer hose.
Note
Washer nozzles cannot be reused.
-
-
DISCONNECT WASHER HOSE ASSEMBLY
-
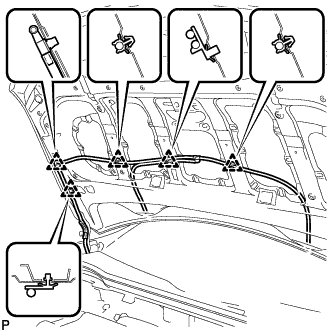
Disengage the 5 clips and disconnect the washer hose assembly.
-
-
REMOVE HOOD SUPPORT ASSEMBLY LH
Note
-
Avoid touching the piston rod as much as possible to prevent foreign matter from attaching to it. Be sure to hold the cylinder while servicing.
-
Do not wear cotton gloves or other similar materials when handling the piston rod. Fibers may attach to the rod and result in gas leaks.
-
In order to prevent the piston rod from deforming, do not apply any horizontal load to the door stay.
-
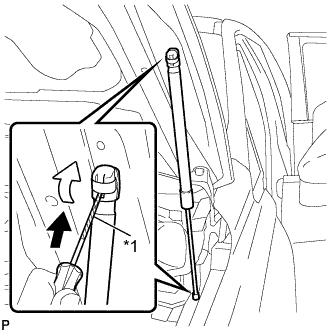
Text in Illustration *1 Protective Tape Using a screwdriver, remove the stop ring along the groove.
Tech Tips
Tape the screwdriver tip before use.
-
Release the ball joint and remove the hood support assembly.
Note
Remove the hood support assembly while supporting the hood by hand.
-
-
REMOVE HOOD SUPPORT ASSEMBLY RH
Tech Tips
Use the same procedure for the RH side and LH side.