ULTRASONIC SENSOR (for Rear Side) INSTALLATION

-
INSTALL NO. 1 ULTRASONIC SENSOR RETAINER (for Corner Sensor)
-

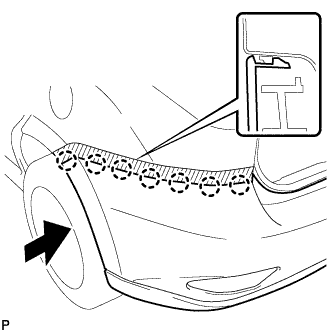
Text in Illustration *1 Protrusion *2 Keyhole Temporarily install the No. 1 ultra sonic sensor retainer to the rear bumper.
Note
-
Do not damage the rear bumper with the protrusion when installing the retainer.
-
Securely install the No. 1 ultrasonic sensor retainer so that there are no gaps between the retainer and surface of the rear bumper.
Tech Tips
-
When installing the retainer, align the keyhole and protrusion as shown in the illustration.
-
Use the same procedure for the RH side and LH side.
-
-
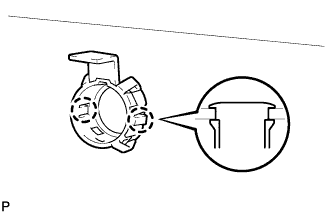
Engage the 2 claws to install the No. 1 ultrasonic sensor retainer.
Tech Tips
Use the same procedure for the RH side and LH side.
-
-
INSTALL NO. 1 ULTRASONIC SENSOR (for Corner Sensor)
-
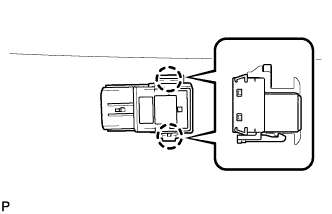
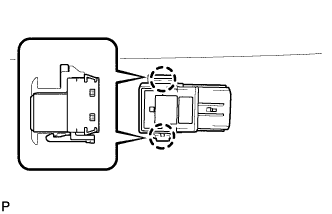
Engage the 2 claws to install the No. 1 ultrasonic sensor.
Note
Push the No. 1 ultrasonic sensor retainer from the outside of the bumper when there is a gap between the retainer and the bumper surface. In this case, do not push on the ultrasonic sensor.
Tech Tips
Use the same procedure for the RH side and LH side.
-
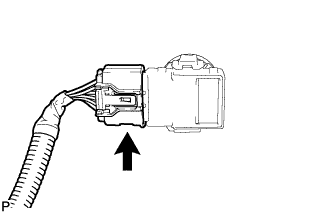
Connect the connector.
Tech Tips
Use the same procedure for the RH side and LH side.
-
-
INSTALL NO. 1 ULTRASONIC SENSOR RETAINER (for Back Sensor)
-
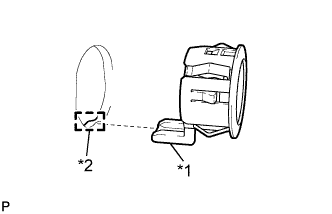
Text in Illustration *1 Protrusion *2 Keyhole Temporarily install the No. 1 ultra sonic sensor retainer to the rear bumper.
Note
-
Do not damage the rear bumper with the protrusion when installing the retainer.
-
Securely install the No. 1 ultrasonic sensor retainer so that there are no gaps between the retainer and surface of the rear bumper.
Tech Tips
-
When installing the retainer, align the keyhole and protrusion as shown in the illustration.
-
The illustration is for the LH side. The RH side is the opposite of the LH side.
-
-
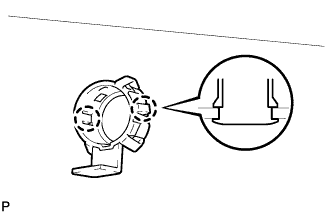
Engage the 2 claws to install the No. 1 ultrasonic sensor retainer.
Tech Tips
The illustration is for the LH side. The RH side is the opposite of the LH side.
-
-
INSTALL NO. 1 ULTRASONIC SENSOR (for Back Sensor)
-
Engage the 2 claws to install the No. 1 ultrasonic sensor.
Note
Push the No. 1 ultrasonic sensor retainer from the outside of the bumper when there is a gap between the retainer and the bumper surface. In this case, do not push on the ultrasonic sensor.
Tech Tips
The illustration is for the LH side. The RH side is the opposite of the LH side.
-

Connect the connector.
Tech Tips
The illustration is for the LH side. The RH side is the opposite of the LH side.
-
-
INSTALL REAR BUMPER ASSEMBLY
-
Connect each connector.
-
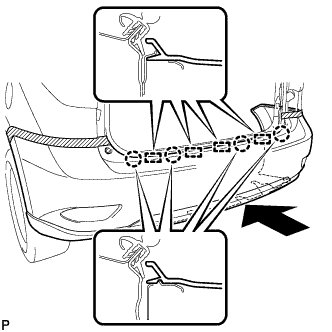
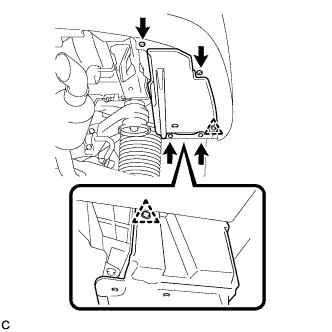
Engage the 4 claws and 4 guides, and install the rear bumper assembly as shown in the illustration.
-
Engage the 7 claws.
Tech Tips
Use the same procedure for the RH side and LH side.
-

Install the screw.
- Torque:
- 2.5 N*m { 26 kgf*cm, 22 in.*lbf }
Tech Tips
Use the same procedure for the RH side and LH side.
-
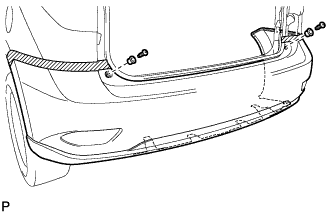
Engage the 2 rear bumper upper stoppers and install the 2 screws.
- Torque:
- 7.5 N*m { 77 kgf*cm, 66 in.*lbf }
-
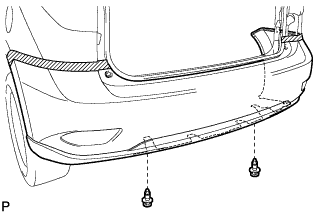
Install the 2 clips.
-
-
INSTALL NO. 2 LUGGAGE COMPARTMENT SIDE COVER PROTECTOR
-
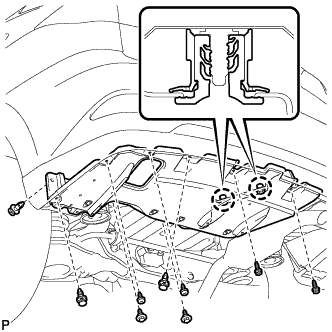
Engage the 2 craws and install the No. 2 luggage compartment side cover protector.
-
Install the 3 clips and 2 bolts.
-
Install the 4 screws.
- Torque:
- 7.5 N*m { 77 kgf*cm, 66 in.*lbf }
-
Install the 2 screws.
- Torque:
- 7.5 N*m { 77 kgf*cm, 66 in.*lbf }
-
Install a new grommet.
-
-
INSTALL NO. 1 LUGGAGE COMPARTMENT SIDE COVER PROTECTOR
-
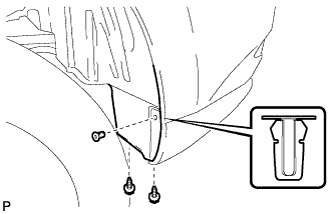
Install the No. 1 luggage compartment side cover protector with the 2 clips.
-
Install the 2 bolts and 2 screws.
-
-
INSTALL REAR QUARTER PANEL MUDGUARD SUB-ASSEMBLY LH
-
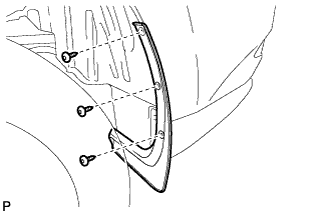
Using a 4 mm hexagon wrench, install the rear quarter panel mudguard sub-assembly with the 3 hexagon screws.
- Torque:
- 7.5 N*m { 77 kgf*cm, 66 in.*lbf }
-
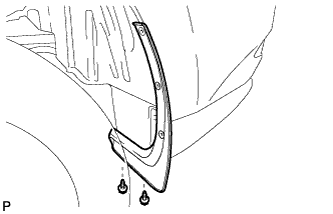
Install the 2 screws.
- Torque:
- 7.5 N*m { 77 kgf*cm, 66 in.*lbf }
-
-
INSTALL REAR QUARTER PANEL MUDGUARD SUB-ASSEMBLY RH
Tech Tips
Use the same procedure for the RH side and LH side.