ULTRASONIC SENSOR (for Rear Side) REMOVAL

-
REMOVE REAR QUARTER PANEL MUDGUARD SUB-ASSEMBLY LH (w/ Rear Fender Mudguard)
-
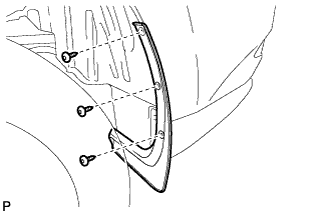
Using a 4 mm hexagon wrench, remove the 3 hexagon screws.
-
Remove the 2 screws and rear quarter panel mudguard sub-assembly.
-
-
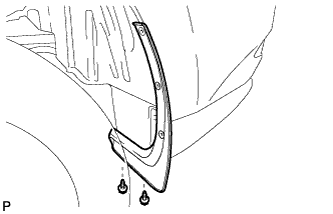
REMOVE REAR QUARTER PANEL MUDGUARD SUB-ASSEMBLY RH (w/ Rear Fender Mudguard)
Tech Tips
Use the same procedure for the RH side and LH side.
-
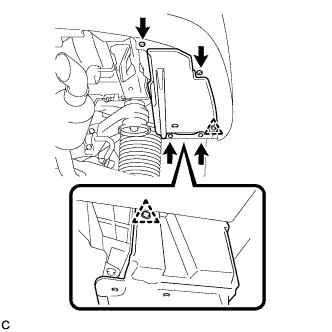
REMOVE NO. 2 LUGGAGE COMPARTMENT SIDE COVER PROTECTOR
-
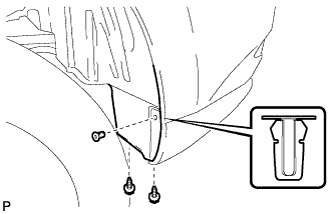
Remove the 2 screws and grommet.
-
Remove the 4 screws.
-
Remove the 2 bolts and 3 clips.
-
Disengage the 2 claws and remove the No. 2 luggage compartment side cover protector.
-
-
REMOVE NO. 1 LUGGAGE COMPARTMENT SIDE COVER PROTECTOR
-
Remove the 2 bolts and 2 screws.
-
Remove the 2 clips and No. 1 luggage compartment side cover protector.
-
-
REMOVE REAR BUMPER ASSEMBLY
-
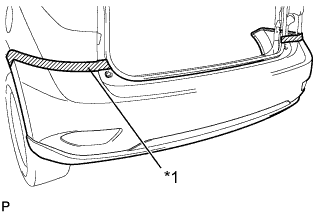
Text in Illustration *1 Protective Tape Put protective tape around the rear bumper assembly.
-
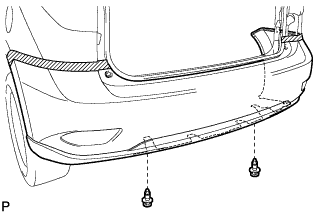
Using a clip remover, remove the 2 clips.
-
Remove the 2 screws and 2 rear bumper upper stoppers.
-

Remove the screw.
Tech Tips
Use the same procedure for the RH side and LH side.
-
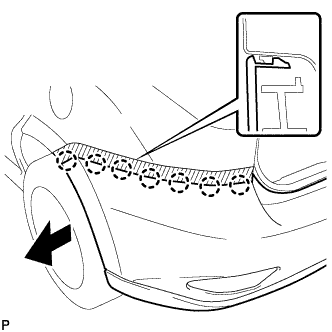
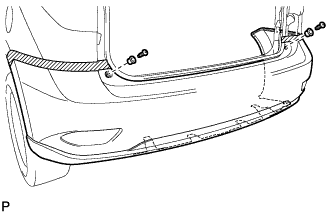
Disengage the 7 claws.
Tech Tips
Use the same procedure for the RH side and LH side.
-
Disconnect each connector.
-
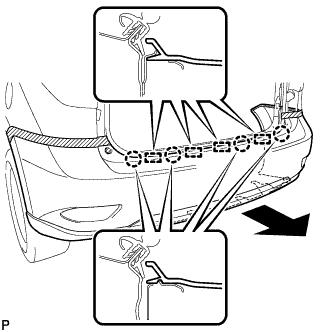
Disengage the 4 claws and 4 guides, and remove the rear bumper assembly as shown in the illustration.
-
-
REMOVE NO. 1 ULTRASONIC SENSOR (for Back Sensor)
-

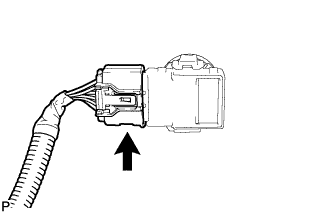
Disconnect the connector.
Tech Tips
The illustration is for the LH side. The RH side is the opposite of the LH side.
-
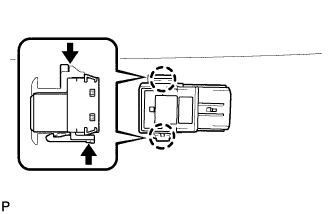
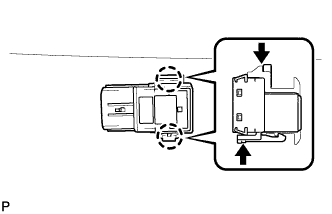
Disengage the 2 claws and remove the No. 1 ultrasonic sensor.
Tech Tips
The illustration is for the LH side. The RH side is the opposite of the LH side.
-
-
REMOVE NO. 1 ULTRASONIC SENSOR RETAINER (for Back Sensor)
-
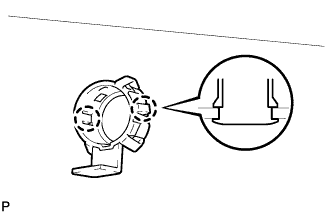
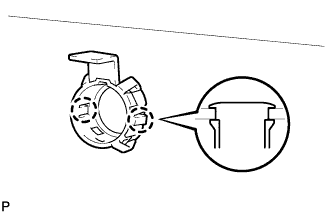
Disengage the 2 claws and remove the No. 1 ultrasonic sensor retainer.
Tech Tips
The illustration is for the LH side. The RH side is the opposite of the LH side.
-
-
REMOVE NO. 1 ULTRASONIC SENSOR (for Corner Sensor)
-
Disconnect the connector.
Tech Tips
Use the same procedure for the RH side and LH side.
-
Disengage the 2 claws and remove the No. 1 ultrasonic sensor.
Tech Tips
Use the same procedure for the RH side and LH side.
-
-
REMOVE NO. 1 ULTRASONIC SENSOR RETAINER (for Corner Sensor)
-
Disengage the 2 claws and remove the No. 1 ultrasonic sensor retainer.
Tech Tips
Use the same procedure for the RH side and LH side.
-