NOISE FILTER REMOVAL

-
REMOVE TONNEAU COVER SUB-ASSEMBLY
-
REMOVE BACK DOOR FINISH COVER LH (w/o Power Back Door)
-
Using a moulding remover, disengage the 6 claws and remove the back door finish cover LH.
-
-
REMOVE BACK DOOR TRIM BASE (w/ Power Back Door)
-
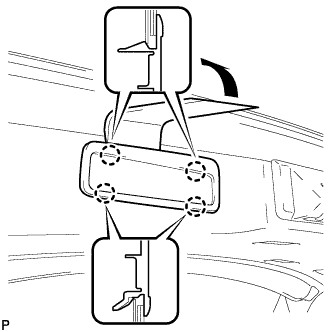
Using a moulding remover, disengage the 4 claws and remove the back door trim base.
-
-
REMOVE BACK DOOR FINISH COVER RH (w/o Power Back Door)
-
Using a moulding remover, disengage the 6 claws and remove the back door finish cover RH.
-
-
REMOVE DOOR PULL HANDLE WITH SWITCH (w/ Power Back Door)
-
Using a moulding remover, disengage the 6 claws and remove the door pull handle with switch.
-
Disconnect the connector.
-
-
REMOVE BACK DOOR LOCK COVER
-
Disengage the 4 claws and remove the back door lock cover.
-
-
REMOVE NO. 2 ROOM LIGHT ASSEMBLY
-
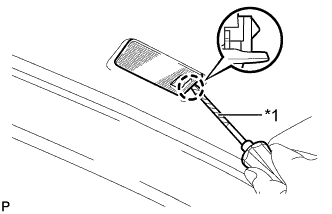
Text in Illustration *1 Protective Tape Using a screwdriver wrapped with protective tape, disengage the claw.
-
Disconnect the connector and remove the No. 2 room light assembly.
-
-
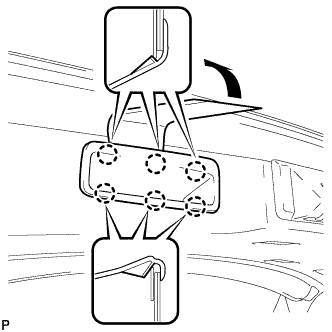
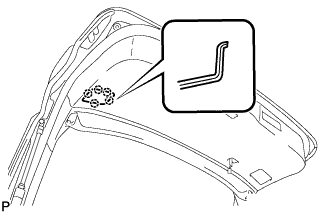
REMOVE BACK DOOR UPPER TRIM COVER LH
-
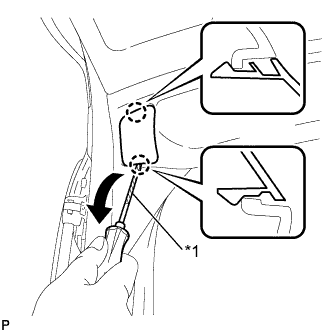
Text in Illustration *1 Protective Tape Using a screwdriver, disengage the 2 claws and remove the back door upper trim cover LH as shown in the illustration.
Tech Tips
Tape the screwdriver tip before use.
-
-
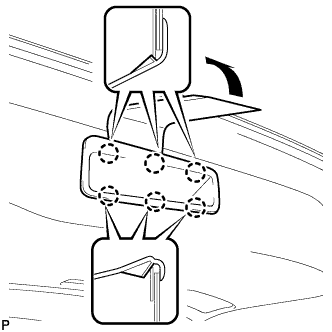
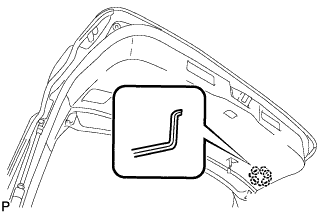
REMOVE BACK DOOR UPPER TRIM COVER RH
-
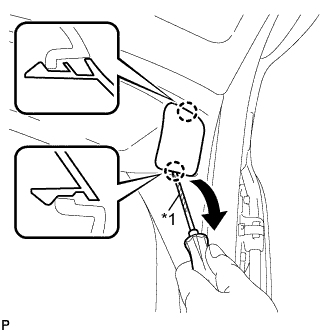
Text in Illustration *1 Protective Tape Using a screwdriver, disengage the 2 claws and remove the back door upper trim cover RH as shown in the illustration.
Tech Tips
Tape the screwdriver tip before use.
-
-
REMOVE BACK DOOR SERVICE HOLE COVER LH
-
Disengage the 5 claws and remove the back door service hole cover LH.
-
-
REMOVE BACK DOOR SERVICE HOLE COVER RH
-
Disengage the 5 claws and remove the back door service hole cover RH.
-
-
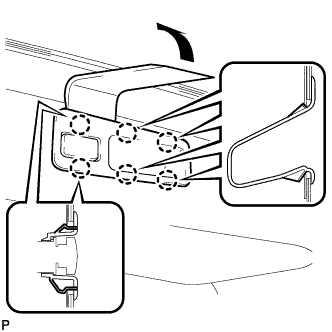
REMOVE BACK DOOR TRIM PANEL ASSEMBLY
-
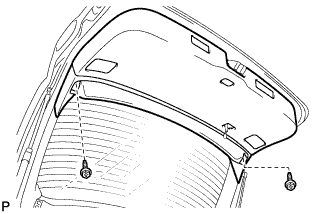
Remove the 2 screws.
-
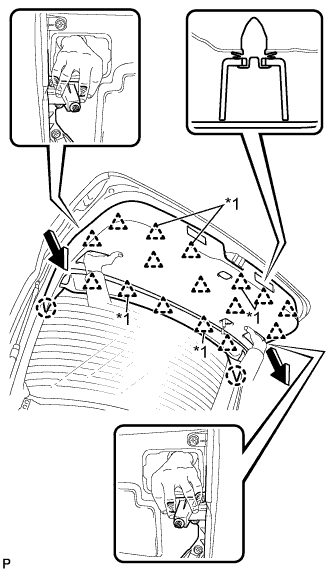
Grab the service holes by hand.
Note
Make sure to hold the clip bases as shown in the illustration.
-
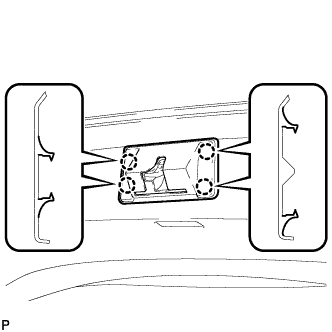
Pull the back door trim panel assembly in the direction shown by the arrows in the illustration (pull perpendicular to the surface of the trim panel) to disengage the 2 claws and 16 clips, and remove the back door trim panel assembly.
Text in Illustration *1 2-piece Type Clip Note
Removing the back door trim panel assembly at an angle may cause deformation or damage. To avoid this, make sure to pull the panel in the direction shown by the arrows (pull perpendicular to the surface of the panel).
Tech Tips
If any clips remain on the back door panel after the back door trim panel assembly is removed, remove the clips and install them to the back door trim panel assembly.
-
-
REMOVE RADIO SETTING CONDENSER
Note
When the terminal cover is removed, the radio setting condenser must be replaced because the terminal cover and condenser are supplied as a set.
-
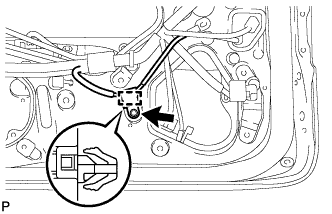
Remove the bolt.
-
Disengage the clamp and remove the radio setting condenser with wire harness from the vehicle body.
-

Text in Illustration *1 Protective Tape Using a screwdriver wrapped with protective tape, disengage the 3 claws and remove the terminal cover with wire harness from the condenser.
-
Using a screwdriver, bend back and break off the claw as shown in the illustration.
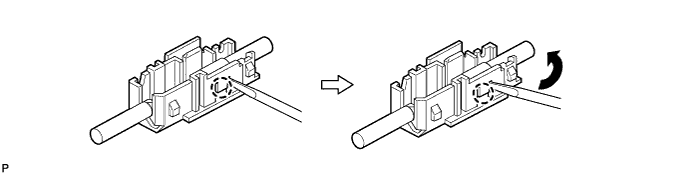
-
Remove the terminal cover from wire harness.
-