ROOF SUNSHADE DISASSEMBLY

-
REMOVE SLIDING ROOF DRIVE GEAR SUB-ASSEMBLY
-
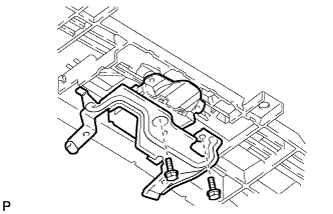
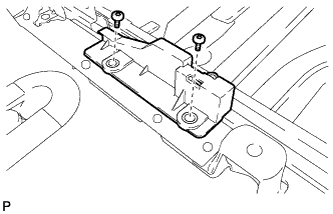
Remove the 2 bolts and the sliding roof drive gear sub-assembly and room light bracket.
-
-
REMOVE SUNSHADE TRIM SUB-ASSEMBLY (for Rear)
-
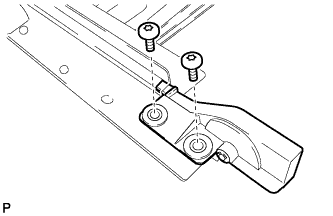
Using "TORX" socket wrench T20, remove the 2 "TORX" bolts and rear roof sunshade guide LH.
Tech Tips
Use the same procedure for the LH side and RH side.
-
Using "TORX" socket wrench T20, remove the 2 "TORX" bolts and front roof sunshade guide LH.
Tech Tips
Use the same procedure for the LH side and RH side.
-

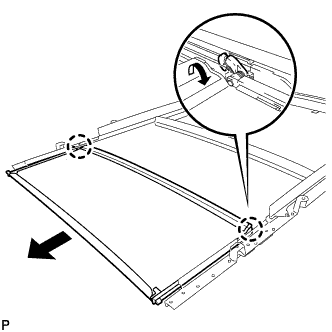
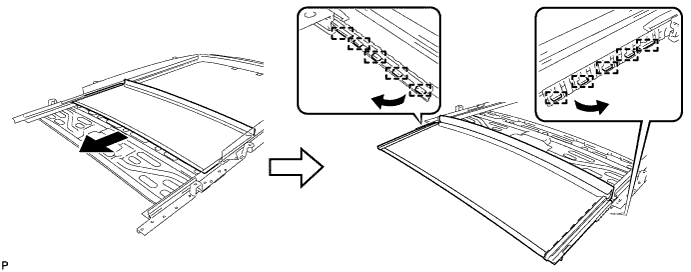
Push the sunshade trim sub-assembly toward the open direction as shown in the illustration to disengage the 2 claws from the rail notch.
Tech Tips
Tape the screwdriver tip before use.
-
Slide the sunshade trim sub-assembly in the direction indicated by the arrow to remove it.
-
-
REMOVE SUNSHADE TRIM SUB-ASSEMBLY (for Center)
-
Push the sunshade trim sub-assembly toward the open direction as shown in the illustration to disengage the 2 claws from the rail notch.
Tech Tips
Tape the screwdriver tip before use.
-
Slide the sunshade trim sub-assembly in the direction indicated by the arrow to remove it.
-
-
REMOVE SUNSHADE TRIM SUB-ASSEMBLY (for Front)
-
Slide the sunshade trim sub-assembly in the direction indicated by the arrow.
-
Disengage the 10 guides and disconnect the sliding roof drive cable.
-
Remove the sunshade trim sub-assembly.
-
-
REMOVE SLIDING ROOF SIDE GARNISH LH
-
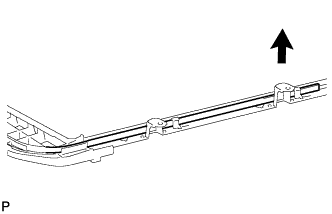
Remove the outer casing to the extent that allows removal of the sliding roof side garnish.
-
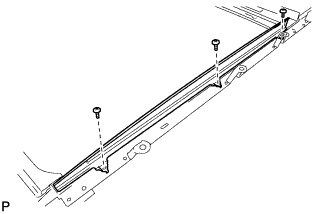
Remove the 3 screws and remove the sliding roof side garnish LH.
-
-
REMOVE SLIDING ROOF SIDE GARNISH RH
Tech Tips
Use the same procedure for the LH side and RH side.