HEATER WATER PUMP REMOVAL

-
PRECAUTION (w/ Navigation System for HDD)
Note
After the power switch is turned off, the display and navigation module display (HDD navigation system) records various types of memory and settings. As a result, after turning the power switch off, make sure to wait for the time specified in the following table before disconnecting the cable from the negative (-) battery terminal.
Waiting Time before Disconnecting Cable from Negative (-) Battery Terminal Specification Waiting Time w/o Telematics transceiver 60 sec. w/ Telematics transceiver 120 sec. -
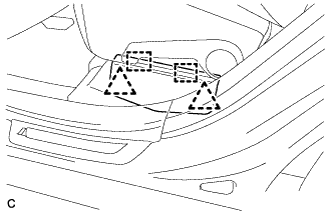
REMOVE REAR DECK FLOOR BOX
-

Remove the 3 clips and the rear deck floor box.
-
-
DISCONNECT CABLE FROM NEGATIVE BATTERY TERMINAL
Note
When disconnecting the cable, some systems need to be initialized after the cable is reconnected Click here.
-
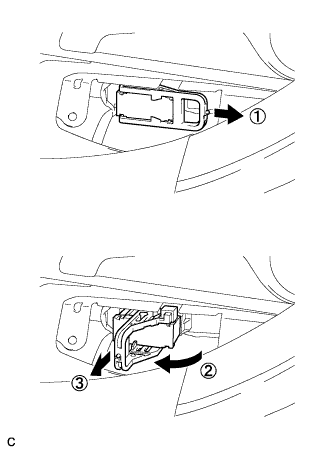
REMOVE BATTERY SERVICE HOLE COVER
-
Disengage the 2 clips and 2 guides, and remove the battery service hole cover.
Tech Tips
Because these are 2-piece clips, one side will remain in the bracket when they are being removed.
-
-
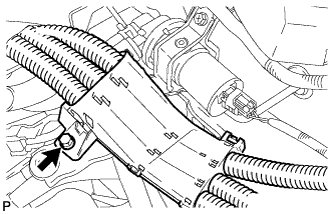
REMOVE SERVICE PLUG GRIP
CAUTION:
-
Remove the service plug grip to interrupt a high voltage circuit at the time of the check.
-
Keep the removed service plug grip in your pocket to prevent other technicians from accidentally reconnecting it while you are servicing the vehicle.
-
All the high voltage wiring connectors are orange colored.
-
Wear insulated gloves. Remove the service plug grip after sliding the lever of the service plug grip.
CAUTION:
-
Keep the removed service plug grip in your pocket to prevent other technicians from accidentally reconnecting it while you are servicing the vehicle.
-
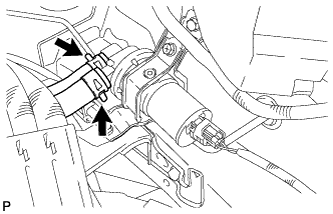
After disconnecting the service plug grip, wait for at least 10 minutes before touching any of the high-voltage connectors or terminals.
Tech Tips
Waiting for at least 10 minutes is required to discharge the high-voltage capacitor inside the inverter with converter assembly.
-
-
-
REMOVE AIR CLEANER ASSEMBLY
Tech Tips
Refer to the procedure for Remove Air Cleaner Assembly Click here.
-
CHECK TERMINAL VOLTAGE
-
Remove the inverter terminal cover Click here.
-
Check the terminal voltage Click here.
-
Install the inverter terminal cover Click here.
-
-
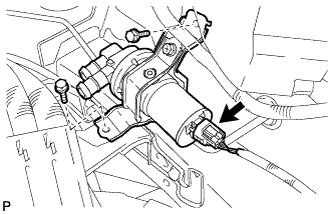
REMOVE HEATER WATER PUMP ASSEMBLY
-
Remove the bolt and disengage the wire harness.
CAUTION:
Wear insulating gloves.
-
Using pliers, grip the claws of the clip, slide the clip, and disconnect the 2 heater water hoses.
Note
-
Do not apply any excessive force to the heater water hoses.
-
Prepare a drain pan or cloth for when the cooling water leaks.
-
-
Disconnect the connector.
-
Remove the 2 bolts and heater water pump assembly.
-