МЕХАНИЧЕСКАЯ ТРАНСМИССИЯ В СБОРЕ СНЯТИЕ
Note
When the transaxle is removed, be sure to use a new clutch release with bearing cylinder assembly and new installation bolts. Removal of the transaxle allows the compressed clutch release with bearing cylinder assembly to return to its original position, and dust could damage the seal of the clutch release with bearing cylinder assembly, possibly causing clutch fluid leaks.
-
REMOVE ENGINE ASSEMBLY WITH TRANSAXLE
-
Remove the engine assembly with transaxle Click here.
-
-
REMOVE STARTER ASSEMBLY
-
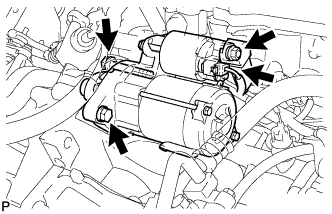
Open the terminal cap.
-
Remove the nut and disconnect the terminal 30.
-
Disconnect the connector.
-
Remove the 2 bolts and the starter assembly.
-
-
REMOVE MANUAL TRANSAXLE ASSEMBLY
-
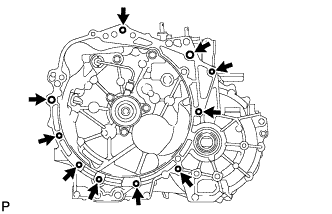
Remove the 8 bolts and the manual transaxle.
-
-
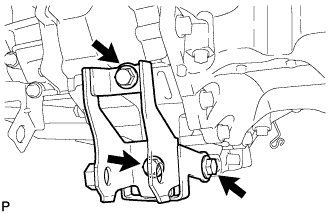
REMOVE TRANSVERSE ENGINE ENGINE MOUNTING CONTROL BRACKET
-
Remove the 3 bolts and the engine mounting control bracket.
-
-
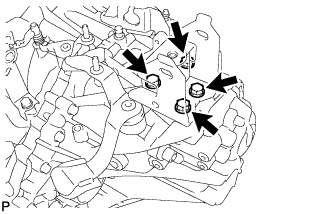
REMOVE TRANSVERSE ENGINE ENGINE MOUNTING BRACKET
-
Remove the 4 bolts and the engine mounting bracket LH.
-
-
REMOVE CONTROL CABLE BRACKET
-
Disengage the wire harness clamps and connector from control cable bracket.
-
Remove the 2 bolts and control cable bracket.
-
-
REMOVE TRANSMISSION CASE PLUG
-
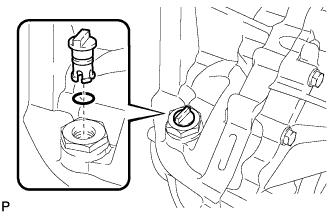
Remove the transmission case plug with the O-ring from the manual transaxle.
-
-
REMOVE WIRE HARNESS CLAMP BRACKET
-

Remove the bolt and oxygen sensor wire harness clamp bracket.
-
Remove the bolt and wire harness clamp bracket.
-
-
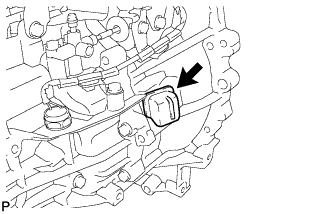
REMOVE NO. 1 CLUTCH HOUSING COVER
-
Снимите кожух картера сцепления № 1 с трансмиссии в блоке с главной передачей.
-
-
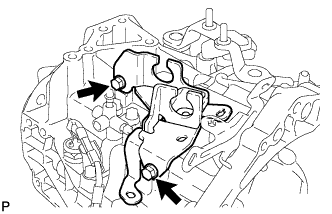
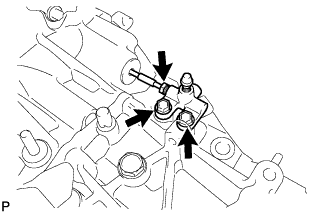
REMOVE CLUTCH RELEASE BLEEDER SUB-ASSEMBLY
-
С помощью разрезной головки 10 мм отсоедините прокачной штуцер механизма выключения сцепления от трубки выключения сцепления прокачного штуцера.
-
Выверните 2 болта и снимите прокачной штуцер механизма выключения сцепления.
-
-
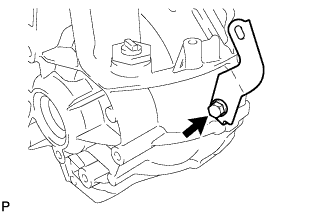
REMOVE BLEEDER CLUTCH RELEASE TUBE
-
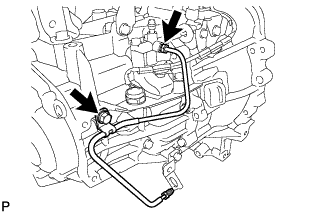
С помощью разрезной головки 10 мм снимите трубку выключения сцепления прокачного штуцера.
-
Выверните болт и снимите трубку выключения сцепления прокачного штуцера.
-
-
REMOVE CLUTCH TUBE BOOT
-
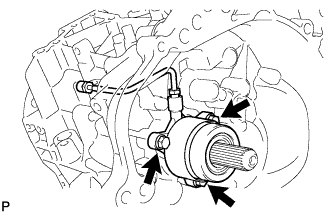
REMOVE CLUTCH RELEASE WITH BEARING CYLINDER ASSEMBLY
-
Выверните 3 болта и снимите рабочий цилиндр сцепления с подшипником в сборе вместе с трубкой выключения сцепления прокачного штуцера.
-
-
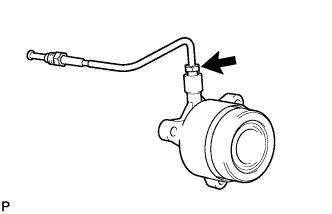
REMOVE BLEEDER CLUTCH RELEASE TUBE
-
С помощью разрезной головки 10 мм отсоедините трубку выключения сцепления от рабочего цилиндра сцепления с подшипником в сборе.
-