ТОПЛИВНАЯ СИСТЕМА ДВИГАТЕЛЯ COMMON RAIL СНЯТИЕ
-
REMOVE EGR WITH COOLER PIPE ASSEMBLY
-
Remove the EGR with cooler pipe assembly Click here.
-
-
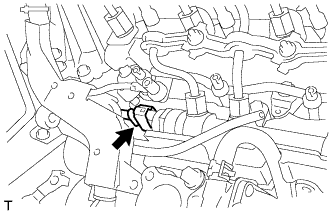
REMOVE NO. 1 EGR COOLER BRACKET
-

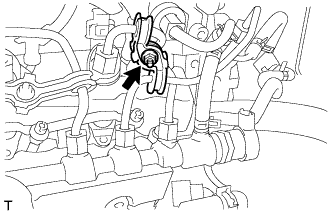
Disconnect the vacuum hose.
-
Remove the 2 bolts and No. 1 EGR cooler bracket.
-
-
REMOVE NO. 2 INJECTION PIPE CLAMP
-
Remove the nut and both sides of the No. 2 injection pipe clamp.
-
-
REMOVE NO. 1 INJECTION PIPE CLAMP
-
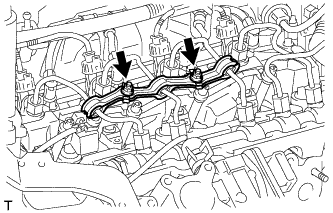
Remove the 2 nuts and both sides of the No. 1 injection pipe clamp.
-
-
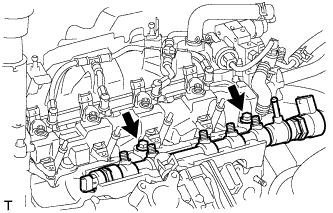
REMOVE NO. 1 INJECTION PIPE SUB-ASSEMBLY
-
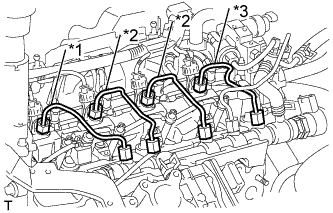
Text in Illustration *1 No. 1 Injection Pipe *2 No. 2 Injection Pipe *3 No. 3 Injection Pipe Using a union nut wrench (17 mm), separate the union nut from the injector first.
-
Then remove the union nut from the common rail, and remove the injection pipe.
-
After removing the injection pipe, cover the common rail with vinyl tape and cover the injector inlet with a vinyl or plastic bag in order to prevent dust and foreign matter from entering.
-
-
REMOVE NO. 2 INJECTION PIPE SUB-ASSEMBLY
Tech Tips
Perform the same procedure as for injection pipe No. 1.
-
REMOVE NO. 3 INJECTION PIPE SUB-ASSEMBLY
Tech Tips
Perform the same procedure as for injection pipe No. 1.
-
REMOVE FUEL INLET PIPE SUB-ASSEMBLY
-
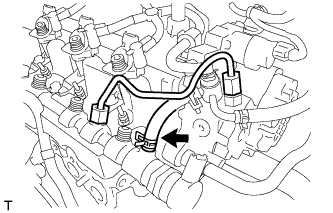
Using a wrench (17 mm), hold the supply pump, and using a union nut wrench (17 mm), separate the union nut from the supply pump first.
-
Then remove the union nut from the common rail, and remove the fuel inlet pipe.
-
After removing the fuel inlet pipe, cover the common rail with vinyl tape and cover the injector inlet with a vinyl or plastic bag in order to prevent dust and foreign matter from entering.
-
Disconnect the No. 2 fuel hose.
-
-
REMOVE COMMON RAIL ASSEMBLY
-
Disconnect the connector.
-
Remove the 2 bolts and common rail.
Note
Do not remove the fuel pressure sensor or fuel pressure regulator.
-