ТОПЛИВНАЯ ФОРСУНКА ПРОВЕРКА

-
INSPECT FUEL INJECTOR ASSEMBLY
-
Check the resistance.
-
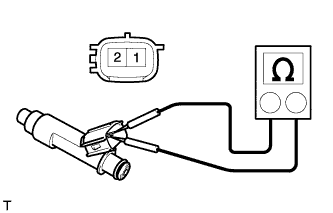
Measure the resistance according to the value(s) in the table below.
Standard Resistance Tester Connection Condition Standard Condition 1 - 2 20°C (68°F) 11.6 to 12.4 Ω Tech Tips
If the result is not as specified, replace the fuel injector assembly.
-
-
Check the operation.
Note
Perform the inspection in a well-ventilated area. Do not perform the inspection near any flames.
-
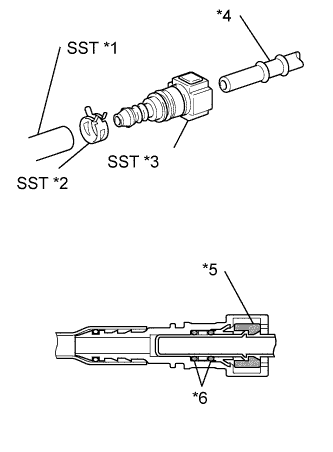
Text in Illustration *1 Hose *2 Clip *3 Fuel Tube Connector *4 Fuel Pipe *5 Retainer *6 O-ring Connect SST (fuel tube connector) to SST (hose), and then connect them to the fuel pipe (vehicle side).
- SST
- 09268-31013 ( 09268-41500, 90467-13001, 95336-08070 )
Note
SST (connector) seals the fuel tube connector and pipe with an O-ring. Ensure that there is no damage or foreign matter on the contact surface. Install the O-ring onto the fuel injector.
-
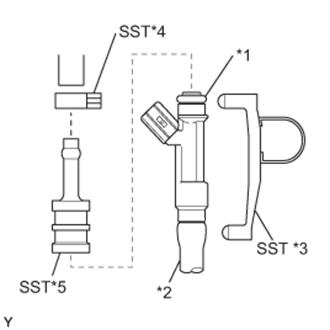
Text in Illustration *1 O-ring *2 Vinyl tube *3 Clamp *4 Clip *5 Adapter Install the O-ring onto the fuel injector.
-
Connect SST (adapter and hose) to the fuel injector assembly, and hold the fuel injector assembly and union with SST (clamp).
- SST
- 09268-31013 ( 09268-41141, 09268-41410, 90467-13001, 95336-08070 )
-
Set the fuel injector assembly in a graduated cylinder.
Note
Install a suitable vinyl tube onto the injector assembly to prevent fuel splashes.
-
Operate the fuel pump Click here.
-
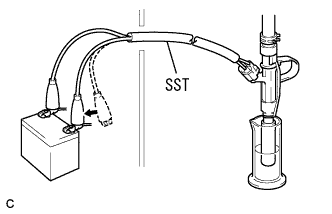
Connect SST (EFI inspection wire H) to the battery for 60 seconds, and then measure the injection volume with the graduated cylinder. Repeat 2 or 3 times and calculate the average.
Injection Volume Tester Connection Condition Specified Condition Positive terminal - Ground terminal 1 minute 193 to 205 cm3 (11.8 to 12.5 cu in.) - SST
- 09842-30080
Difference between injectors 12 cm3 (0.7 cu in.) or less CAUTION:
Always do the switching (voltage on/off) at the battery terminal.
Tech Tips
If the injection volume is not as specified, replace the injector.
-
-
Check for leaks.
-
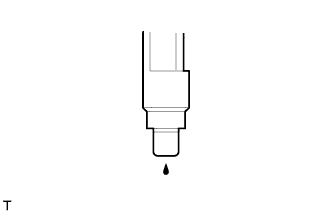
In the condition above, disconnect SST (EFI inspection wire H) from the battery and check the fuel leakage from the injector.
Fuel drop 1 drop or less every 12 minutes -
Connect the fuel tube.
Tech Tips
Refer to "Precaution" for the fuel tube connection procedure Click here.
-
Install the fuel pipe clamp.
-
-