РАСПРЕДВАЛ СНЯТИЕ
-
REMOVE NO. 3 ENGINE UNDER COVER (w/ No. 1 Engine Cover)
-
Снимите 3 фиксатора и защиту картера двигателя № 3.
-
-
REMOVE NO. 1 ENGINE COVER (w/ No. 1 Engine Cover)
-
Remove the 2 bolts, nut and the No. 1 engine cover.
-
-
REMOVE INTAKE MANIFOLD
-
Remove the intake manifold Click here.
-
-
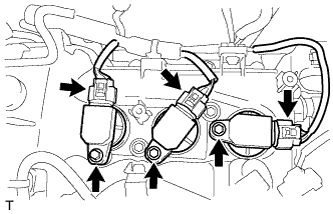
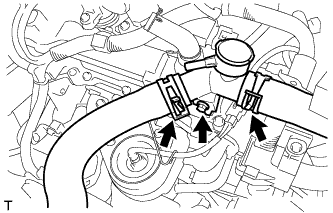
REMOVE NO. 1 IGNITION COIL
-
Disconnect the 3 No. 1 ignition coil connectors.
-
Remove the 3 bolts and the 3 No. 1 ignition coils.
-
-
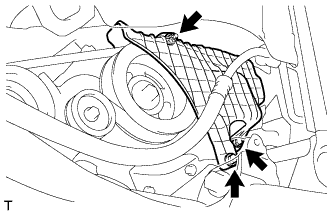
DISCONNECT RADIATOR RESERVOIR TANK HOSE
-
Отсоедините шланг расширительного бачка радиатора от хомута шланга.
-
Ослабьте фиксатор и отсоедините шланг расширительного бачка радиатора.
-
-
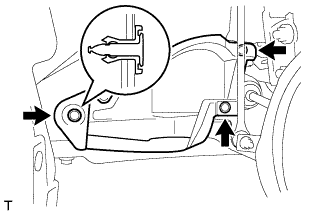
REMOVE WATER FILLER ASSEMBLY
-
Loosen the 2 clips and disconnect the No. 1 radiator hose and No. 3 radiator hose.
-
Remove the bolt and the water filler assembly.
-
-
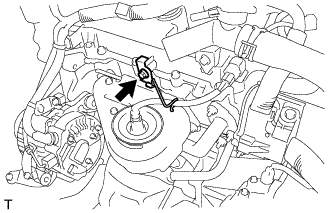
REMOVE HARNESS BRACKET
-
Remove the bolt and the harness bracket.
-
-
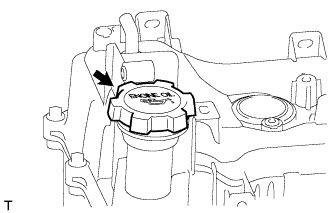
REMOVE OIL FILLER CAP SUB-ASSEMBLY
-
Remove the oil filler cap sub-assembly.
-
-
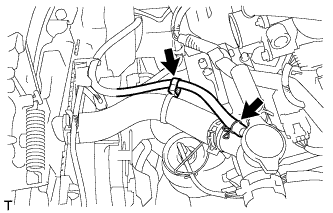
REMOVE CYLINDER HEAD COVER SUB-ASSEMBLY
-
Disconnect the vacuum hose from the vacuum switching valve.
-
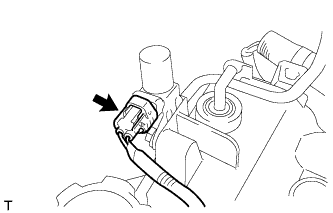
Disconnect the vacuum switching valve connector.
-
Separate the wire harness from the cylinder head cover sub-assembly
-
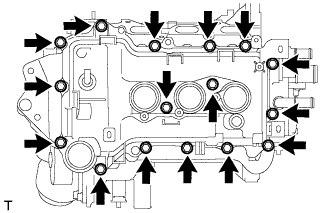
Remove the 16 bolts and the cylinder head cover sub-assembly.
-
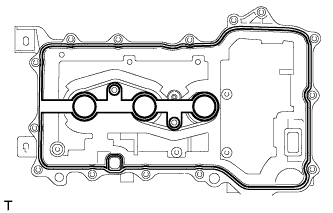
Remove the gasket from the cylinder head cover sub-assembly.
-
-
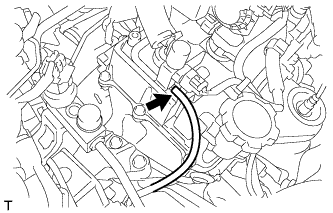
REMOVE TIMING GEAR COVER TIGHT PLUG

Text in Illustration *1 8 mm Socket Hexagon Wrench
-
Using an 8 mm socket hexagon wrench, remove the timing gear cover tight plug.
-
-
REMOVE CAMSHAFT TIMING GEAR OR SPROCKET
-
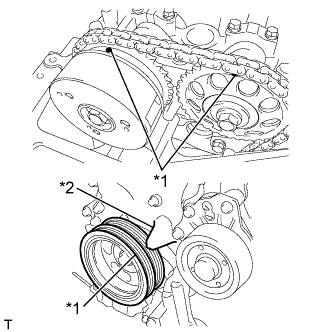
Turn the crankshaft pulley clockwise to align the timing mark on the pulley with the timing pointer of timing chain cover (Set the No. 1 piston to the TDC/compression).
Text in Illustration *1 Timing Mark *2 Timing Pointer -
Make sure that the timing mark of the camshaft sprocket is at the top.
Tech Tips
If the timing mark is not at the top, turn the crankshaft pulley 1 revolution so that the timing mark comes to the top (Set the No. 1 piston to the TDC/compression).
-

Text in Illustration *1 Paint Mark *2 Timing Mark Place paint marks on the chain plate corresponding to the timing marks of the camshaft timing gear and the camshaft timing sprocket.
-
Turn the crankshaft pulley slightly counterclockwise.
Note
Do not allow the lifted valve and piston to come into contact with each other when removing the camshaft.
-

Loosen the bolts on the sprocket while holding the hexagonal portion of the camshaft.
-
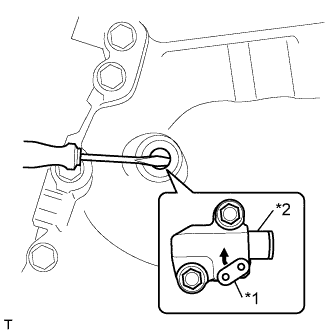
Text in Illustration *1 Stopper Plate *2 Plunger Insert a screwdriver from the plug hole and turn the stopper plate of the timing chain tensioner clockwise to release the lock, and keep it as it is.
Tech Tips
-
The plunger of the timing chain tensioner is locked.
-
If the stopper plate is locked firmly, slightly turn the hexagonal portion of the camshaft to the right and left.
-
-
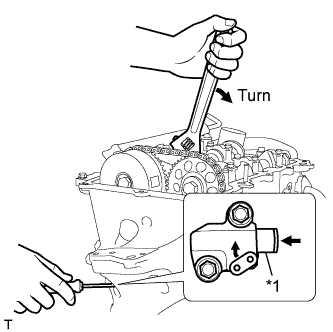
Text in Illustration *1 Plunger Slightly turn the hexagonal portion of the camshaft clockwise so that the plunger of the timing chain tensioner is pushed by the timing chain.
-
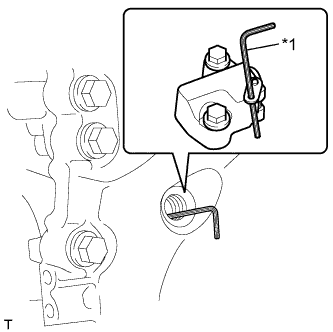
Text in Illustration *1 Hexagon Wrench Remove the screwdriver from the plug. Insert the hexagon wrench into the stopper plate hole.
Note
Hold the hexagonal portion of the camshaft.
Tech Tips
Perform this procedure in order to maintain the pressure on the plunger from the timing chain tensioner.
-
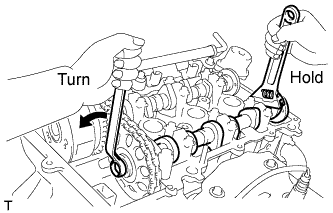
Remove the bolt of the sprocket while holding the hexagonal portion of the No. 2 camshaft.
-

Remove the camshaft timing gear or sprocket.
-
-
REMOVE NO. 2 CAMSHAFT
-

Slide the camshaft timing sprocket toward the engine front until the No. 1 camshaft bearing cap comes off.
-
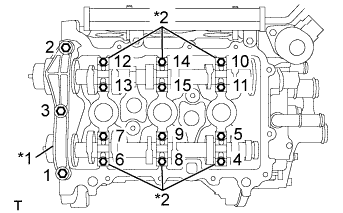
Remove the 15 bolts in the order shown in the illustration.
-
Remove the No. 1 camshaft bearing cap and No. 2 camshaft bearing caps.
Text in Illustration *1 No. 1 Camshaft Bearing Cap *2 No. 2 Camshaft Bearing Cap -
Remove the No. 2 camshaft.
-
-
REMOVE CAMSHAFT
-
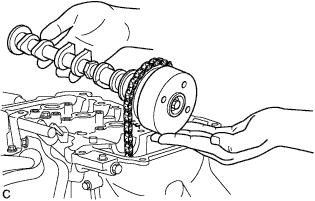
Remove the camshaft.
Tech Tips
-
Remove the camshaft along with the camshaft timing sprocket.
-
Assemble the camshaft timing sprocket to the camshaft before installing them.
-
-
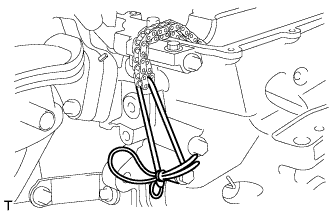
Using a piece of string or the equivalent, fix the timing chain to prevent it from dropping.
-
-
REMOVE CAMSHAFT TIMING SPROCKET ASSEMBLY
-
Remove the bolt and the camshaft timing sprocket assembly.
-