FRONT BLOWER MOTOR REMOVAL

-
REMOVE FRONT DOOR SCUFF PLATE LH (for LHD)
Tech Tips
Use the same procedure as for the RH side Click here.
-
REMOVE FRONT DOOR OPENING TRIM WEATHERSTRIP LH (for LHD)
Tech Tips
Use the same procedure as for the RH side Click here.
-
REMOVE COWL SIDE TRIM BOARD LH (for LHD)
Tech Tips
Use the same procedure as for the RH side Click here.
-
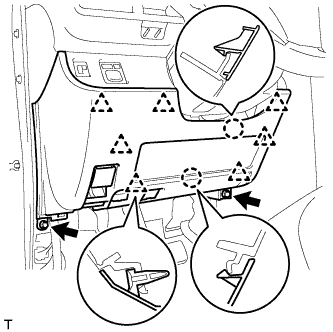
REMOVE LOWER NO. 1 INSTRUMENT PANEL FINISH PANEL (for LHD)
-
Remove the 2 <C> bolts.
-
Disengage the 2 claws and the 7 clips and separate the lower No. 1 instrument panel finish panel.
-
Disconnect the connector.
-
Disengage the 2 claws and disconnect the DLC3 connector.
-
Disengage the 3 claws and disconnect the hood lock control lever.
-
-
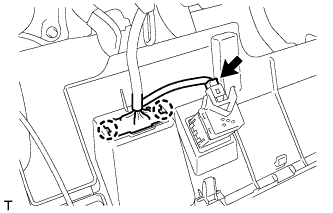
REMOVE NO. 3 AIR DUCT SUB-ASSEMBLY
-
Disconnect the connector.
Tech Tips
If the vehicle is equipped with stop and start system, disconnect the connector.
-
Remove the clip.
-
Disengage the 3 claws and remove the air duct.
-
-
REMOVE CLUTCH PEDAL SUB-ASSEMBLY (for RHD Manual Transaxle)
-
Remove the clutch pedal sub-assembly Click here.
-
-
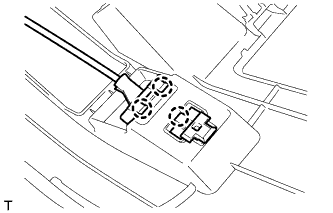
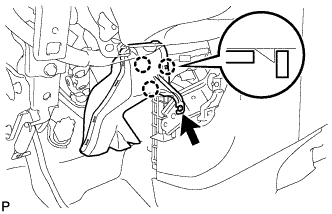
REMOVE NO. 2 AIR DUCT SUB-ASSEMBLY
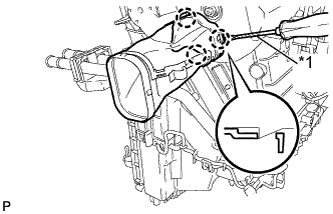
Text in Illustration *1 Protective tape
-
Using a screwdriver with its tip wrapped in protective tape, disengage the 3 claws and remove the air duct.
-
-
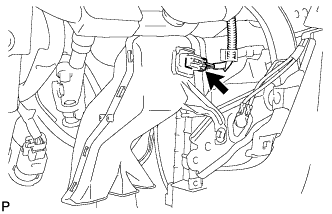
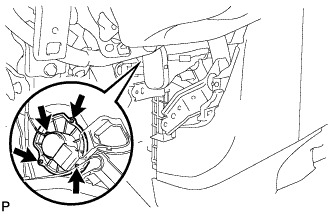
REMOVE BLOWER W/FAN MOTOR SUB-ASSEMBLY
-
Disconnect the connector.
-
Remove the 3 screws and remove the blower w/fan motor.
-