MAIN BODY ECU REMOVAL

-
REMOVE FRONT DOOR SCUFF PLATE LH
Tech Tips
Use the same procedure as for the RH side Click here.
-
SEPARATE FRONT DOOR OPENING TRIM WEATHERSTRIP LH
Tech Tips
Use the same procedure as for the RH side Click here.
-
REMOVE COWL SIDE TRIM BOARD LH
Tech Tips
Use the same procedure as for the RH side Click here.
-
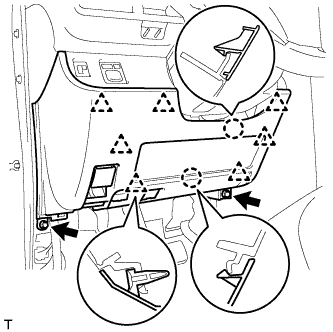
REMOVE LOWER NO. 1 INSTRUMENT PANEL FINISH PANEL (for LHD)
-
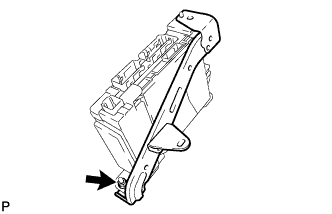
Remove the 2 <C> bolts.
-
Disengage the 2 claws and the 7 clips and separate the lower No. 1 instrument panel finish panel.
-
Disconnect the connector.
-
Disengage the 2 claws and disconnect the DLC3 connector.
-
Disengage the 3 claws and disconnect the hood lock control lever.
-
-
REMOVE LOWER NO. 2 INSTRUMENT PANEL FINISH PANEL (for RHD)
Tech Tips
Use the same procedure as for the LHD side Click here.
-
REMOVE UPPER INSTRUMENT PANEL SUB-ASSEMBLY (for RHD)
Tech Tips
Use the same procedure as for the LHD side Click here.
-
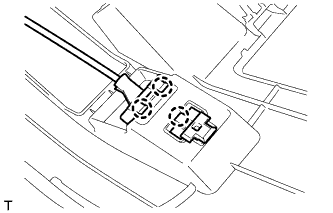
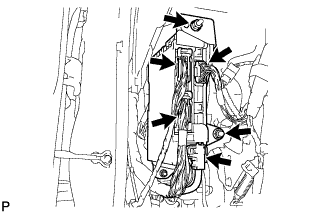
REMOVE INSTRUMENT PANEL JUNCTION BLOCK ASSEMBLY (for LHD)
-
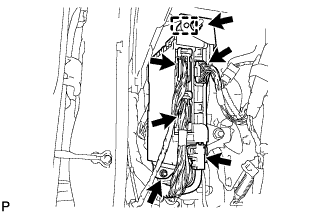
Disconnect the connectors on the front side.
-
Remove the 2 nuts.
-
Disconnect the connectors on the back side, and then remove the instrument panel junction block.
-
Remove the nut and bracket.
-
-
REMOVE INSTRUMENT PANEL JUNCTION BLOCK ASSEMBLY (for RHD)
-
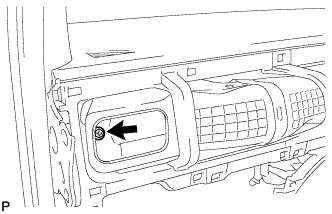
Remove the heater to register duct installing screw.
-
Disconnect the connectors on the front side.
-
Remove the 2 nuts and disengage the guide.
-
Disconnect the connectors on the back side and, then remove the instrument panel junction block.
-
-
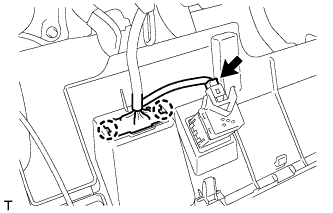
REMOVE MAIN BODY ECU
-
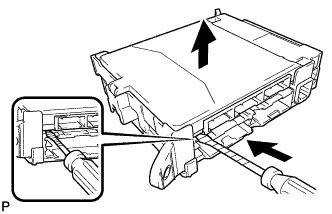
Release the lock on the junction block side.
-
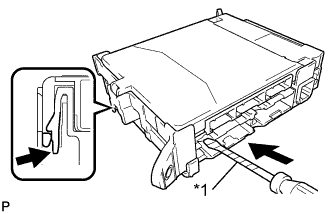
While pressing the lock on the junction block side, insert a screwdriver with its tip wrapped in protective tape between the main body ECU and the junction block.
Text in illustration *1 Protective tape Note
Use a blade screwdriver with a diameter of 5.0 to 6.3 mm (0.197 to 0.248 in.), and with a length of 90 mm or more.
-
Do not pry the inserted screwdriver. Lift up the main body ECU to the point where the lock releases.
-
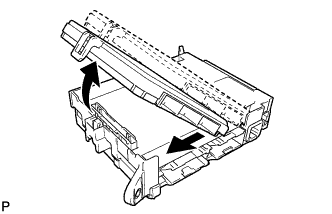
Remove the main body ECU by pulling it out from the junction block.
-