GENERATOR INSTALLATION

-
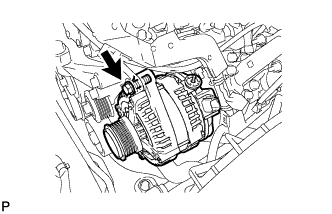
INSTALL GENERATOR ASSEMBLY
-
Provisionally install the generator with the bolt.
-
Using a "TORX" socket wrench (E10), install the stud bolt.
- Torque:
- 21 N*m { 214 kgf*cm, 16 ft.*lbf }
-
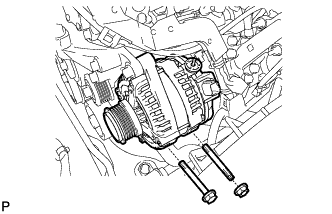
Install the bolt and nut.
- Torque:
- 54 N*m { 551 kgf*cm, 40 ft.*lbf }
-
Tighten the bolt.
- Torque:
- 21 N*m { 214 kgf*cm, 16 ft.*lbf }
-
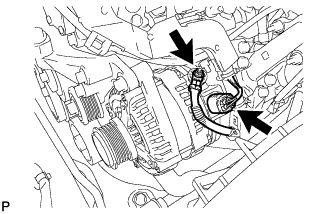
Install the terminal B with the nut.
- Torque:
- 9.8 N*m { 100 kgf*cm, 87 in.*lbf }
-
Connect the connector.
-
Install the terminal cap.
-
-
INSTALL AIR CLEANER CASE SUB-ASSEMBLY
-
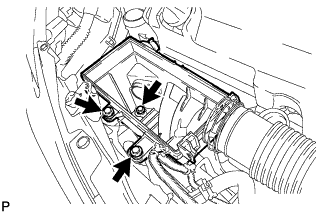
Install the air cleaner case with the 3 bolts.
- Torque:
- 7.5 N*m { 76 kgf*cm, 66 in.*lbf }
-
-
INSTALL AIR CLEANER FILTER ELEMENT SUB-ASSEMBLY
-
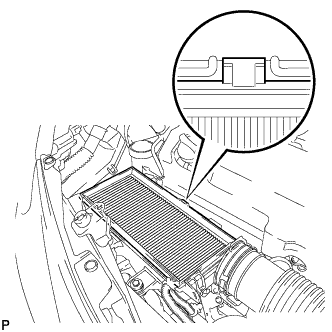
Install the air cleaner filter element.
Note
Engage the air cleaner filter element protrusion with the air cleaner case groove.
-
-
INSTALL AIR CLEANER CAP SUB-ASSEMBLY
-
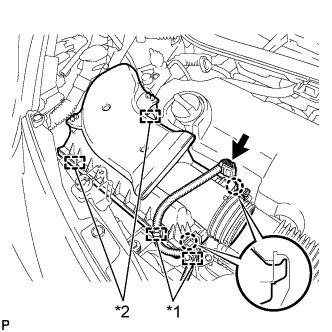
Engage the 2 claws and 2 clamps and install the air cleaner cap.
-
Connect the connector and 2 wire harness clamps.
Text in Illustration *1 Wire harness clamp *2 Clamp -
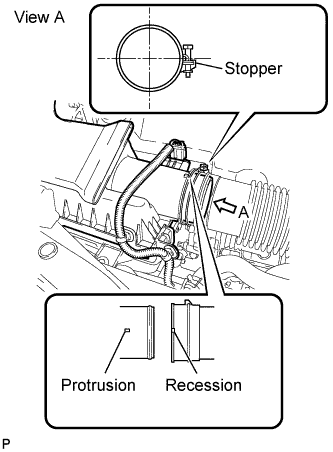
Connect the air cleaner hose to the air cleaner cap.
Tech Tips
-
The clamp should contact the air cleaner hose stopper.
-
Make sure that the air cleaner hose recession is securely engaged with the air cleaner cap protrusion.
-
-
-
INSTALL FAN & GENERATOR V BELT
-
Install the fan and generator V belt Click here.
-
-
CONNECT CABLE TO NEGATIVE BATTERY TERMINAL
- Torque:
- 5.4 N*m { 55 kgf*cm, 48 in.*lbf }