RADIO ANTENNA CORD INSTALLATION

-
INSTALL ANTENNA CORD SUB-ASSEMBLY
Note
-
Apply the tape securely in place.
-
Do not touch the adhesive surface when applying the tape to prevent adhesion failure.
-
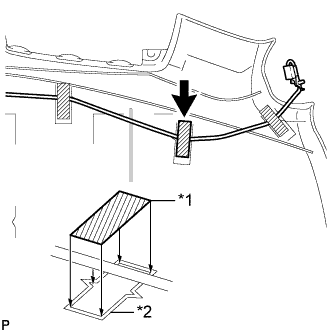
Align the marking tapes on the antenna cord with the markings on the roof headlining.
-
Install the antenna cord onto the roof headlining with 2 new pieces of tape.
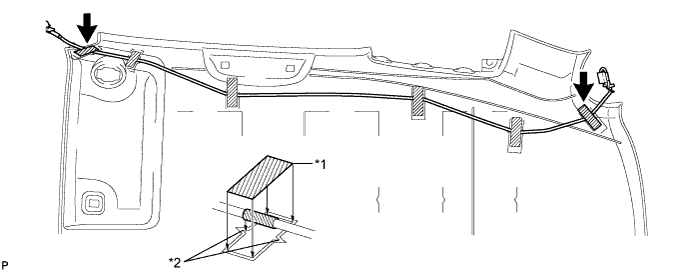
Text in Illustration: *1 Tape *2 Marking -
Align the antenna cord with the markings on the roof headlining with 3 new pieces of tape.
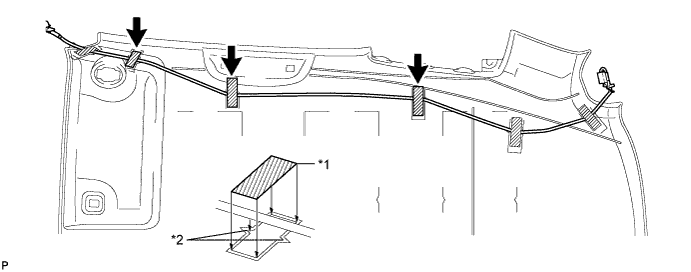
Text in Illustration *1 Tape *2 Marking -
Text in Illustration *1 Tape *2 Marking Install the rest of antenna cord onto the roof headlining with a new piece of tape.
-
-
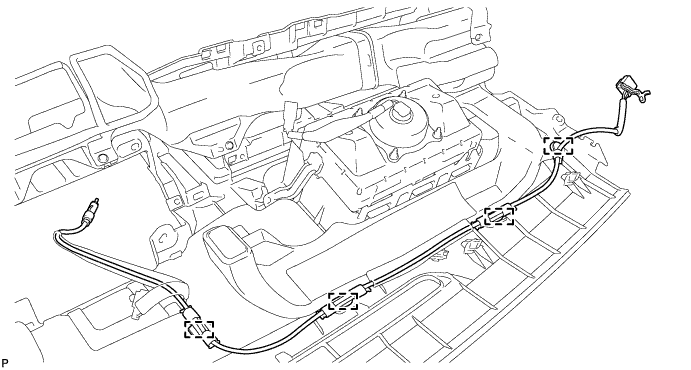
INSTALL NO. 2 ANTENNA CORD SUB-ASSEMBLY
-
Engage the 4 clamps and install the No. 2 antenna cord.
-
-
INSTALL ROOF HEADLINING
-
INSTALL INSTRUMENT PANEL SUB-ASSEMBLY
-
CONNECT CABLE TO NEGATIVE BATTERY TERMINAL
- Torque:
- 5.4 N*m { 55 kgf*cm, 48 in.*lbf }
-
INSPECT SRS WARNING LIGHT