QUARTER TRIM SPEAKER REMOVAL

Tech Tips
The procedure listed below is for the LH side. Use the same procedure for both the RH and LH sides, unless otherwise specified.
-
DISCONNECT CABLE FROM NEGATIVE BATTERY TERMINAL
-
REMOVE REAR SEAT ASSEMBLY
-
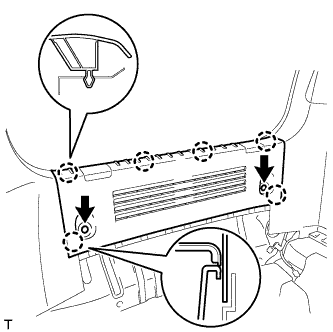
REMOVE REAR FLOOR BOARD SUB-ASSEMBLY (w/o Rear Seat)
-
Remove the 6 bolts and rear floor board.
-
-
REMOVE FRONT DOOR SCUFF PLATE RH

-
Disengage the 9 claws and remove the front door scuff plate.
-
-
SEPARATE FRONT DOOR OPENING TRIM WEATHERSTRIP RH
-
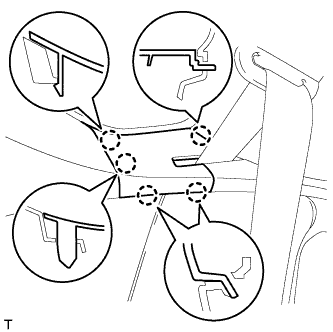
REMOVE REAR DECK TRIM COVER
-
Remove the 2 clips.
-
Disengage the 6 claws and remove the rear deck trim cover.
-
-
REMOVE DECK TRIM SIDE BELT HOLE COVER RH
-
Disengage the 5 claws and remove the deck trim side belt hole cover.
-
-
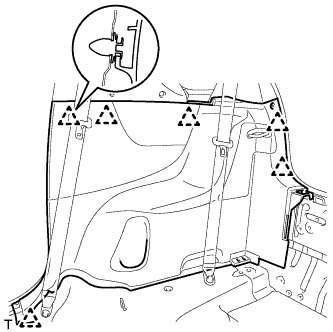
REMOVE SIDE NO. 1 TRIM ASSEMBLY RH
-
Disengage the 6 clips and remove the side No. 1 trim.
-
-
SEPARATE FRONT SEAT OUTER BELT ASSEMBLY RH
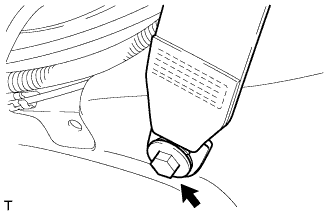
-
Remove the bolt and the front seat outer belt.
-
-
REMOVE CENTER PILLAR UPPER GARNISH RH
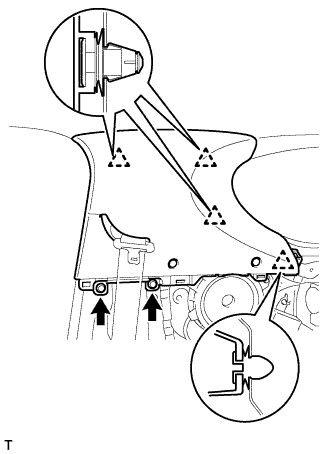
-
Remove the 2 clips.
-
Disengage the 4 clips and remove the center pillar upper garnish.
-
Remove the 3 clip caps from the body side.
-
-
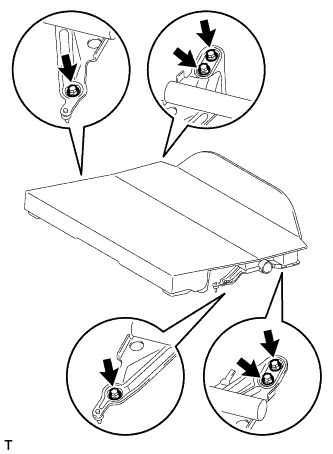
REMOVE REAR SPEAKER ASSEMBLY
-
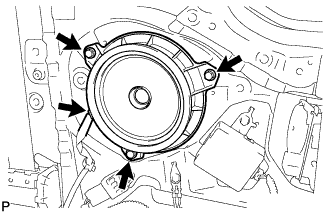
Disconnect the connector.
-
Remove the 3 bolts and the rear speaker.
-