FRONT DOOR SPEAKER INSTALLATION

Tech Tips
The procedure described below is for the RH side. Use the same procedure for both the RH and LH sides, unless otherwise specified.
-
INSTALL FRONT NO. 1 SPEAKER ASSEMBLY
-

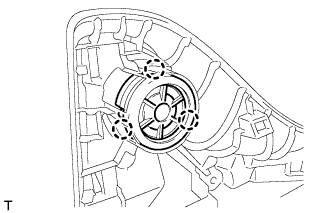
Using an air riveter or hand riveter, install the front No. 1 speaker with 3 new strike rivets.
Tech Tips
Install the new strike rivets in the order shown in the illustration.
Note
-
Do not pry the rivet with the riveter, as this will cause damage to the riveter and mandrel.
-
Confirm that the rivets are seated properly against the speaker.
-
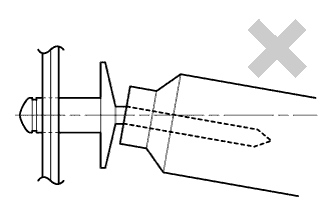
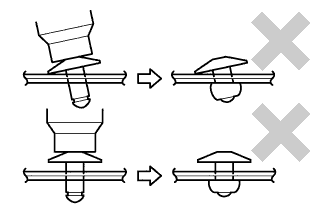
Do not tilt the riveter when installing the rivet into the speaker.
-
Do not leave any space between the rivet head and speaker.
-
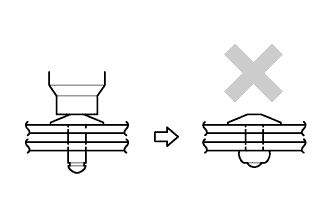
Do not leave any space between the speaker and door. Firmly hold together the 2 items while installing the rivet.
-
-
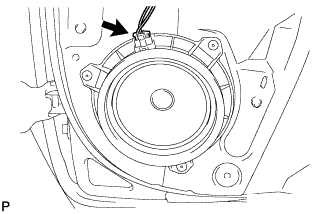
Connect the connector.
-
-
INSTALL FRONT NO. 2 SPEAKER ASSEMBLY
-
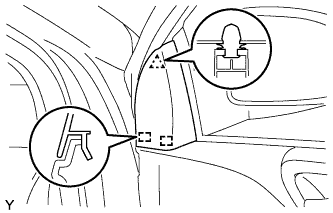
Engage the 3 claws and install the front No. 2 speaker.
-
-
INSTALL FRONT DOOR TRIM BOARD SUB-ASSEMBLY
-

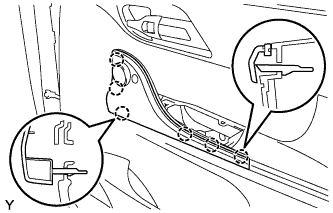
Connect the front door lock remote control cable and the front door inside locking cable.
-

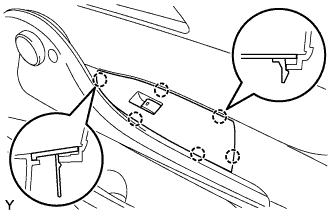
Engage the 6 claws and 10 clips and install the front door trim board.
-
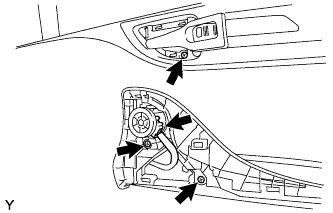
Tighten the 3 screws.
-
Connect the connector.
-
-
INSTALL DOOR ASSIST GRIP COVER
-
Engage the 6 claws and install the door assist grip cover.
-
-
INSTALL FRONT DOOR INSIDE HANDLE BEZEL
-

Engage the 4 claws and install the front door inside handle bezel.
-
-
INSTALL FRONT ARMREST BASE UPPER PANEL
-
Connect the connector.
-
Engage the 6 claws and install the front armrest base upper panel.
-
-
INSTALL FRONT DOOR LOWER FRAME BRACKET GARNISH
-
Engage the 2 guides and the clip and install the front door lower frame bracket garnish.
-