PARKING BRAKE CABLE (for Rear Drum Brake) REMOVAL

-
REMOVE FRONT SEAT ASSEMBLY
-
Remove the front seat assembly Click here.
-
-
REMOVE REAR SEAT ASSEMBLY (w/ Rear Seat Assembly)
-
Remove the rear seat assembly Click here.
-
-
REMOVE REAR SEAT UNDER TRAY
-
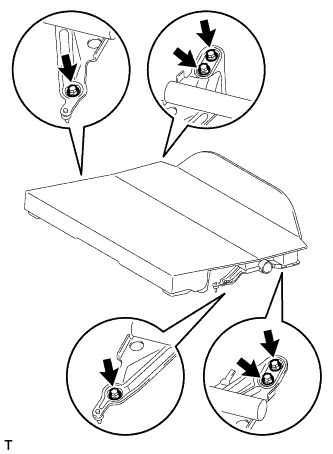
REMOVE REAR SEAT SUB FLOOR BOARD ASSEMBLY (w/o Rear Seat Assembly)
-
Remove the 6 bolts and rear floor board.
-
-
REMOVE LUGGAGE COMPARTMENT TRAY
-
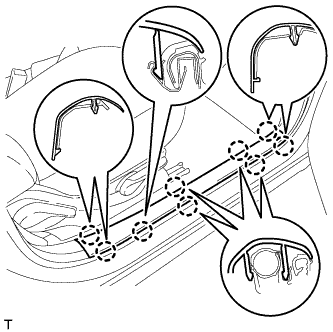
REMOVE FRONT DOOR SCUFF PLATE RH
-
Disengage the 9 claws and remove the front door scuff plate.
-
-
REMOVE FRONT DOOR SCUFF PLATE LH
Tech Tips
Use the same procedure as for the RH side.
-
SEPARATE FRONT DOOR OPENING TRIM WEATHERSTRIP RH
-
SEPARATE FRONT DOOR OPENING TRIM WEATHERSTRIP LH
-
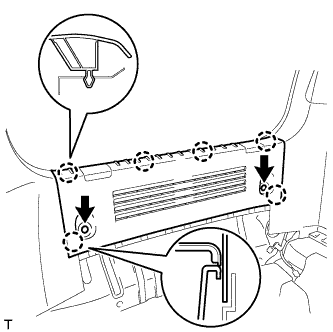
REMOVE REAR DECK TRIM COVER
-
Remove the 2 clips.
-
Disengage the 6 claws and remove the rear deck trim cover.
-
-
SEPARATE BACK DOOR WEATHERSTRIP
-
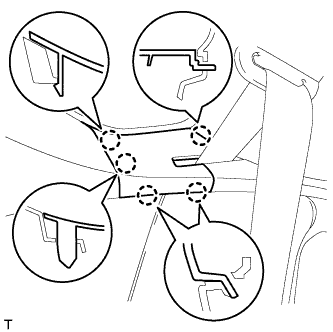
REMOVE DECK TRIM SIDE BELT HOLE COVER RH
-
Disengage the 5 claws and remove the deck trim side belt hole cover.
-
-
REMOVE DECK TRIM SIDE BELT HOLE COVER LH
Tech Tips
Use the same procedure as for the RH side.
-
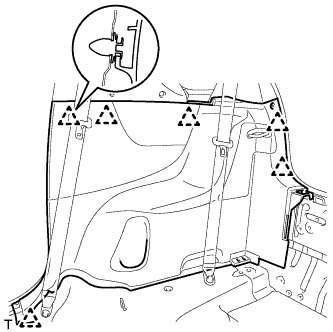
REMOVE SIDE NO. 1 TRIM ASSEMBLY RH
-
Disengage the 6 clips and remove the side No. 1 trim.
-
-
REMOVE SIDE NO. 1 TRIM ASSEMBLY LH
Tech Tips
Use the same procedure as for the RH side.
-
REMOVE SHIFT LEVER KNOB SUB-ASSEMBLY (for Manual Transaxle)
-
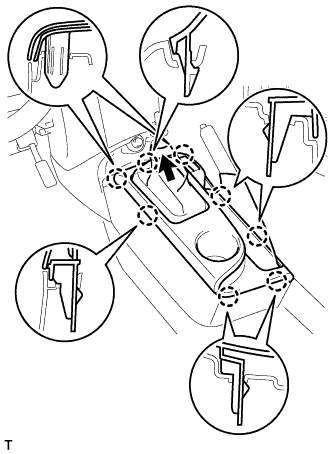
REMOVE CONSOLE UPPER PANEL SUB-ASSEMBLY (for Manual Transaxle)
-
Disengage the 8 claws and remove the console upper panel.
-
Separate the shifting hole cover.
-
-
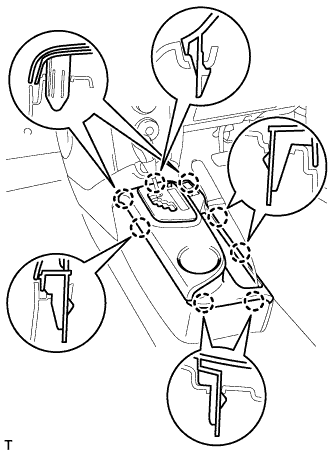
REMOVE CONSOLE UPPER PANEL SUB-ASSEMBLY (for CVT)
-
Disengage the 8 claws and remove the console upper panel.
-
-
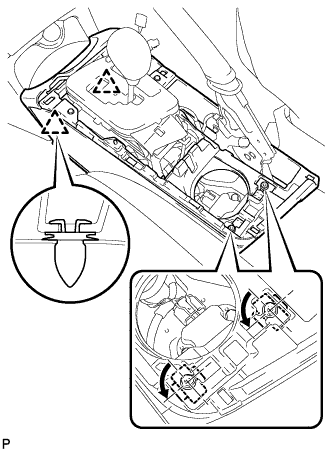
REMOVE REAR CONSOLE BOX ASSEMBLY
-
Rotate the 2 rear clips in the direction indicated by the arrows and remove them.
-
Disengage the 2 front clips and remove the rear console box assembly RR.
-
-
REMOVE PARKING BRAKE LEVER SUB-ASSEMBLY
-
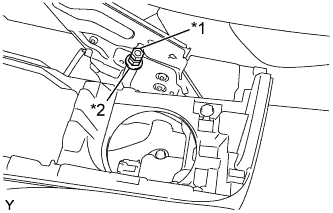
Text in Illustration *1 Lock Nut *2 Adjusting Nut Remove the lock nut and adjusting nut.
-
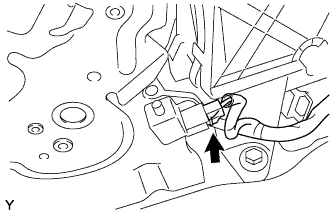
Disconnect the parking brake switch connector.
-
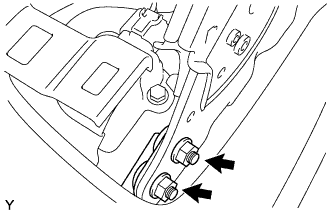
Remove the 2 nuts from the No. 1 parking brake cable assembly.
-
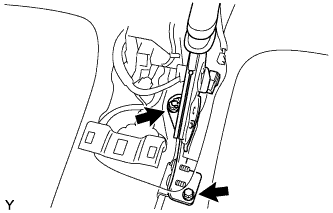
Remove the 2 bolts and parking brake lever sub-assembly.
-
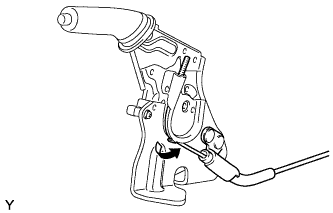
Pull up the parking brake lever claw and remove the No. 1 parking brake cable assembly.
-
-
REMOVE PARKING BRAKE CABLE COVER
-
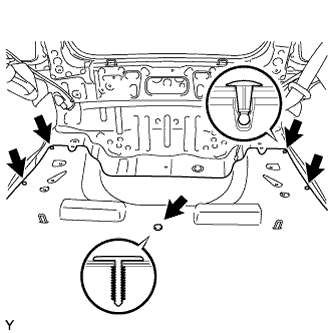
Remove the 5 clips from the floor carpet.
-
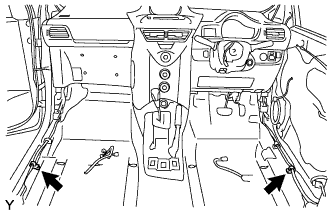
Disconnect the 2 hooks from the floor carpet and pull back the floor carpet to the place where the parking brake cable cover can be removed.
-
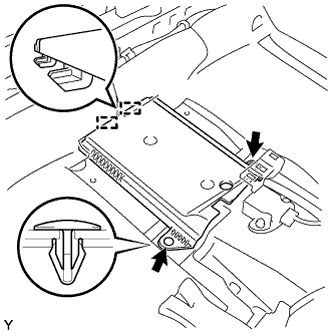
Remove the 2 clips.
-
Disengage the 2 guides and remove the parking brake cable cover.
-
-
REMOVE NO. 1 PARKING BRAKE CABLE ASSEMBLY
-
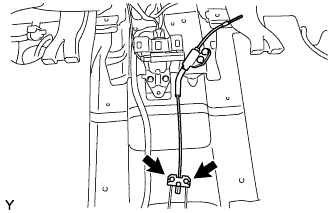
Disconnect the No. 2 and No. 3 parking brake cable assemblies from the No. 1 parking brake cable assembly.
-
-
REMOVE REAR WHEELS
-
REMOVE REAR BRAKE DRUM
-
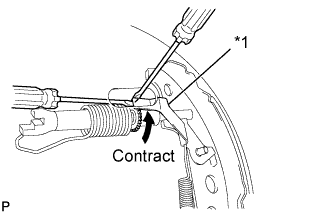
Text in Illustration *1 Automatic Adjust Lever Release the parking brake and remove the rear brake drum.
Tech Tips
If the rear brake drum cannot be removed easily, perform the following procedure.
-
Remove the shoe adjusting hole plug and insert a screwdriver through the hole into the backing plate, and hold the automatic adjust lever away from the adjuster.
-
Using another screwdriver, contract the brake shoe by turning the adjusting bolt.
-
-
-
REMOVE REAR BRAKE SHOE KIT
-
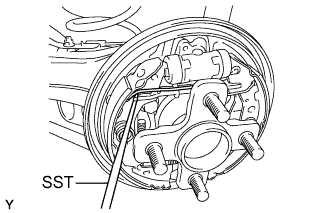
Using SST, separate the shoe return spring from the rear brake shoe.
- SST
- 09921-00010
Note
Do not damage the wheel cylinder boot.
-
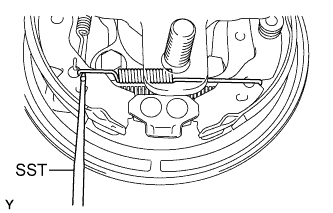
Remove the tension spring.
- SST
- 09921-00010
-
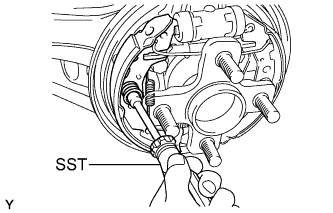
Using SST, remove the shoe hold down spring cup, shoe hold down spring, pin and rear brake shoe.
- SST
- 09718-00011
-
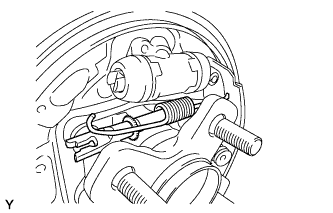
Remove the shoe return spring from the rear brake shoe and remove the rear brake shoe strut set.
-
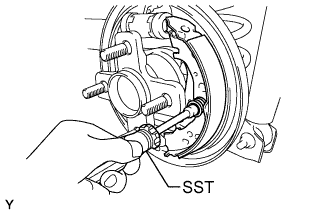
Using SST, remove the shoe hold down spring cup, shoe hold down spring, pin and rear brake shoe.
- SST
- 09718-00011
-
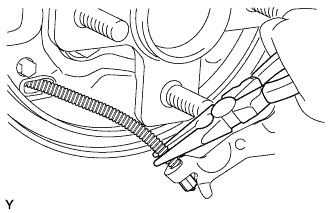
Using needle-nose pliers, separate the parking brake cable.
-
-
REMOVE NO. 2 PARKING BRAKE CABLE ASSEMBLY
-
Remove the 3 bolts.
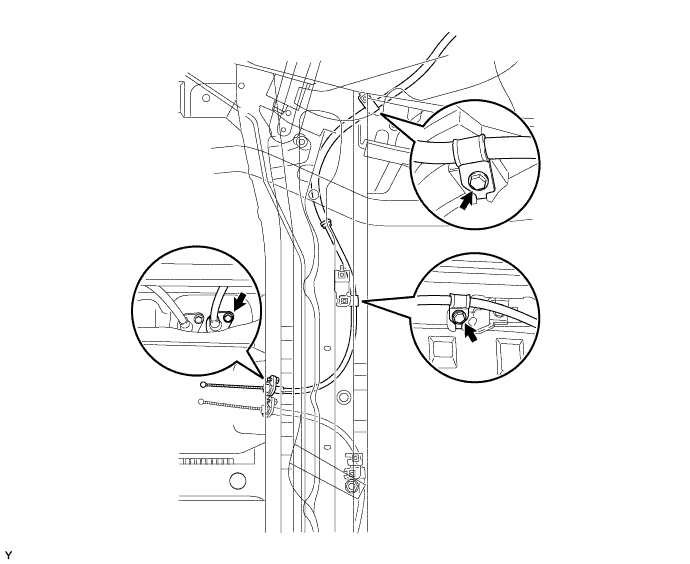
-
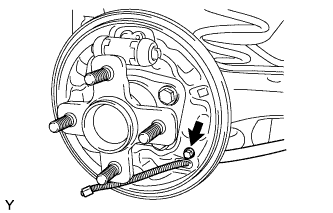
Remove the bolt and remove the No. 2 parking brake cable assembly from the backing plate.
-
-
REMOVE NO. 3 PARKING BRAKE CABLE ASSEMBLY
-
Remove the 3 bolts.
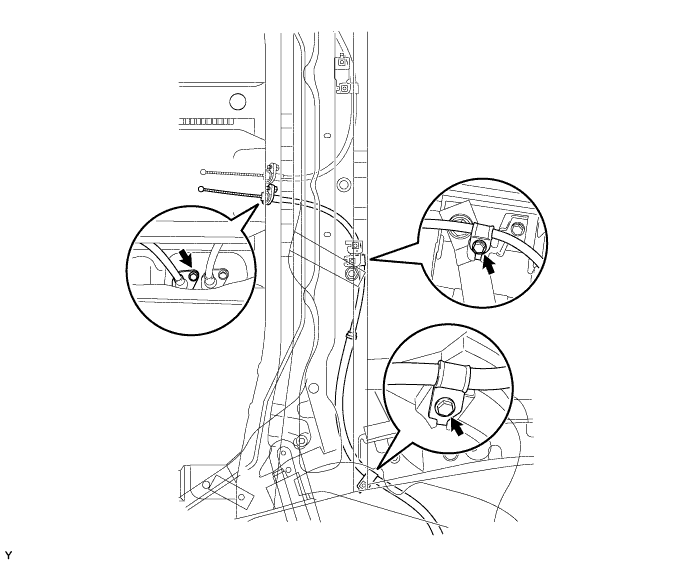
-
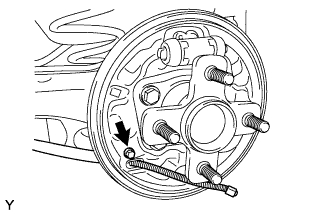
Remove the bolt and remove the No. 3 parking brake cable assembly from the backing plate.
-