REAR BRAKE (for Drum Type) REMOVAL

Tech Tips
-
Use the same procedure for the LH side and RH side.
-
The following procedure listed is for the LH side.
-
The rear wheel brake cylinder assemblies can be disassembled and inspected with the rear wheel brake cylinder assemblies installed to the backing plate. It is not necessary to remove the rear wheel brake cylinder assemblies from the backing plates except when the rear wheel brake cylinder assemblies should be replaced.
-
REMOVE REAR WHEEL
-
DRAIN BRAKE FLUID
Note
Immediately wash off any brake fluid that comes into contact with any painted surfaces.
-
REMOVE SHIFT LEVER KNOB SUB-ASSEMBLY (for Manual Transaxle)
-
REMOVE CONSOLE UPPER PANEL SUB-ASSEMBLY (for Manual Transaxle)
-
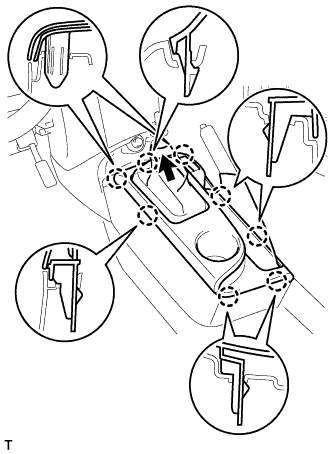
Disengage the 8 claws and remove the console upper panel.
-
Separate the shifting hole cover.
-
-
REMOVE CONSOLE UPPER PANEL SUB-ASSEMBLY (for CVT)
-
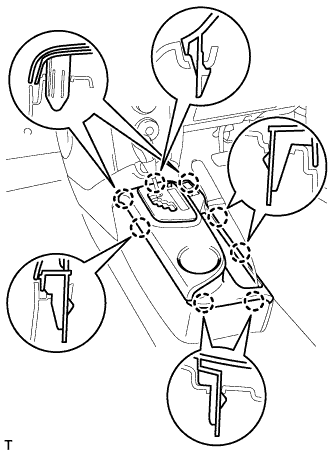
Disengage the 8 claws and remove the console upper panel.
-
-
LOOSEN ADJUSTING NUT
-
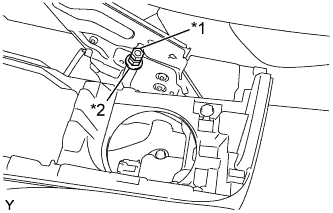
Text in Illustration *1 Lock Nut *2 Adjusting Nut Loosen the lock nut and adjusting nu to completely release the No. 1 parking brake cable assembly.
-
-
REMOVE REAR BRAKE DRUM
-
Text in Illustration *1 Automatic Adjust Lever Release the parking brake and remove the rear brake drum.
Tech Tips
If the rear brake drum cannot be removed easily, perform the following procedure.
-
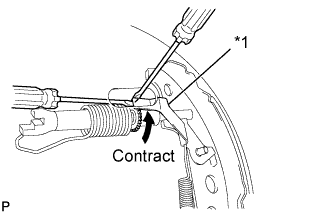
Remove the shoe adjusting hole plug and insert a screwdriver through the hole into the backing plate, and hold the automatic adjust lever away from the adjuster.
-
Using another screwdriver, contract the brake shoe by turning the adjusting bolt.
-
-