BRAKE ACTUATOR REMOVAL

-
DISCONNECT CABLE FROM NEGATIVE BATTERY TERMINAL
-
REMOVE BATTERY CLAMP SUB-ASSEMBLY (for 1ND-TV RHD)
-
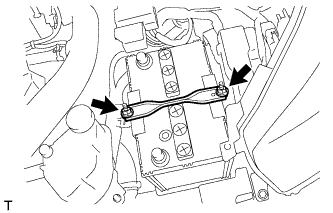
Remove the 2 nuts and the battery clamp.
-
-
REMOVE BATTERY (for 1ND-TV RHD)
-
REMOVE FUEL FILTER ASSEMBLY (for 1ND-TV RHD)
-
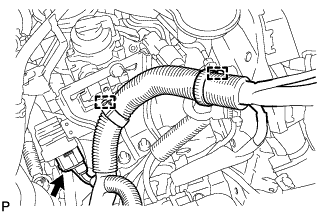
Disconnect the 2 wire harness clamps.
-
Disconnect the connector.
-
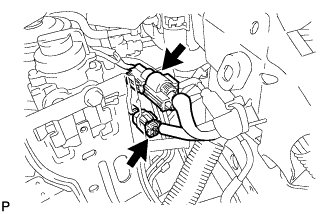
Disconnect the 2 connectors.
-

Disconnect the 2 fuel hose clamps from the fuel filter.
-
Disconnect the 2 fuel hoses.
-
Loosen the fuel filter drain plug to drain fuel.
-
Tighten the fuel filter drain plug.
-
Remove the 2 nuts and fuel filter.
-
-
DRAIN BRAKE FLUID
Note
If brake fluid leaks onto any painted surface, immediately clean it off completely.
-
REMOVE COWL PANEL SUB-ASSEMBLY
-
Remove the cowl panel sub-assembly Click here.
-
-
REMOVE HEATER ASSEMBLY (w/ Combustion Type Power Heater)
-
Remove the heater assembly Click here.
-
-
REMOVE NO. 2 HEATER BRACKET SUB-ASSEMBLY (w/ Combustion Type Power Heater)
-
Remove the bolt and the No. 2 heater bracket sub-assembly from the body.
-
-
REMOVE COWL VENTILATOR SPLASH SHIELD RH (for LHD)
-
Disengage the claw, guide and the cowl ventilator splash shield RH from the body.
-
-
REMOVE FRONT FENDER EXTENSION RH (for LHD)
-
Remove the 2 bolts, 3 nuts and the front fender extension RH from the body.
-
-
REMOVE BRAKE ACTUATOR WITH BRACKET (for LHD)
-
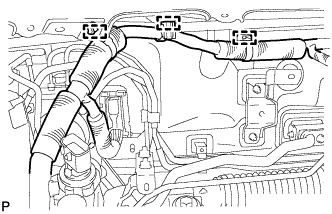
Disengage the 3 wire harness clamps from the body.
-
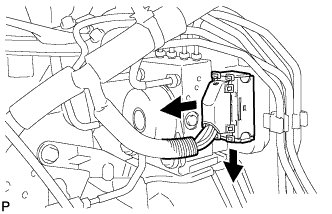
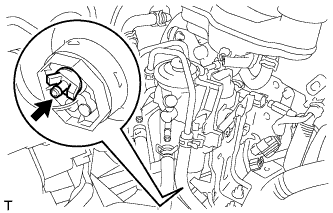
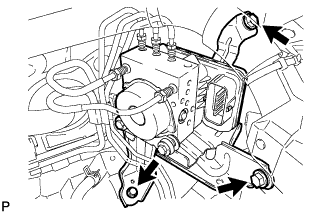
Release the lock lever and disconnect the brake actuator connector.
Note
Be careful not to allow brake fluid to enter the removed connector.
-
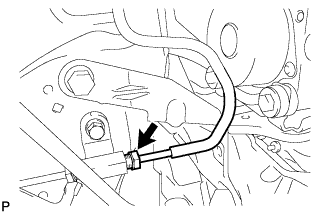
Using a union nut wrench (10 mm), disconnect the No. 3 brake tube from the brake tube way.
-
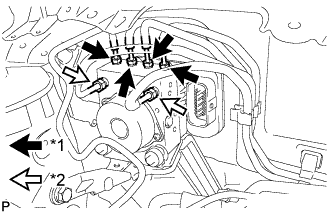
Text in Illustration *1 Flare Nut ( 10 mm) *2 Flare Nut ( 12 mm) Using a union nut wrench (10 mm and 12 mm), disconnect the 6 brake tubes from the actuator.
-
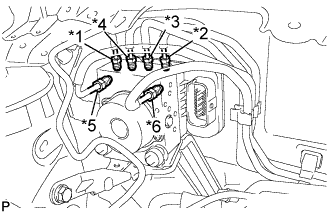
Text in Illustration *1 To Front Wheel Cylinder RH *2 To Front Wheel Cylinder LH *3 To Rear Wheel Cylinder RH *4 To Rear Wheel Cylinder LH *5 From 1st of Master Cylinder *6 From 2nd of Master Cylinder Use tags or make a memo to identify the places to reconnect.
-
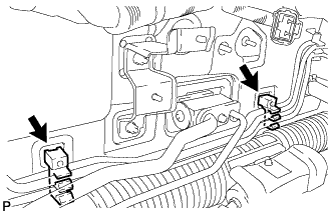
Disengage the 2 clamps and separate the brake tube assembly from the body.
-
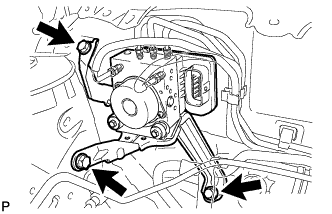
Remove the 3 bolts and the brake actuator with bracket from the body.
Note
-
Do not damage the brake tubes or wire harness.
-
Do not carry the brake actuator assembly by the connector.
-
-
-
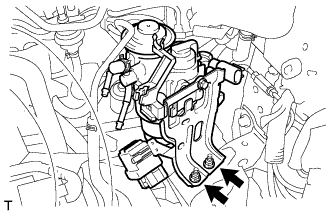
REMOVE BRAKE ACTUATOR WITH BRACKET (for RHD)
-
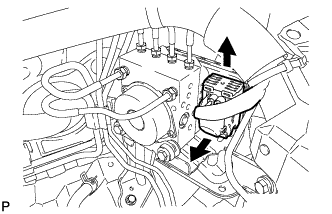
Release the lock lever and disconnect the brake actuator connector.
Note
Be careful not to allow brake fluid to enter the removed connector.
-
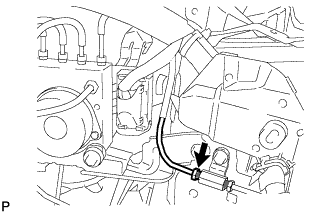
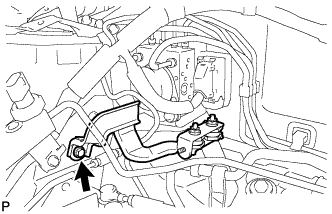
Using a union nut wrench (10 mm), disconnect the No. 5 brake tube from the brake tube way.
-

Text in Illustration *1 Flare Nut ( 10 mm) *2 Flare Nut ( 12 mm) Using a union nut wrench (10 mm and 12 mm), disconnect the 6 brake tubes from the actuator.
-
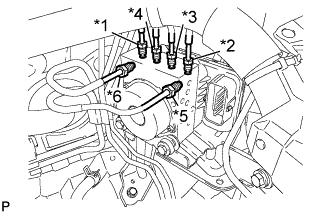
Text in Illustration *1 To Front Wheel Cylinder RH *2 To Front Wheel Cylinder LH *3 To Rear Wheel Cylinder RH *4 To Rear Wheel Cylinder LH *5 From 1st of Master Cylinder *6 From 2nd of Master Cylinder Use tags or make a memo to identify the places to reconnect.
-
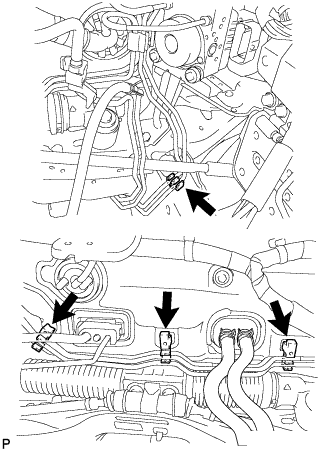
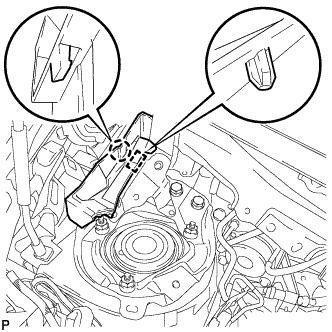
Disengage the 4 clamps and separate the brake tube assembly from the body.
-
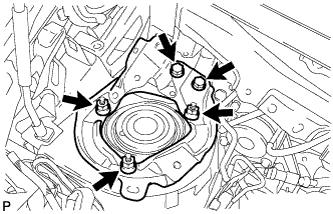
Remove the 3 bolts and the brake actuator with bracket from the body.
Note
-
Do not damage the brake tubes or wire harness.
-
Do not carry the brake actuator assembly by the connector.
-
-
-
REMOVE BRAKE ACTUATOR BRACKET ASSEMBLY (for LHD)
-
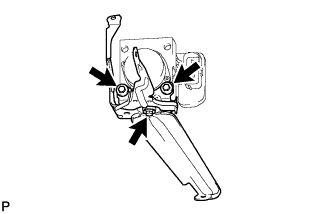
Remove the 3 bolts and brake actuator from the brake actuator bracket assembly.
-
-
REMOVE BRAKE ACTUATOR BRACKET ASSEMBLY (for RHD)
-
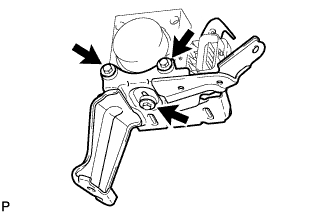
Remove the 3 bolts and brake actuator from the brake actuator bracket assembly.
-