REVOLUTION SENSOR (NOUT SENSOR) INSTALLATION
-
INSTALL TRANSMISSION REVOLUTION SENSOR (NOUT SENSOR)
-
Apply a light coat of Toyota Genuine CVT fluid FE to a new O-ring and install it to the transmission revolution sensor (NOUT).
Note
Do not twist the O-ring.
-
Install the transmission revolution sensor (NOUT) to the continuously variable transaxle assembly with a new bolt.
- Torque:
- 4.4 N*m { 45 kgf*cm, 39 in.*lbf }
Note
Make sure that the O-ring is not cracked or moved out of place when installing the transmission revolution sensor (NOUT).
-
Connect the transmission revolution sensor (NOUT) connector.
-
-
INSTALL AIR CLEANER FILTER ELEMENT SUB-ASSEMBLY
-
INSTALL AIR CLEANER AND HOSE
-
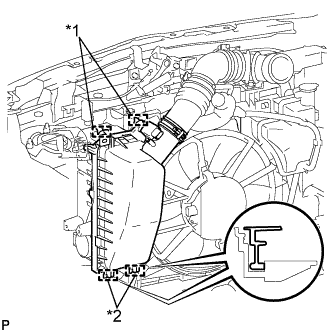
Text in Illustration *1 Clamp *2 Guide Align the 2 hinges with the guides on the case and engage them in the grooves.
-
Install the air cleaner and hose with the 2 clamps.
-
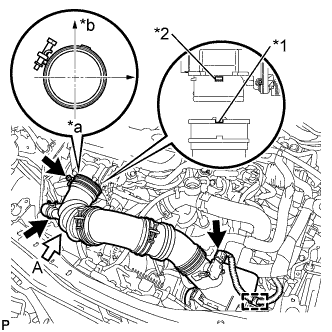
Text in Illustration *1 Recession *2 Protrusion *a View A *b Upper Side Connect the air cleaner hose with the hose clamp as shown in the illustration.
- Torque:
- 3.0 N*m { 31 kgf*cm, 27 in.*lbf }
Note
-
The clamp should contact the air cleaner hose stopper.
-
Perform the installation with the hose clip at the correct angle.
-
Connect the ventilation hose.
-
Install the mass air flow meter connector and the wire harness clamp.
-
-
INSPECT FOR CONTINUOUSLY VARIABLE TRANSAXLE FLUID LEAK
-
Clean the area and check for fluid leaks.
-