ENGINE STOP AND START ECU REMOVAL
-
READ NUMBER OF STARTER OPERATIONS
Tech Tips
If the engine stop and start ECU is being replaced, be sure to read and record the number of starter operations that is stored in the ECU before removing the ECU.
Register this number into the new engine stop and start ECU after replacement.
-
Connect the intelligent tester to the DLC3.
-
Turn the ignition switch to ON.
-
Turn the tester on.
-
Enter the following menus: Powertrain / Stop and Start / Data List / Starter Operation #.
-
Record the value displayed by the tester.
-
-
REMOVE FRONT DOOR SCUFF PLATE RH

-
Disengage the 9 claws and remove the front door scuff plate.
-
-
REMOVE COWL SIDE TRIM BOARD RH
-
Disengage the 2 claws and guide and remove the cowl side trim board.
-
-
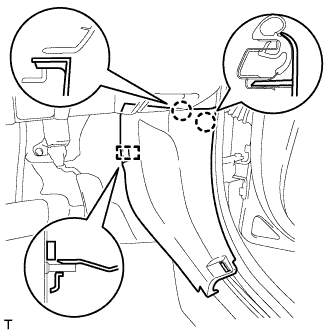
SEPARATE FRONT DOOR OPENING TRIM WEATHERSTRIP RH
-
REMOVE LOWER NO. 2 INSTRUMENT PANEL FINISH PANEL (for LHD)
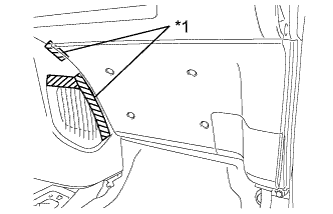
Text in Illustration *1 Protective Tape
-
Apply protective tape, as shown in the illustration.
-
Remove the <C> bolt.
-
Disengage the 4 claws and 2 clips and remove the lower No. 2 instrument panel finish panel.
-
-
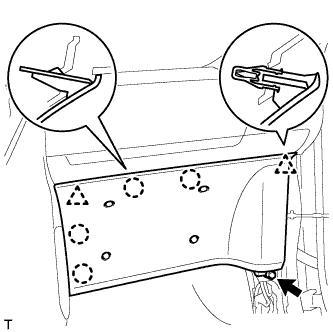
REMOVE LOWER NO. 1 INSTRUMENT PANEL FINISH PANEL (for RHD)
-
Remove the 2 <C> bolts.
-
Disengage the 2 claws and the 8 clips and separate the lower No. 1 instrument panel finish panel.
-
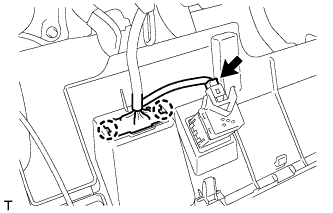
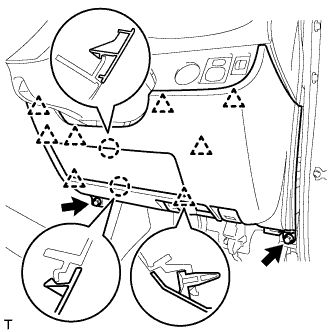
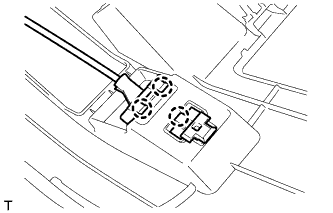
Disconnect the connector.
-
Disengage the 2 claws and disconnect the DLC3 connector.
-
Disengage the 3 claws and disconnect the hood lock control lever.
-
-
REMOVE ENGINE STOP AND START ECU
-
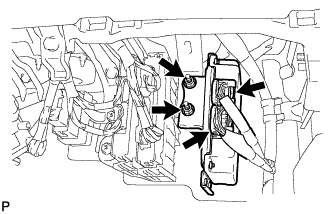
Disconnect the 2 connectors.
-
Remove the 2 nuts and the engine stop and start ECU.
-