THERMOSTAT REMOVAL

-
DRAIN ENGINE COOLANT
CAUTION:
To avoid the danger of being burned, do not remove the water filler cap sub-assembly while the engine and radiator assembly are still hot. Thermal expansion will cause hot engine coolant and steam to blow out from the radiator assembly.
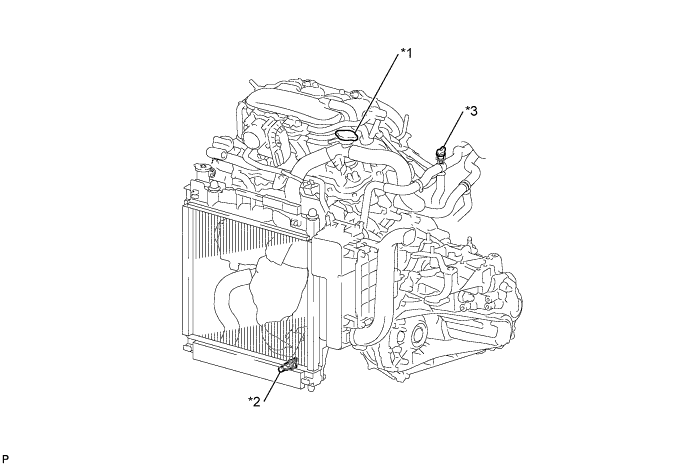
Text in Illustration *1 Water Filler Cap Sub-assembly *2 Radiator Drain Cock Plug *3 Air Bleed Valve - -
-
Loosen the radiator drain cock plug.
Tech Tips
Collect the coolant in a container and dispose of it according to the regulations in your area.
-
Remove the water filler cap sub-assembly.
-
-
REMOVE GENERATOR ASSEMBLY (for 80A Type)
-
REMOVE GENERATOR ASSEMBLY (for 100A Type)
-
REMOVE BEARING BRACKET HEAT INSULATOR
-
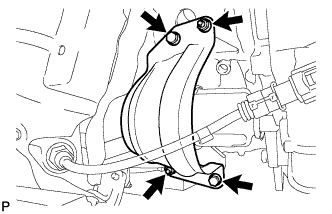
Remove the 2 bolts, 2 nuts and bearing bracket heat insulator.
-
-
DISCONNECT NO. 1 WATER BY-PASS PIPE
-
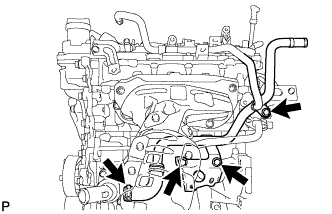
Remove the 3 bolts and then disconnect the No. 1 water by-pass pipe.
-
-
DISCONNECT NO. 2 RADIATOR HOSE
-
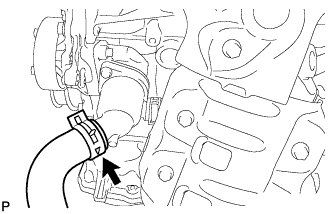
Disconnect the No. 2 radiator hose from the water inlet.
-
-
REMOVE WATER INLET
-
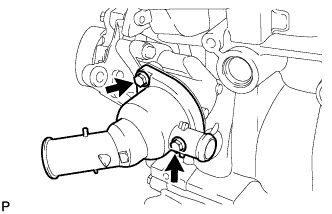
Remove the 2 bolts and the water inlet.
-
-
REMOVE NO. 2 WATER INLET HOUSING GASKET
-
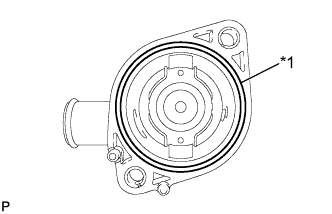
Text in Illustration *1 No. 2 Water Inlet Housing Gasket Remove the No. 2 water inlet housing gasket from the water inlet.
-
-
REMOVE THERMOSTAT
-
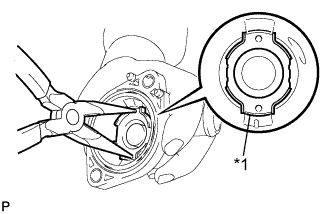
Text in Illustration *1 Frame Remove the frame from the water inlet.
Tech Tips
Using needle nose pliers, push down on the frame to compress the spring. While the spring is compressed, turn the frame to remove it from the water inlet.
-
Remove the spring and element.
-