WATER PUMP REMOVAL

-
REMOVE ENGINE UNDER COVER
-
DRAIN ENGINE COOLANT
CAUTION:
To avoid the danger of being burned, do not remove the reserve tank cap sub-assembly while the engine and reserve tank assembly are still hot. Thermal expansion will cause hot engine coolant and steam to blow out from the radiator assembly.
-
Loosen the radiator drain cock plug.
Tech Tips
Collect the coolant in a container and dispose of it according to the regulations in your area.
-
Remove the reserve tank cap.
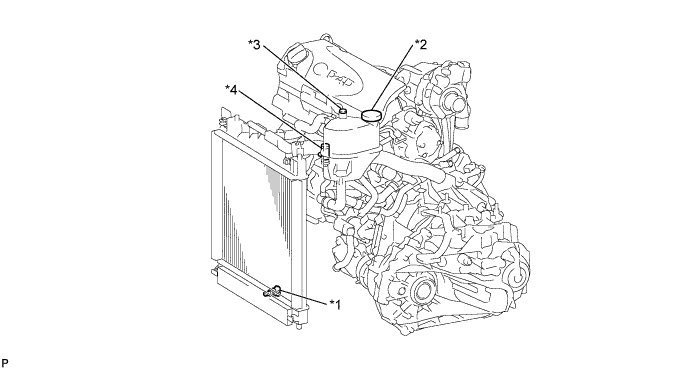
Text in Illustration *1 Radiator Drain Cock Plug *3 Air Bleed Valve 1 *2 Reserve Tank Cap Sub-assembly *4 Air Bleed Valve 2
-
-
REMOVE AIR CLEANER CAP SUB-ASSEMBLY
-
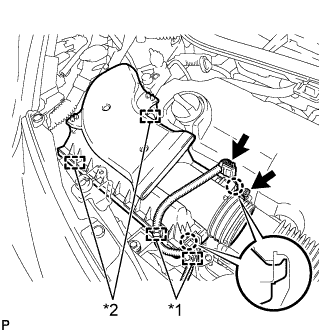
Text in Illustration *1 Wire harness clamp *2 Clamp Disconnect the connector and 2 wire harness clamps.
-
Loosen the hose clamp and separate the air cleaner hose.
-
Disengage the 2 clamps and 2 claws and remove the air cleaner cap.
-
-
REMOVE AIR CLEANER FILTER ELEMENT SUB-ASSEMBLY
-
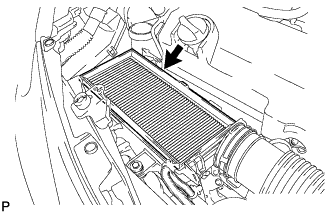
Remove the air cleaner filter element.
-
-
REMOVE AIR CLEANER CASE SUB-ASSEMBLY
-
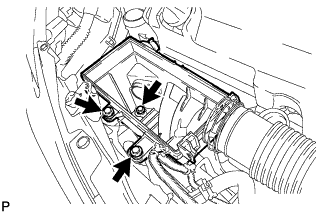
Remove the 3 bolts and the air cleaner case.
-
-
REMOVE FAN & GENERATOR V BELT
-
Remove the fan and generator V belt Click here.
-
-
REMOVE IDLER PULLEY SUB-ASSEMBLY
-
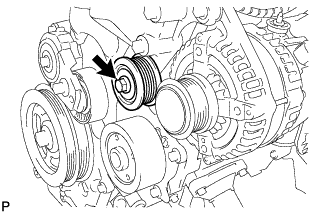
Remove the bolt and the idler pulley.
-
-
REMOVE WATER PUMP ASSEMBLY
-
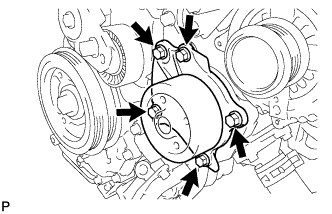
Remove the 5 bolts and the water pump.
-
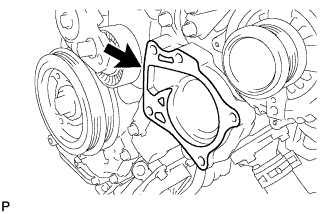
Remove the gasket from the timing chain cover.
-