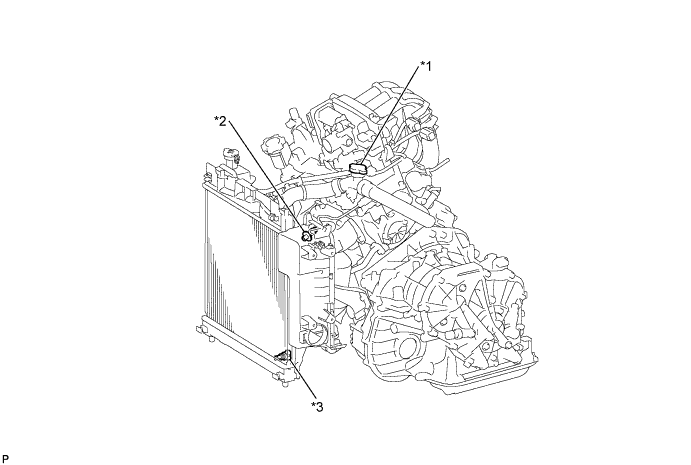
RADIATOR REMOVAL

-
DRAIN ENGINE COOLANT (w/ Water Inlet Drain Cock Plug)
Text in Illustration *1 Water Filler Cap Sub-assembly *3 Radiator Drain Cock Plug *2 Water Inlet Drain Cock Plug - - CAUTION:
To avoid the danger of being burned, do not remove the water filler cap sub-assembly while the engine and assembly are still hot. Thermal expansion will cause hot engine coolant and steam to blow out from the radiator assembly.
-
Loosen the radiator drain cock plug.
Tech Tips
Collect the coolant in a container and dispose of it according to the regulations in your area.
-
Remove the water filler cap sub-assembly.
-
Text in Illustration *1 Hose *2 Water Inlet Clip Connect the hose to the water inlet drain cock plug.
-
Remove the water inlet clip.
-
Pull out the water inlet drain cock plug.
-
-
DRAIN ENGINE COOLANT (w/o Water Inlet Drain Cock Plug)

Text in Illustration *1 Water Filler Cap Sub-assembly *2 Radiator Drain Cock Plug CAUTION:
To avoid the danger of being burned, do not remove the water filler cap sub-assembly while the engine and assembly are still hot. Thermal expansion will cause hot engine coolant and steam to blow out from the radiator assembly.
-
Loosen the radiator drain cock plug.
Tech Tips
Collect the coolant in a container and dispose of it according to the regulations in your area.
-
Remove the water filler cap sub-assembly.
-
-
REMOVE FRONT BUMPER ASSEMBLY
-
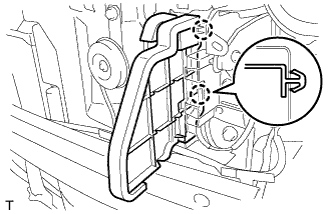
REMOVE UPPER RADIATOR SUPPORT ABSORBER
-
Disengage the 7 claws and remove the radiator support absorber.
-
-
REMOVE FRONT BUMPER ENERGY ABSORBER
-
Remove the front bumper energy absorber.
-
-
REMOVE NO. 2 RADIATOR SIDE AIR SEAL
-
Disengage the 2 claws and remove the radiator side air seal.
-
-
REMOVE NO. 1 RADIATOR SIDE AIR SEAL
Tech Tips
Use the same procedure as for the No. 1 side.
-
REMOVE RADIATOR SUPPORT EXTENSION LH

-
Disengage the 2 claws and remove the radiator support extension.
-
-
REMOVE RADIATOR SUPPORT EXTENSION RH
Tech Tips
Use the same procedure as for the LH side.
-
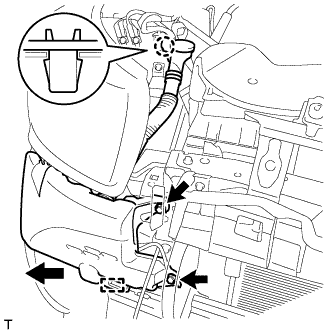
REMOVE WINDSHIELD WASHER JAR ASSEMBLY
-
Remove the 2 bolts.
-
Disengage the claw.
-
Disengage the guide and remove the windshield washer jar.
-
Disconnect the washer hose.
-
Disconnect the connectors.
-
-
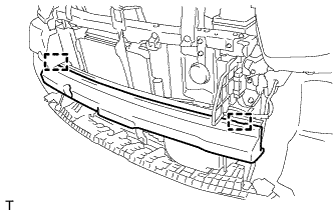
REMOVE FRONT BUMPER REINFORCEMENT SUB-ASSEMBLY
-
Disengage the 5 clamps and disconnect the wire harness.
-
Remove the 8 bolts.
-
Disengage the 2 guides and remove the front bumper reinforcement.
-
-
REMOVE AIR CLEANER CAP SUB-ASSEMBLY
-

Text in Illustration *1 Clamp *2 Guide Loosen the hose clamp and disconnect the air cleaner hose.
-
Disengage the 2 clamps and 2 guides and remove the air cleaner cap.
-
-
REMOVE AIR CLEANER FILTER ELEMENT SUB-ASSEMBLY
-
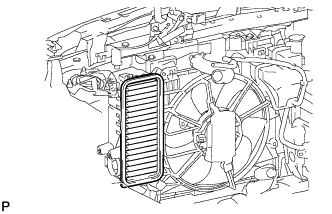
Remove the air cleaner filter element.
-
-
DISCONNECT RADIATOR RESERVOIR TANK HOSE
-
Disengage the hose clamp.
-
Loosen the clamp and disconnect the reserve tank hose from reserve tank.
-
-
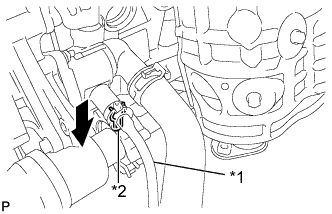
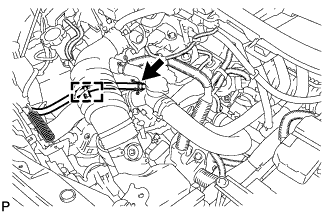
DISCONNECT NO. 3 RADIATOR HOSE
-
Loosen the clamp and disconnect the radiator hose from the radiator assembly.
-
-
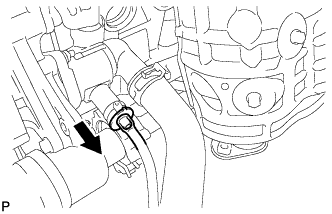
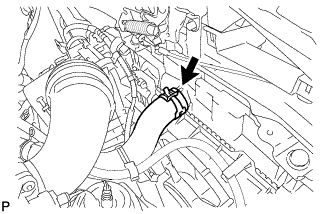
DISCONNECT NO. 2 RADIATOR HOSE
-
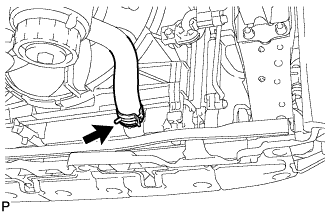
Loosen the clamp and disconnect the radiator hose from the radiator assembly.
-
-
REMOVE HIGH PITCHED HORN ASSEMBLY
-
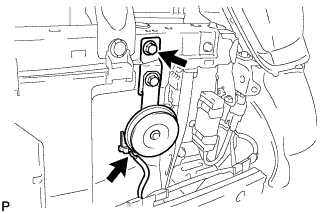
Disconnect the horn connector.
-
Remove the bolt and the horn.
-
-
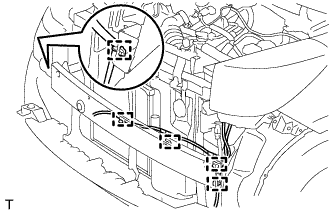
REMOVE RADIATOR LOWER NO. 1 AIR DEFLECTOR
-
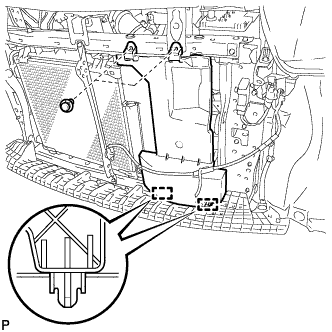
Remove the 2 clips.
-
Remove the 2 guides and radiator air deflector.
-
-
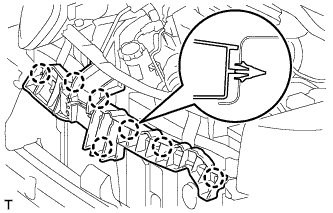
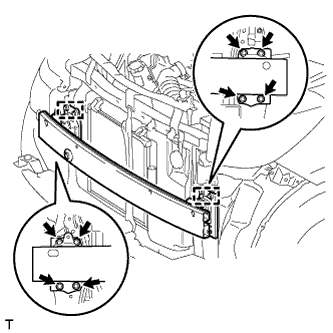
REMOVE UPPER RADIATOR SUPPORT SUB-ASSEMBLY
-
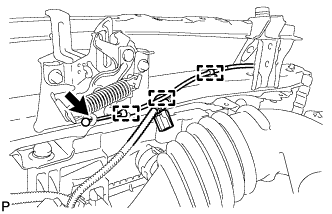
Disengage the wire harness clamp.
-
Disengage the 2 clamps and separate the hood lock cable.
-
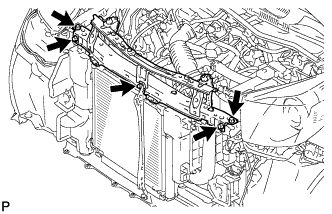
Remove the 5 bolts and the upper radiator support.
-
-
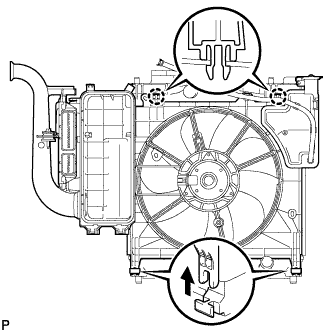
REMOVE RADIATOR ASSEMBLY
-
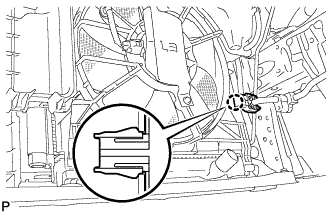
Disengage the claw and remove the piping clamp.
-
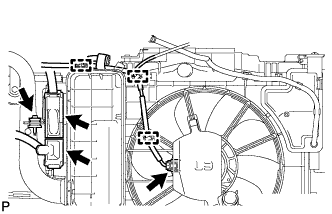
Disengage the 3 harness clamps and disconnect the 3 connectors.
-
Remove the bolt from the ECM.
-
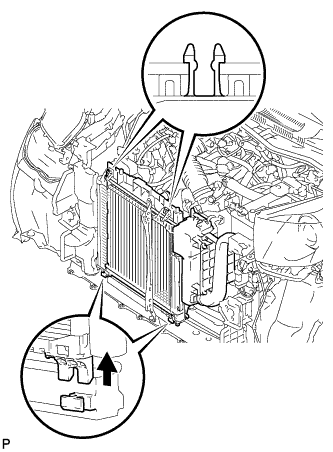
Disengage the 2 claws on the condenser and remove the radiator assembly together with the fan shroud from the vehicle.
Note
Do not apply any excessive force to the cooler condenser assembly or piping when removing the radiator assembly.
-
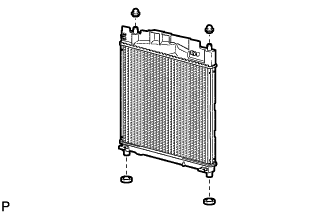
Remove the 2 cushions and 2 grommets.
-
Disengage the 2 claws and remove the radiator assembly from the fan shroud.
-
-
REMOVE RADIATOR DRAIN COCK PLUG
-
Remove the radiator drain cock plug from the radiator.
-
-
REMOVE NO. 1 RADIATOR TO SUPPORT SEAL
-
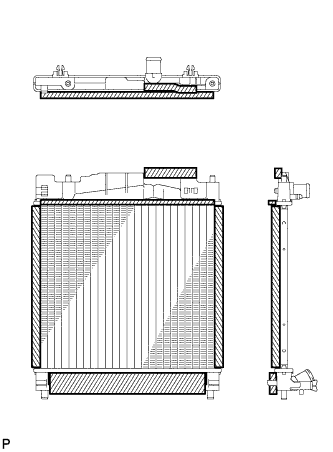
Remove the 5 support seals from the radiator.
Note
Remove any tape remaining on the radiator.
-