COOLING FAN MOTOR REMOVAL

-
DRAIN ENGINE COOLANT
CAUTION:
To avoid the danger of being burned, do not remove the water filler cap sub-assembly while the engine and radiator assembly are still hot. Thermal expansion will cause hot engine coolant and steam to blow out from the radiator assembly.
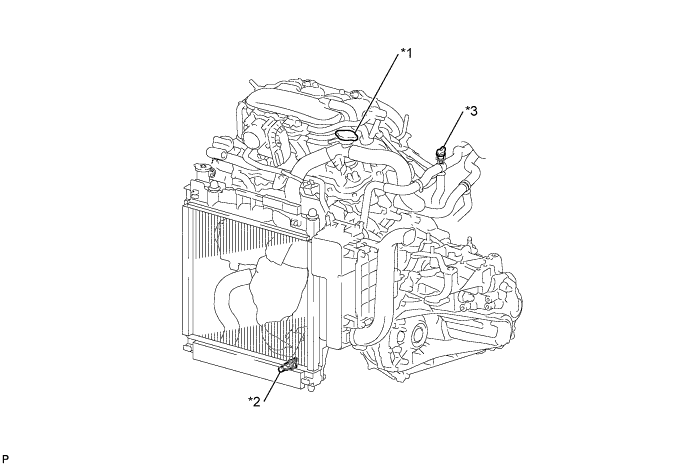
Text in Illustration *1 Water Filler Cap Sub-assembly *2 Radiator Drain Cock Plug *3 Air Bleed Valve - -
-
Loosen the radiator drain cock plug.
Tech Tips
Collect the coolant in a container and dispose of it according to the regulations in your area.
-
Remove the water filler cap sub-assembly.
-
-
REMOVE FRONT BUMPER ASSEMBLY
-
Remove the front bumper assembly Click here.
-
-
REMOVE UPPER RADIATOR SUPPORT ABSORBER
-
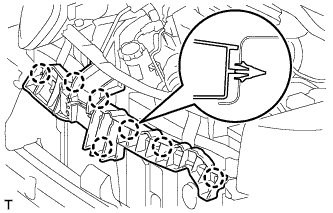
Disengage the 7 claws and remove the radiator support absorber.
-
-
REMOVE FRONT BUMPER ENERGY ABSORBER
-
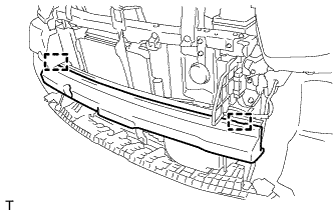
Remove the front bumper energy absorber.
-
-
REMOVE NO. 2 RADIATOR SIDE AIR SEAL
-
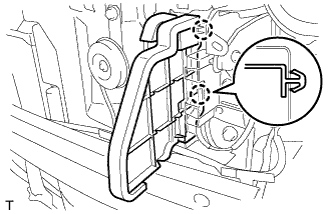
Disengage the 2 claws and remove the radiator side air seal.
-
-
REMOVE NO. 1 RADIATOR SIDE AIR SEAL
Tech Tips
Use the same procedure as for the No. 1 side.
-
REMOVE RADIATOR SUPPORT EXTENSION LH

-
Disengage the 2 claws and remove the radiator support extension.
-
-
REMOVE RADIATOR SUPPORT EXTENSION RH
Tech Tips
Use the same procedure as for the LH side.
-
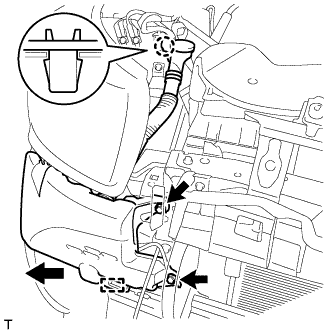
REMOVE WINDSHIELD WASHER JAR ASSEMBLY
-
Remove the 2 bolts.
-
Disengage the claw.
-
Disengage the guide and remove the windshield washer jar.
-
Disconnect the washer hose.
-
Disconnect the connectors.
-
-
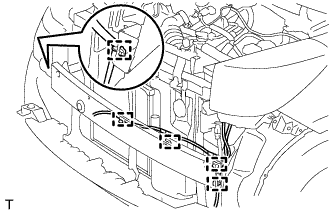
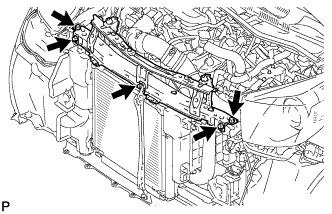
REMOVE FRONT BUMPER REINFORCEMENT SUB-ASSEMBLY
-
Disengage the 5 clamps and disconnect the wire harness.
-
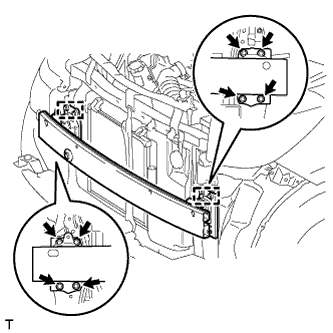
Remove the 8 bolts.
-
Disengage the 2 guides and remove the front bumper reinforcement.
-
-
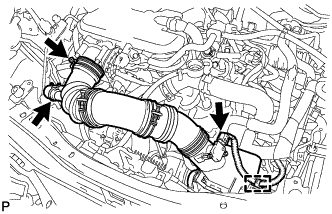
REMOVE AIR CLEANER AND HOSE
-
Disconnect the wire harness clamp and the intake mass air flow meter connector.
-
Disconnect the ventilation hose.
-
Loosen the hose clamp and disconnect the air cleaner hose.
-
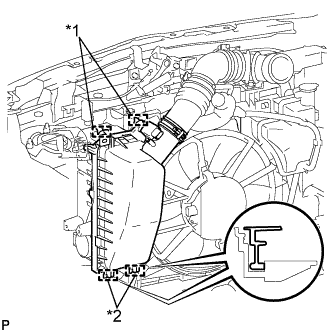
Text in Illustration *1 Clamp *2 Guide Disengage the 2 clamps and 2 guides and remove the air cleaner and hose.
-
-
REMOVE AIR CLEANER FILTER ELEMENT SUB-ASSEMBLY
-
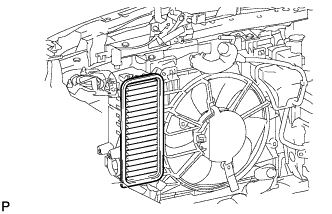
Remove the air cleaner filter element.
-
-
SEPARATE RADIATOR RESERVOIR TANK HOSE
-
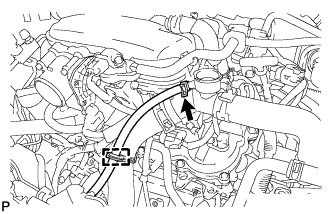
Disengage the hose clamp.
-
Loosen the clamp and disconnect the reserve tank hose from the water filler.
-
-
SEPARATE NO. 3 RADIATOR HOSE
-
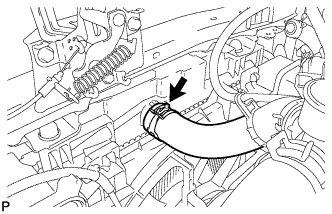
Loosen the clamp and disconnect the radiator hose from the radiator assembly.
-
-
REMOVE HIGH PITCHED HORN ASSEMBLY
-
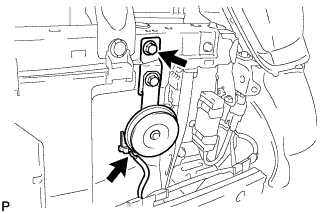
Disconnect the horn connector.
-
Remove the bolt and the horn.
-
-
REMOVE RADIATOR LOWER NO. 1 AIR DEFLECTOR
-
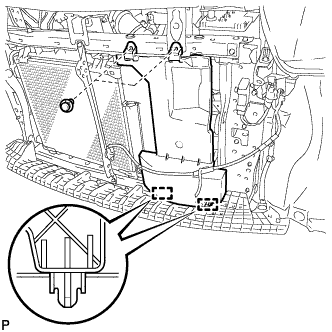
Remove the 2 clips.
-
Remove the 2 guides and the radiator air deflector.
-
-
REMOVE UPPER RADIATOR SUPPORT SUB-ASSEMBLY
-
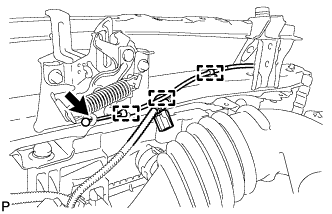
Disengage the wire harness clamp.
-
Disengage the 2 clamps and separate the hood lock cable.
-
Remove the 5 bolts and the upper radiator support.
-
-
REMOVE FAN SHROUD
-
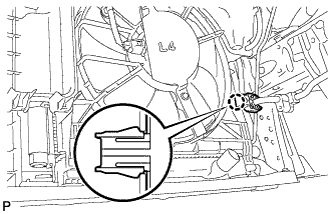
Disengage the claw and remove the piping clamp.
-
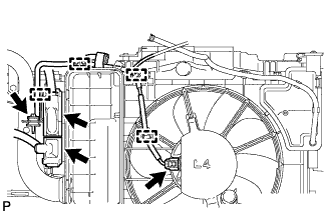
Disengage the 4 harness clamps and disconnect the 3 connectors.
-
Remove the bolt from the ECM.
-
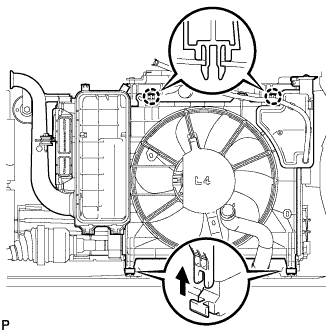
Disengage the 2 claws and remove the fan shroud from the vehicle.
-
-
REMOVE COOLING FAN MOTOR INSULATOR
-
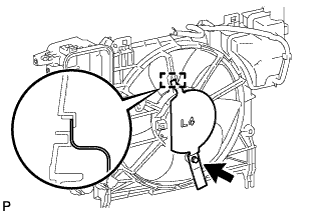
Remove the bolt and the cooling fan motor insulator.
-
-
REMOVE FAN
-
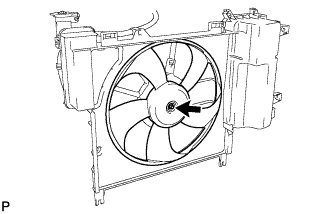
Remove the nut and the fan.
-
-
REMOVE COOLING FAN MOTOR
-
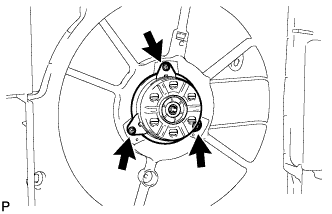
Remove the 3 screws and the cooling fan motor.
-