FUEL FILTER INSTALLATION

-
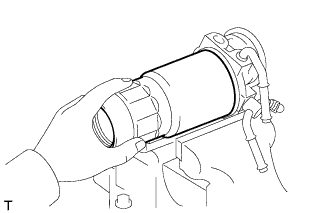
INSTALL FUEL FILTER ELEMENT ASSEMBLY
-
Check and clean the fuel filter installation surface.
-
Apply fuel to the gasket of a new fuel filter element.
-
Lightly screw the fuel filter element into place, and tighten it until the gasket comes into contact with the seat.
-
Tighten it an additional 3/4 turn by hand.
-
-
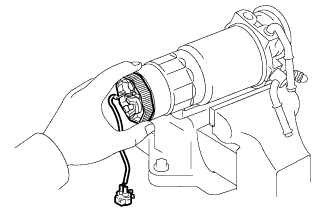
INSTALL FUEL FILTER DRAIN PLUG
-
Install the O-ring onto the drain plug.
-
Apply fuel to the O-ring of the drain plug.
-
Install the fuel filter drain plug onto the level warning switch by hand.
-
-
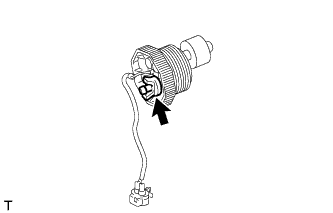
INSTALL LEVEL WARNING SWITCH
-
Install a new O-ring onto the level warning switch.
-
Apply fuel to the O-ring of the level warning switch.
-
Install the level warning switch onto the fuel filter by hand.
-
-
INSTALL FUEL HEATER ASSEMBLY
-
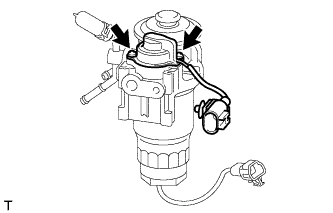
Install the fuel heater assembly with the 2 screws.
-
-
INSTALL FUEL FILTER SUPPORT
-
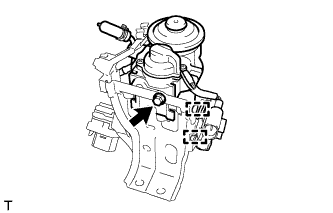
Install the fuel filter support with the bolt.
- Torque:
- 8.5 N*m { 87 kgf*cm, 75 in.*lbf }
-
Connect the 2 clamps.
-
-
INSTALL FUEL FILTER ASSEMBLY
-
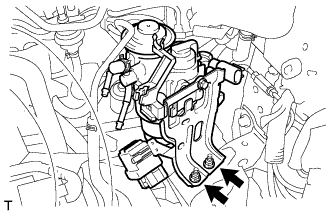
Install the fuel filter with the 2 nuts.
- Torque:
- 19 N*m { 189 kgf*cm, 14 ft.*lbf }
-

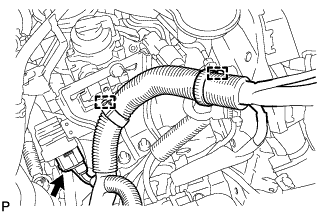
Connect the 2 fuel hose clamps to the fuel filter.
-
Connect the 2 fuel hoses to the fuel filter.
-
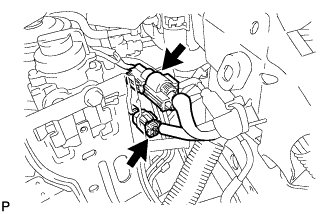
Connect the 2 connectors.
-
Connect the 2 wire harness clamps.
-
Connect the connector.
-
-
INSTALL BATTERY
-
INSTALL BATTERY CLAMP SUB-ASSEMBLY
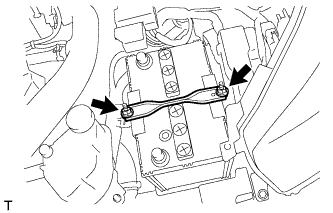
-
Install the battery clamp with the 2 nuts.
- Torque:
- 3.5 N*m { 36 kgf*cm, 31 in.*lbf }
-
-
INSTALL COWL PANEL SUB-ASSEMBLY
-
Install the cowl panel sub-assembly Click here.
-
-
BLEED AIR FROM FUEL SYSTEM
-
INSPECT FOR FUEL LEAK
-
Connect an intelligent tester to the DLC3.
-
Turn the ignition switch to ON.
-
Turn the tester on.
-
Enter the following menus: Powertrain / Engine / Active Test.
-
Perform the Active Test.
Intelligent Tester Display Test Details Control Range Diagnostic Notes Test the Fuel Leak Pressurize common rail internal fuel pressure, and check for fuel leaks Stop/Start Perform inspection of the high pressure fuel system.
Test is possible when the following conditions are met:
-
Warmed up engine.
-
Vehicle is stopped.
-
Battery voltage is 12 V or more.
-
PM regeneration is not operating.
-
Engine speed is less than 4000 rpm.
Results of real-vehicle check:
-
Engine Speed: 2702 rpm
-
Fuel Pressure: 108570 kPa
-
Target Common Rail Pressure: 105500 kPa
-
Target Pump SCV Current: 1.2 A
-
MAP: 127 kPa
-
MAF: 28 g/sec.
-
-