FRONT CRANKSHAFT OIL SEAL REMOVAL

-
REMOVE FRONT WHEEL RH
-
REMOVE NO. 3 ENGINE UNDER COVER
-
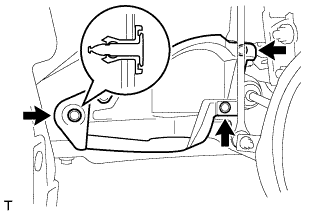
Remove the 3 clips and the No. 3 engine under cover.
-
-
REMOVE NO. 1 V-RIBBED (COOLER COMPRESSOR TO CRANKSHAFT PULLEY) BELT (w/ Air Conditioning System)
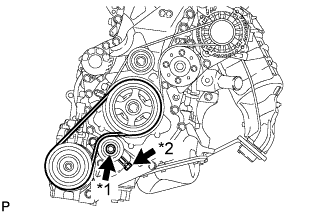
Text in Illustration *1 Bolt A *2 Adjusting Bolt B
-
Loosen the bolt A.
-
Turn adjusting bolt B to release the tension and remove the No. 1 V-ribbed belt from the pulleys.
-
-
REMOVE FAN AND GENERATOR V-RIBBED BELT
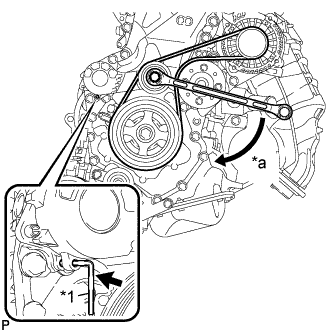
Text in Illustration *1 4 mm Bi-hexagon Wrench *a Turn
-
Release the V-ribbed belt tension by turning the V-ribbed belt tensioner counterclockwise, and remove the V-ribbed belt from the V-ribbed belt tensioner.
-
While turning the V-ribbed belt tensioner counterclockwise, align the holes, and then insert a 4 mm bi-hexagon wrench into the holes to fix the V-ribbed belt tensioner in place.
-
-
REMOVE CRANKSHAFT PULLEY ASSEMBLY
-
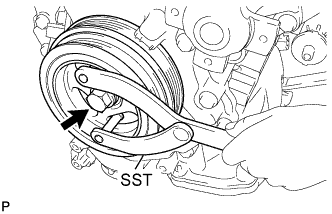
Using SST, remove the crankshaft pulley bolt.
- SST
- 09960-10010 ( 09962-01000, 09963-01000 )
-
Remove the crankshaft pulley from the crankshaft.
-
-
REMOVE TIMING CHAIN COVER OIL SEAL
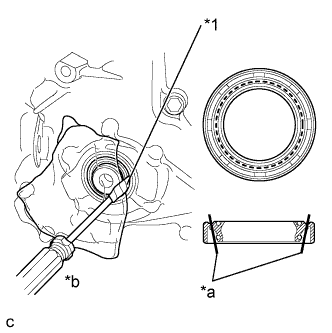
Text in Illustration *1 Protective Tape *a Cut Position *b Pry Out
-
Using a knife, cut off the oil seal lip.
-
Using a screwdriver with its tip wrapped with protective tape, pry out the timing chain cover oil seal.
Note
-
Do not damage the surface of the oil seal press fit hole.
-
After removing, check the crankshaft for damage. If damaged, smooth the surface with 400-grit sandpaper.
-
-