CYLINDER BLOCK DISASSEMBLY

-
REMOVE CYLINDER BLOCK WATER JACKET SPACER
Note
When turning the cylinder block upside-down, make sure that the cylinder block water jacket spacer does not fall out.
-
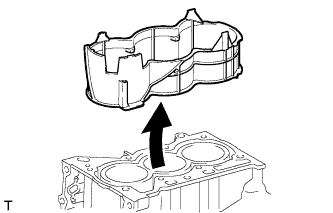
Remove the cylinder block water jacket spacer from the cylinder block.
-
-
REMOVE CONNECTING ROD SUB-ASSEMBLY
Note
Do not turn the crankshaft.
-
Remove the 6 connecting rod bolts and the 3 connecting rod bearing caps.
Note
Arrange the removed parts for each cylinder in order.
-
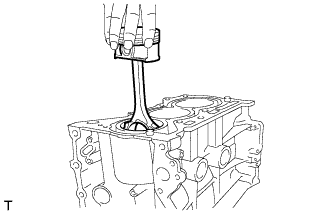
Push the piston, connecting rod and upper bearing through the top of the cylinder block.
Tech Tips
-
Keep the piston, connecting rod and cap together.
-
Arrange the piston and connecting rod for each cylinder in order.
-
-
Remove the 3 connecting rod bearings from the connecting rod sub-assembly.
-
-
REMOVE PISTON RING SET
-
Using a piston ring expander, remove the No. 1 compression ring, No. 2 compression ring and oil ring.
-
-
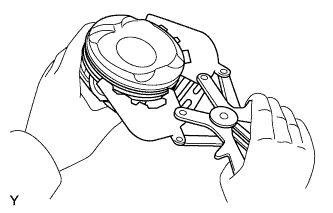
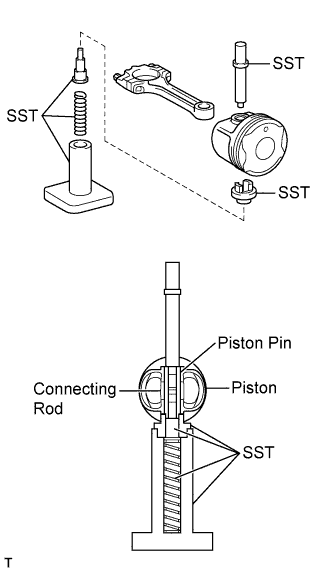
REMOVE WITH PIN PISTON SUB-ASSEMBLY
-
Using SST, press the piston pin out of the piston, and remove the piston.
- SST
- 09221-25026 ( 09221-00021, 09221-00030, 09221-00130, 09221-00141, 09221-00150 )
Tech Tips
-
The piston and pin are a matched set.
-
Arrange the pistons, pins, connecting rods and bearings in the correct order.
-
-
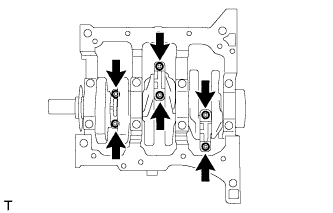
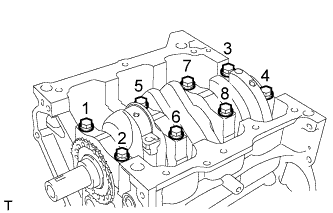
REMOVE CRANKSHAFT
-
Remove the 8 bolts in the order shown in the illustration.
Note
Loosen the crankshaft bearing cap bolts in 2 or 3 steps, in the order shown in the illustration.
-
Remove the 4 crankshaft bearing caps and the crankshaft.
Note
Arrange the removed parts in the removed order.
Tech Tips
-
If it is difficult to remove the crankshaft bearing cap, lightly tap it with a hammer.
-
Move the top of the crankshaft bearing cap back and forth in the axial direction.
-
-
Remove the crankshaft bearing from the cylinder block and crankshaft bearing cap.
-
-
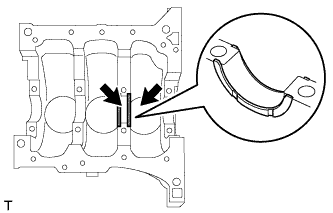
REMOVE CRANKSHAFT THRUST WASHER UPPER
-
Remove the 2 crankshaft thrust washers from journal No. 3 of the cylinder block.
-