FRONT DOOR BELT MOULDING REMOVAL

Tech Tips
-
Use the same procedure for the RH and LH sides.
-
The procedure described below is for the LH side.
-
REMOVE FRONT ARMREST BASE UPPER PANEL (w/o Screw)
Tech Tips
Use the same procedure as for the RH side Click here.
-
REMOVE FRONT ARMREST BASE UPPER PANEL (w/ Screw)
Tech Tips
Use the same procedure as for the RH side Click here.
-
REMOVE FRONT DOOR LOWER FRAME BRACKET GARNISH
Tech Tips
Use the same procedure as for the RH side Click here.
-
REMOVE FRONT DOOR INSIDE HANDLE BEZEL
Tech Tips
Use the same procedure as for the RH side Click here.
-
REMOVE DOOR ASSIST GRIP COVER
Tech Tips
Use the same procedure as for the RH side Click here.
-
REMOVE FRONT DOOR TRIM BOARD SUB-ASSEMBLY
Tech Tips
Use the same procedure as for the RH side Click here.
-
REMOVE OUTER REAR VIEW MIRROR ASSEMBLY
-
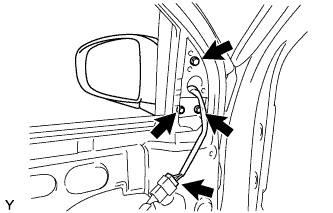
Disconnect the connector.
-
Remove the 3 screws and remove the outer rear view mirror assembly.
-
-
REMOVE FRONT DOOR WINDOW FRAME REAR MOULDING
Tech Tips
Use the same procedure as for the LH side Click here.
-
REMOVE FRONT DOOR GLASS OUTER WEATHERSTRIP ASSEMBLY
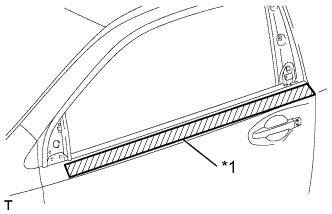
Text in Illustration *1 Protective tape
-
Apply protective tape to the door panel in the area around the front door belt moulding.
-
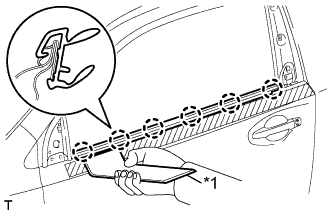
Text in Illustration *1 Moulding remover Using a moulding remover, disengage the 6 claws and remove the front door glass outer weatherstrip.
-