FRONT BUMPER REASSEMBLY

-
INSTALL FRONT BUMPER ENERGY ABSORBER SUB-ASSEMBLY
-
Install the front bumper energy absorber with the 14 screws.
-
-
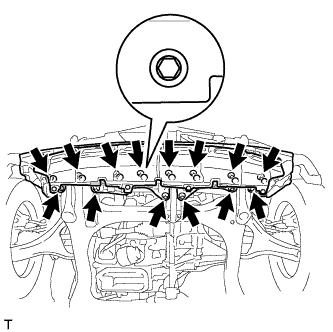
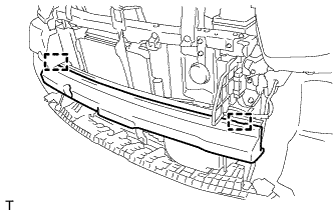
INSTALL FRONT BUMPER REINFORCEMENT SUB-ASSEMBLY
-
Engage the 2 guides and install the front bumper reinforcement
-
Tighten the 8 bolts.
- Torque:
- 40 N*m { 408 kgf*cm, 30 ft.*lbf }
-
Engage the 5 clamps.
-
-
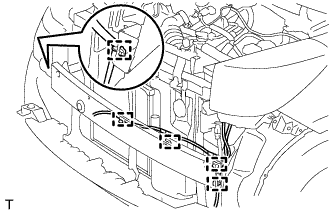
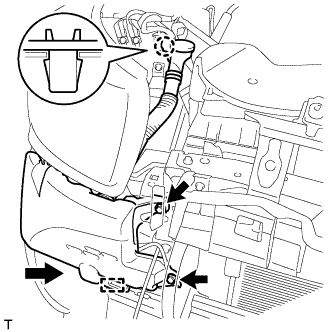
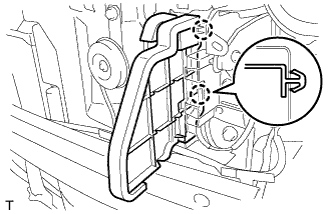
INSTALL WINDSHIELD WASHER JAR ASSEMBLY
-
Connect the connectors.
-
Connect the washer hose.
-
Engage the guide and install the windshield washer jar.
-
Engage the claw.
-
Tighten the 2 bolts.
- Torque:
- 5.5 N*m { 56 kgf*cm, 49 in.*lbf }
-
-
INSTALL HEADLIGHT ASSEMBLY RH (for 1ND-TV)
Tech Tips
Use the same procedure as for the LH side Click here.
-
INSTALL RADIATOR SUPPORT EXTENSION LH

-
Engage the 2 claws and install the radiator support extension.
-
-
INSTALL RADIATOR SUPPORT EXTENSION RH
Tech Tips
Use the same procedure as for the LH side.
-
INSTALL NO. 2 RADIATOR SIDE AIR SEAL
-
Engage the 2 claws and install the radiator side air seal.
-
-
INSTALL NO. 1 RADIATOR SIDE AIR SEAL
Tech Tips
Use the same procedure as for the LH side.
-
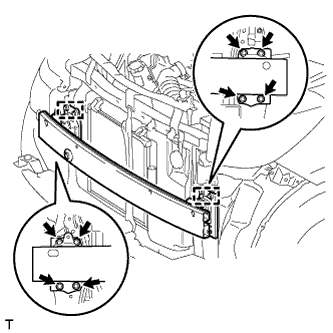
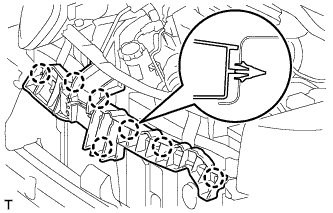
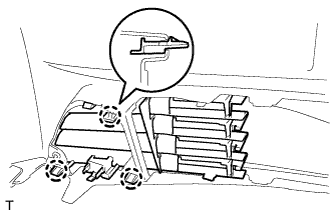
INSTALL FRONT BUMPER ENERGY ABSORBER
-
Engage the 2 guide and install the front bumper energy absorber.
-
-
INSTALL RADIATOR SUPPORT UPPER ABSORBER
-
Engage the 7 claws and install the radiator support upper absorber.
-
-
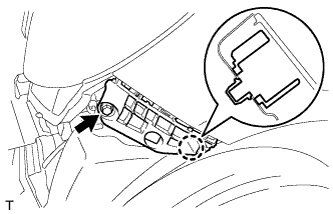
INSTALL FRONT BUMPER SIDE RETAINER LH
-
Engage the claw and install the front bumper side retainer.
-
Tighten the screw.
-
-
INSTALL FRONT BUMPER SIDE RETAINER RH
Tech Tips
Use the same procedure as for the LH side.
-
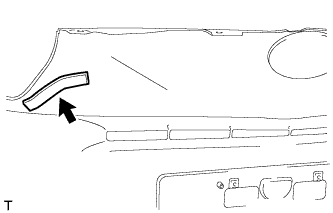
INSTALL FRONT BUMPER HOLE COVER
-
Engage the 2 claws and install the front bumper hole cover.
-
-
INSTALL FRONT BUMPER PAD RH
-
Apply Primer G to the installation part of the front bumper pad.
Tech Tips
If primer is applied to an area that is not specified, wipe off the primer with a non-residue solvent before it dries.
-
Install the new front bumper pad onto the front bumper cover, as shown in the illustration.
Note
-
Allow the primer to dry for 3 minutes or more.
-
Throw away any leftover primer.
-
Do not apply too much primer.
-
-
-
INSTALL FRONT BUMPER PAD SUB-ASSEMBLY
-
Apply Primer G to the installation part of the front bumper pad.
Tech Tips
If primer is applied to an area that is not specified, wipe off the primer with a non-residue solvent before it dries.
-
Install the new front bumper pad onto the front bumper cover, as shown in the illustration.
Note
-
Allow the primer to dry for 3 minutes or more.
-
Throw away any leftover primer.
-
Do not apply too much primer.
Tech Tips
Use the same procedure for the RH and LH sides.
-
-
-
INSTALL FRONT BUMPER PAD
-
Apply Primer G to the installation part of the front bumper pad.
Tech Tips
If primer is applied to an area that is not specified, wipe off the primer with a non-residue solvent before it dries.
-
Install the new front bumper pad onto the front bumper cover, as shown in the illustration.
Note
-
Allow the primer to dry for 3 minutes or more.
-
Throw away any leftover primer.
-
Do not apply too much primer.
-
-
-
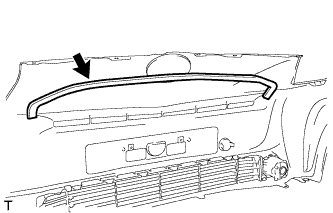
INSTALL FRONT BUMPER HOLE COVER LH
-
Engage the 3 claws and install the front bumper hole cover.
-
-
INSTALL FRONT BUMPER HOLE COVER RH
Tech Tips
Use the same procedure as for the LH side.
-
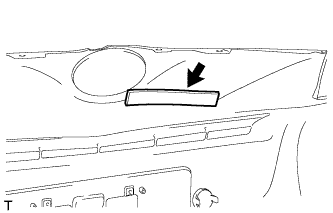
INSTALL NO. 1 RADIATOR LOWER GRILLE
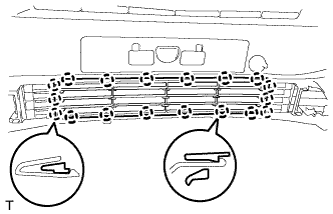
-
Engage the 18 claws and install the radiator lower grille.
-
-
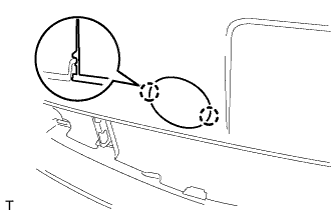
INSTALL FRONT BUMPER EMBLEM
-
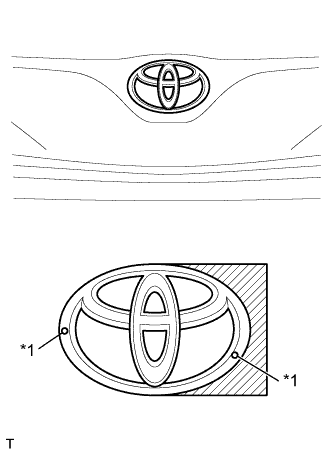
Text in Illustration *1 Location pin Clean the attachment surface.
-
Using an infrared light, heat the double-sided adhesive tape remaining on the vehicle body.
Tech Tips
Heat at 40 to 60°C (104 to 140°F) for 1 to 2 minutes.
-
Using a piece of cloth, rub the remaining double-sided adhesive tape off the vehicle body while it is hot from the infrared light.
Note
Installing the front bumper emblem with any double-sided tape remaining on the engine hood may cause adhesion failure. Therefore, completely remove the double-sided tape.
-
Using a non-residue solvent, clean the attachment surface.
-
-
Insert the 2 pins into the front bumper and install the front bumper emblem.
Note
Install the front bumper emblem in an environment where the ambient temperature is over 20°C (68°F). If it is below 20°C (68°F), using an infrared light, heat the vehicle body and the front bumper emblem to 20 to 30°C (68 to 86°F) and install the front bumper emblem.
-