ROOF DRIP SIDE FINISH MOULDING INSTALLATION

-
INSTALL ROOF DRIP SIDE FINISH MOULDING CLIP
Note
Follow these procedures only when replacing the clips.
-
Remove the tape that remains on the moulding surface of the vehicle body, and then clean the surface with a non-residue solvent.
-
Using an infrared light, heat the clip installation surface of the vehicle body and roof drip side finish moulding.
Heating Temperature Area Temperature Vehicle Body 40 to 60°C (104 to 140°F) Roof Drip Side Finish Moulding 20 to 30°C (68 to 86°F) Note
Do not excessively heat the vehicle body or roof drip side finish moulding.
-
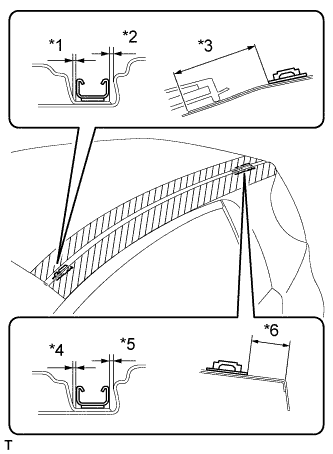
Install new clips in the positions shown in the illustration. Press in the clips by hand.
Specification Area Measurement *1 1.2 mm (0.047 in.) *2 1.8 mm (0.071 in.) *3 53.8 mm (2.118 in.) *4 0.7 mm (0.028 in.) *5 1.8 mm (0.071 in.) *6 28.2 mm (1.110 in.) Note
After pressing in the clips, wait 30 minutes or more before installing the roof drip side finish moulding.
Tech Tips
-
Minimum hardening time: 30 minutes
-
Time needed for complete hardening: 24 hours
-
-
-
INSTALL ROOF DRIP SIDE FINISH MOULDING
-
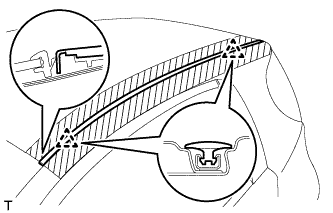
Engage the 2 clips and install the roof drip side finish moulding.
-