FUEL LID LOCK CONTROL CABLE ASSEMBLY REMOVAL

-
REMOVE REAR SEAT ASSEMBLY (w/ Rear Seat Assembly)
-
Remove the rear seat assembly Click here.
-
-
REMOVE REAR SEAT UNDER TRAY
-
Remove the rear seat under tray.
-
-
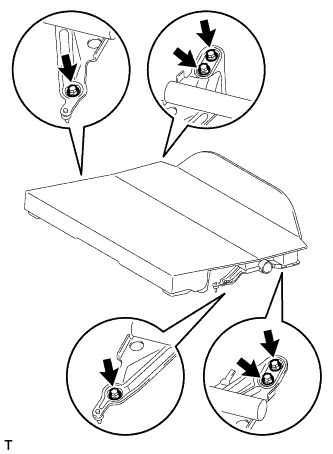
REMOVE REAR SEAT SUB FLOOR BOARD ASSEMBLY (w/o Rear Seat Assembly)
-
Remove the 6 bolts and rear floor board.
-
-
REMOVE FRONT DOOR SCUFF PLATE RH

-
Disengage the 9 claws and remove the front door scuff plate.
-
-
REMOVE FRONT DOOR SCUFF PLATE LH
Tech Tips
Use the same procedure as for the RH side.
-
SEPARATE FRONT DOOR OPENING TRIM WEATHERSTRIP RH
-
Remove the front door opening trim weatherstrip to the extent that the side No.1 trim RH can be removed.
-
-
SEPARATE FRONT DOOR OPENING TRIM WEATHERSTRIP LH
-
Remove the front door opening trim weatherstrip to the extent that the side No.1 trim LH can be removed.
-
-
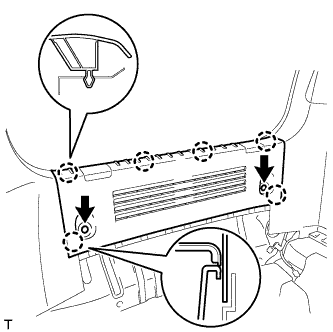
REMOVE REAR DECK TRIM COVER
-
Remove the 2 clips.
-
Disengage the 6 claws and remove the rear deck trim cover.
-
-
REMOVE BACK DOOR WEATHERSTRIP
-
Remove the back door weatherstrip to the extent that the side No.1 trim RH and the side No. 1 trim LH can be removed.
-
-
REMOVE DECK TRIM SIDE BELT HOLE COVER RH
-
Disengage the 5 claws and remove the deck trim side belt hole cover.
-
-
REMOVE DECK TRIM SIDE BELT HOLE COVER LH
Tech Tips
Use the same procedure as for the RH side.
-
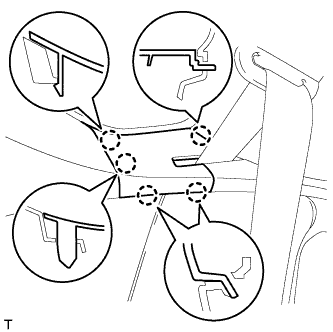
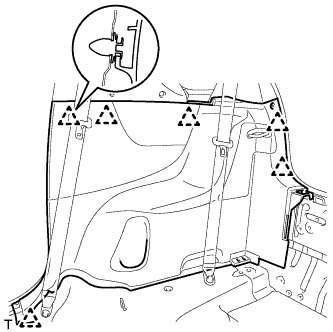
REMOVE SIDE NO. 1 TRIM ASSEMBLY RH
-
Disengage the 6 clips and remove the side No. 1 trim.
-
-
REMOVE SIDE NO. 1 TRIM ASSEMBLY LH
Tech Tips
Use the same procedure as for the RH side.
-
REMOVE REAR SEAT OUTER BELT ASSEMBLY (w/ Rear Seat Assembly)
Tech Tips
Use the same procedure as for the RH side Click here.
-
REMOVE LUGGAGE COMPARTMENT TRAY
-
Remove the luggage compartment tray.
-
-
REMOVE FUEL LID LOCK OPEN LEVER SUB-ASSEMBLY
-
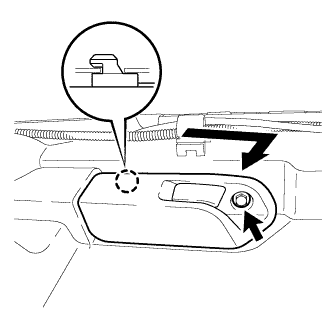
Remove the screw and remove the fuel lid lock open lever.
-
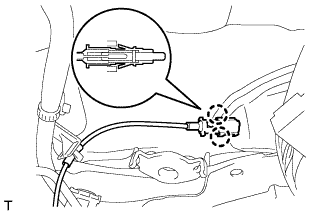
Disconnect the fuel lid lock control cable.
-
-
REMOVE FUEL LID LOCK CONTROL CABLE SUB-ASSEMBLY (for LHD)
-

Disengage the 5 clips and peel back the floor carpet.
Tech Tips
Peel back the floor carpet enough to allow removal and installation of the fuel lid lock control cable.
-
Disengage the 2 claws and remove the fuel lid lock control cable from the fuel filler opening lid lock retainer.
-
Disengage the clamps and remove the fuel lid lock control cable.
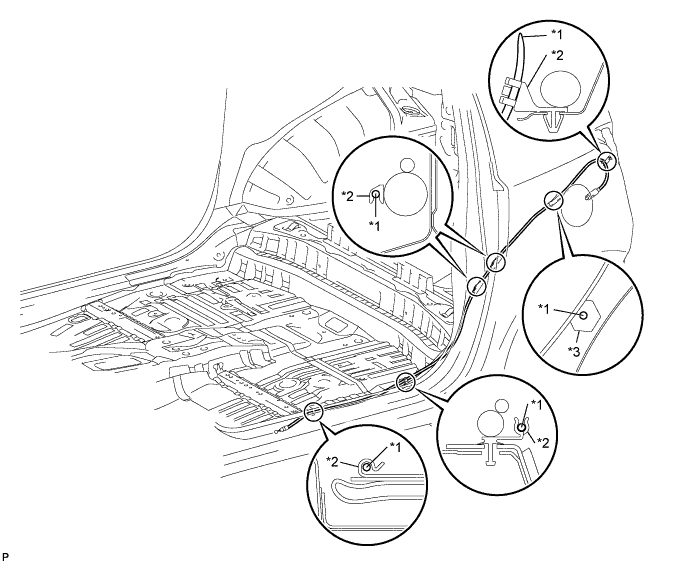
Area Part Name Area Part Name *1 Fuel lid lock control cable *3 Insulator *2 Wire harness clamp - -
-
-
REMOVE FUEL LID LOCK CONTROL CABLE SUB-ASSEMBLY (for RHD)
-
Disengage the 5 clips and peel back the floor carpet.
Tech Tips
Peel back the floor carpet enough to allow removal and installation of the fuel lid lock control cable.
-
Disengage the 2 claws and remove the fuel lid lock control cable from the fuel filler opening lid lock retainer.
-
Disengage the clamps and remove the fuel lid lock control cable.
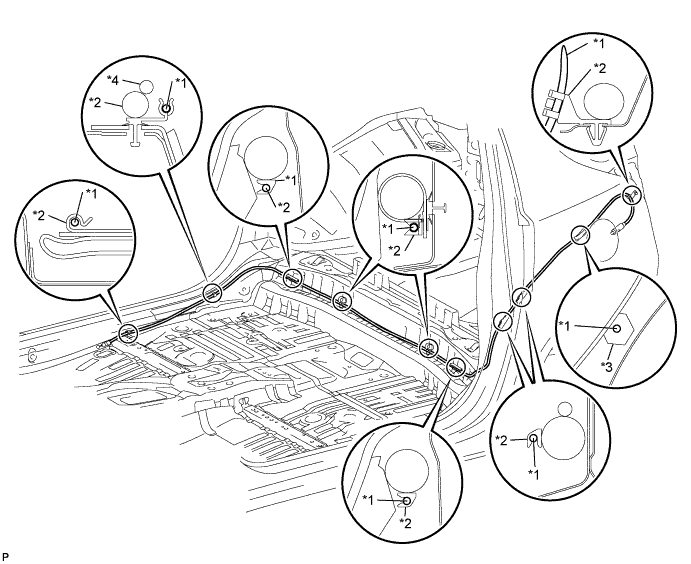
Area Part Name Area Part Name *1 Fuel lid lock control cable *3 Insulator *2 Wire harness clamp *4 Washer hose
-
-
REMOVE FUEL FILLER OPENING LID LOCK RETAINER
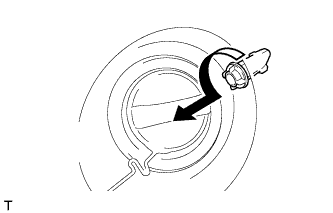
-
Remove the fuel filler opening lid lock retainer by rotating it as shown in the illustration.
-