FRONT WIPER MOTOR INSTALLATION

-
INSTALL WINDSHIELD WIPER MOTOR ASSEMBLY
-
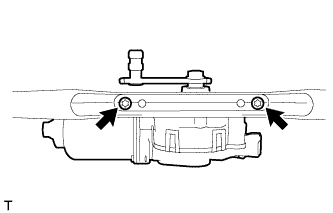
Using a "TORX" socket wrench T30, install the front wiper motor with the 2 screws.
- Torque:
- 7.5 N*m { 76 kgf*cm, 66 in.*lbf }
-
Apply DENSO No. 50 grease to the crank arm pivot of the front wiper motor.
-
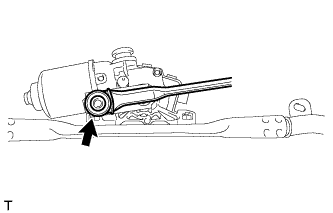
Connect the left wiper rod of the windshield wiper link assembly to the crank arm pivot of the windshield wiper motor.
-
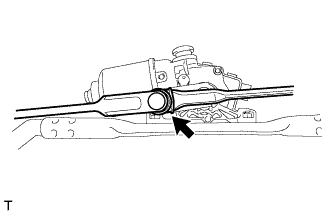
Connect the right wiper rod of the windshield wiper link assembly to the crank arm pivot of the windshield wiper motor.
-
-
INSTALL WINDSHIELD WIPER MOTOR AND LINK ASSEMBLY
-
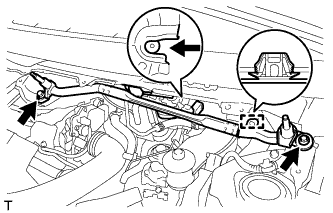
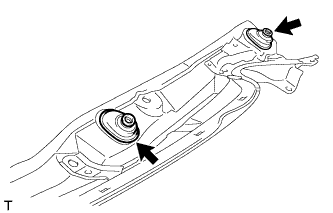
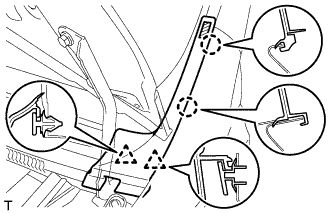
Slide the front wiper motor and link as shown in the illustration and engage the rubber pin with the body.
-
Install the front wiper motor and link with the 2 bolts.
- Torque:
- 5.5 N*m { 56 kgf*cm, 49 in.*lbf }
-
Connect the connector and engage the clamp.
-
-
INSTALL FRONT WIPER MOTOR GROMMET
-
Apply MP grease to the entire surface of the wiper motor grommet lip.
Tech Tips
Make sure that the hole does not get clogged with grease and the grooves on the lip are filled with grease.
-
Install the 2 front wiper motor grommets.
-
-
INSTALL COWL PANEL SUB-ASSEMBLY
-
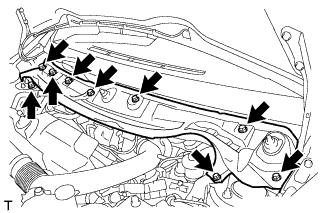
Install the cowl panel with 9 bolts.
- Torque:
- 5.5 N*m { 56 kgf*cm, 49 in.*lbf }
-
-
INSTALL COWL TOP VENTILATOR LOUVER SUB-ASSEMBLY (for LHD)
-
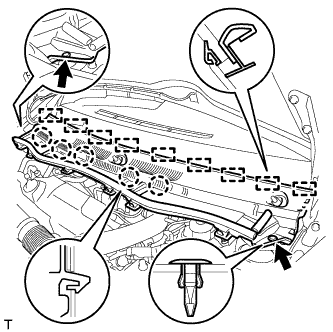
Engage the 9 guides and 5 claws and install the cowl top ventilator louver.
-
Install the 2 clips.
-
-
INSTALL COWL TOP VENTILATOR LOUVER SUB-ASSEMBLY (for RHD)
-
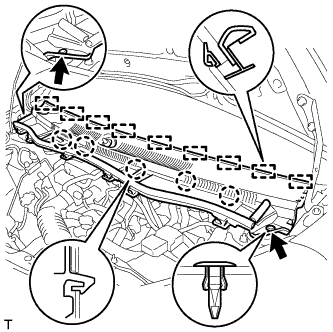
Engage the 9 guides and 5 claws and install the cowl top ventilator louver.
-
Install the 2 clips.
-
-
INSTALL FRONT FENDER TO COWL SIDE SEAL LH
-
Using a piece of cloth or similar material, rub off any double-sided tape remaining on the window moulding.
-
Using a piece of cloth or similar material, remove any double-sided tape remaining on the front fender to cowl side seal.
-
Clean the attachment surfaces for the window moulding and front fender to cowl side seal with a non-residue solvent.
-
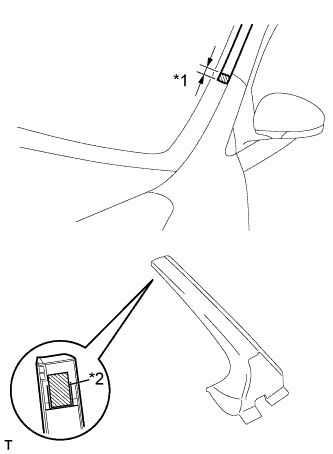
Text in Illustration *1 26 mm *2 Primer and double-sided Tape Apply primer to the attachment surfaces for the front fender to cowl side seal and window moulding.
-
Apply double-sided tape to the front fender to cowl side seal.
-
Engage the 2 claws and 2 clips and apply thorough pressure to the sections with double-sided tape to install the front fender to cowl side seal.
-
-
INSTALL FRONT FENDER TO COWL SIDE SEAL RH
Tech Tips
Use the same procedure as for the LH side.
-
INSTALL FRONT WIPER ARM AND BLADE ASSEMBLY LH
-
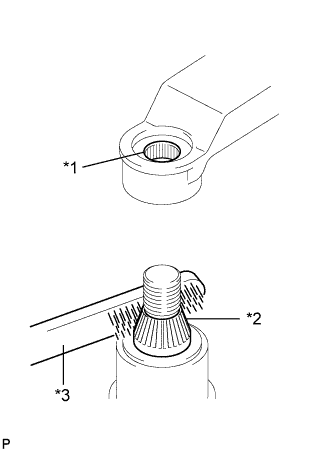
Text in Illustration *1 Wiper Arm Serration *2 Wiper Pivot Serration *3 Wire Brush Scrape any metal powder off the serrated part of the wiper arm with a round file or the equivalent (when reinstalling).
-
Clean the wiper pivot serrations with a wire brush.
-
Operate the wiper, and then stop the windshield wiper motor in the automatic stop position.
-
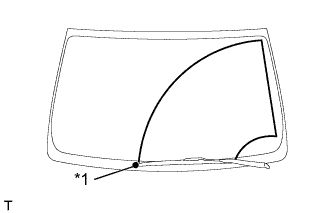
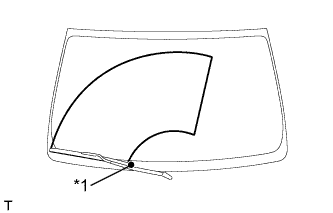
Text in Illustration *1 Mark for Blade Position Align the blade tip with the mark on the glass, as shown in the illustration.
-
Tighten the nut on the front wiper arm.
- Torque:
- 26 N*m { 265 kgf*cm, 19 ft.*lbf }
-
-
INSTALL FRONT WIPER ARM AND BLADE ASSEMBLY RH
-
Text in Illustration *1 Wiper Arm Serration *2 Wiper Pivot Serration *3 Wire Brush Scrape any metal powder off the serrated part of the wiper arm with a round file or the equivalent (when reinstalling).
-
Clean the wiper pivot serrations with a wire brush.
-
Operate the wiper, and then stop the windshield wiper motor in the automatic stop position.
-
Text in Illustration *1 Mark for Blade Position Align the blade tip with the mark on the glass, as shown in the illustration.
-
Tighten the nut on the front wiper arm.
- Torque:
- 26 N*m { 265 kgf*cm, 19 ft.*lbf }
-
-
INSTALL FRONT WIPER ARM HEAD CAP
-
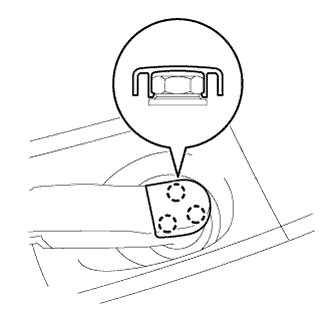
Engage the 3 claws and install the 2 front wiper arm head caps.
-