HOOD REASSEMBLY

-
INSTALL HOOD STAY HOLDER
-
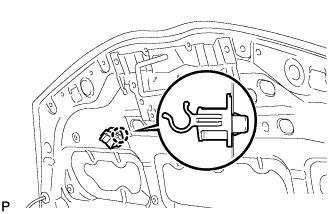
Engage the claw and install the hood stay holder.
-
-
INSTALL HOOD STOPPER
-
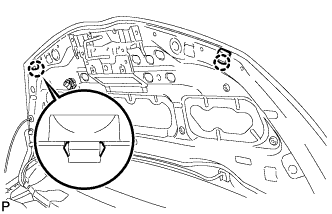
Engage the claw and install the 2 hood stoppers.
-
-
INSTALL HOOD INSULATOR
-
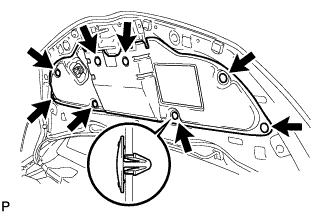
Engage the 8 clips and install the hood insulator.
-
-
INSTALL HOOD REAR MOULDING
-
Clean the attachment surface.
-
Using an infrared light, heat the double-sided adhesive tape remaining on the hood.
Tech Tips
Heat at 40 to 60°C (104 to 140°F) for 1 to 2 minutes.
-
Using a piece of cloth, rub the remaining double-sided adhesive tape off the hood while it is hot from the infrared light.
Note
Installing the hood rear moulding with any double-sided tape remaining on the hood may cause adhesion failure. Therefore, completely remove the double-sided tape.
-
Using a non-residue solvent, clean the attachment surface.
-
-
Remove the release paper from the hood rear moulding.
-

Text in Illustration *1 Double-sided tape Engage the 8 clips and install the hood rear moulding.
Note
Thoroughly press the hood moulding to ensure that it adheres.
-
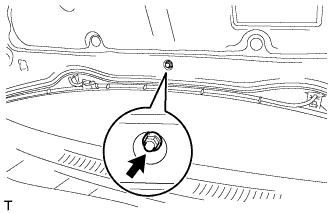
Tighten the nut.
- Torque:
- 4.9 N*m { 50 kgf*cm, 43 in.*lbf }
-
-
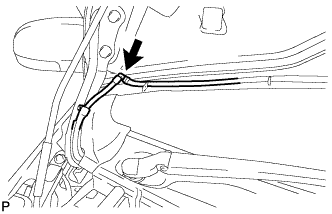
INSTALL WASHER HOSE
-
Install the washer hose.
-
-
CONNECT WASHER HOSE
-
Connect the washer hose.
-
-
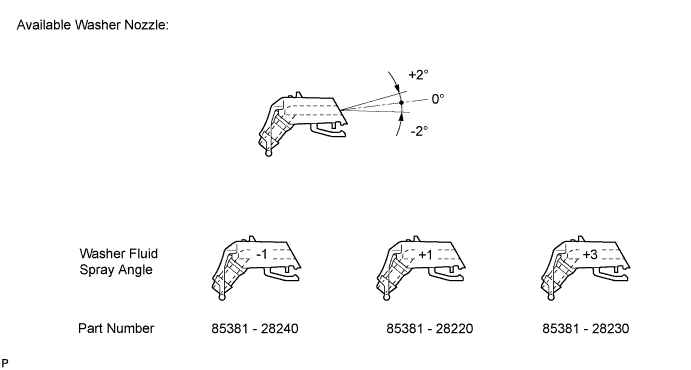
ADJUST WASHER NOZZLE SUB-ASSEMBLY
-
Select a washer nozzle sub-assembly so that the washer fluid spray area is as specified.
-
-
INSTALL WASHER NOZZLE SUB-ASSEMBLY
-
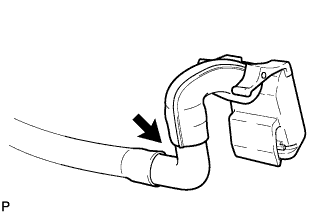
Connect a new front washer nozzle to the washer hose.
-
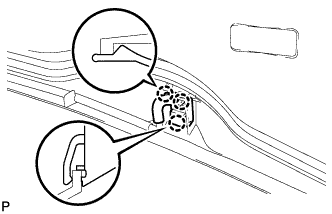
Engage the 3 claws and install the front washer nozzle.
-
-
INSPECT WASHER NOZZLE SUB-ASSEMBLY
-
With the engine running, check where the washer fluid hits the windshield.

Standard Area Measurement Area Measurement *1 259 mm (10.20 in.) *3 130 mm (5.12 in.) *2 613 mm (24.13 in.) *4 195 mm (7.68 in.) OK Washer fluid hits the windshield in the areas shown in the illustration. If the result is not as specified, replace the washer nozzle.
-