HOOD LOCK CONTROL CABLE ASSEMBLY REMOVAL

-
REMOVE FRONT WHEEL
-
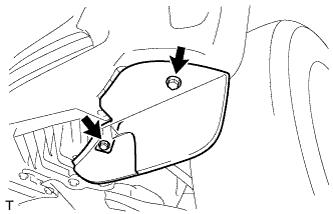
REMOVE FRONT WHEEL OPENING EXTENSION PAD
-
Remove the 2 screws and front wheel opening extension pad.
-
-
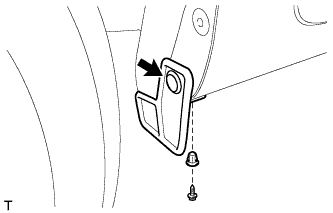
REMOVE FENDER REAR PLATE MUDGUARD
-
Remove the clip and screw.
-
Remove the grommet and the fender rear plate mudguard.
Tech Tips
Replace the grommets with new ones if they are damaged during removal.
-
-
REMOVE FRONT FENDER SPLASH SHIELD SUB-ASSEMBLY
-
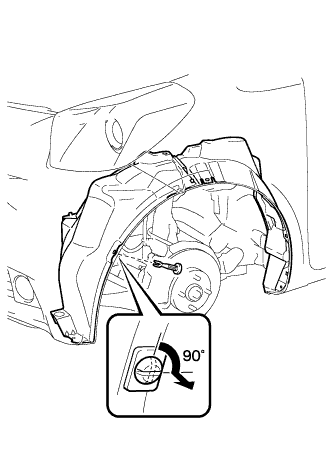
Using a screwdriver, turn the pin 90 degrees and remove the pin hold clip.
-
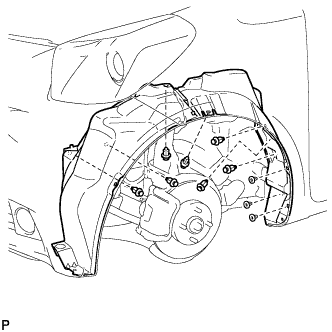
Remove the 7 clips.
-
Remove the 3 grommets and remove the front fender splash shield.
Tech Tips
Replace the grommets with new ones if they are damaged during removal.
-
-
REMOVE HOOD LOCK ASSEMBLY (w/o Engine Hood Courtesy Switch)
-
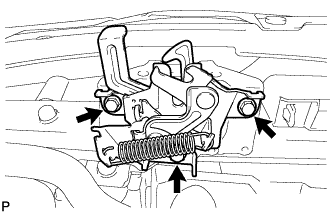
Remove the 3 bolts and remove the hood lock assembly.
-
Disconnect the hood lock control cable.
-
-
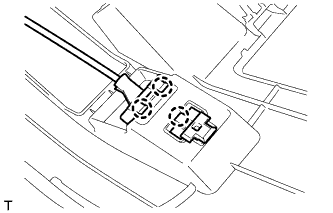
REMOVE HOOD LOCK ASSEMBLY (w/ Engine Hood Courtesy Switch)
-
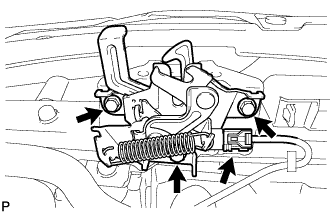
Disconnect the connector.
-
Remove the 3 bolts and remove the hood lock assembly.
-
Disconnect the hood lock control cable.
-
-
REMOVE FRONT DOOR SCUFF PLATE
Tech Tips
Use the same procedure as for the RH side Click here.
-
REMOVE COWL SIDE TRIM BOARD
Tech Tips
Use the same procedure as for the RH side Click here.
-
SEPARATE FRONT DOOR OPENING TRIM WEATHERSTRIP
-
Remove the front door opening trim weatherstrip to the extent that the side No. 1 trim can be removed.
-
-
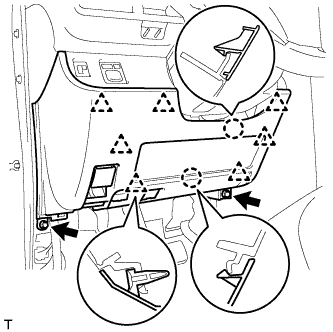
REMOVE LOWER NO.1 INSTRUMENT PANEL FINISH PANEL
-
Remove the 2 <C> bolts.
-
Disengage the 2 claws and the 7 clips and separate the lower No. 1 instrument panel finish panel.
-
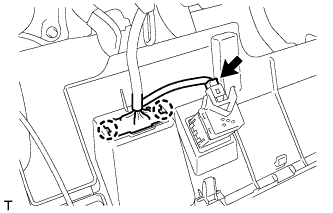
Disconnect the connector.
-
Disengage the 2 claws and disconnect the DLC3 connector.
-
Disengage the 3 claws and disconnect the hood lock control lever.
-
-
REMOVE HOOD LOCK CONTROL LEVER
-

Disengage the 3 claws and remove the hood lock control lever.
-
Disconnect the hood lock control cable.
-
-
REMOVE HOOD LOCK CONTROL CABLE ASSEMBLY (for LHD)
-
Using a screwdriver with its tip wrapped in protective tape, disconnect the clamps shown in the illustration.
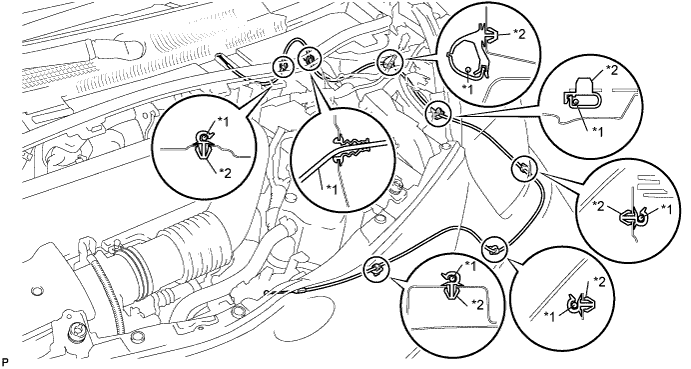
Area Part Name Area Part Name *1 Hood lock control cable *2 clamp -
Pull the cable from the engine compartment and remove it.
-
-
REMOVE HOOD LOCK CONTROL CABLE ASSEMBLY (for RHD)
-
Using a screwdriver with its tip wrapped in protective tape, disconnect the clamps shown in the illustration.
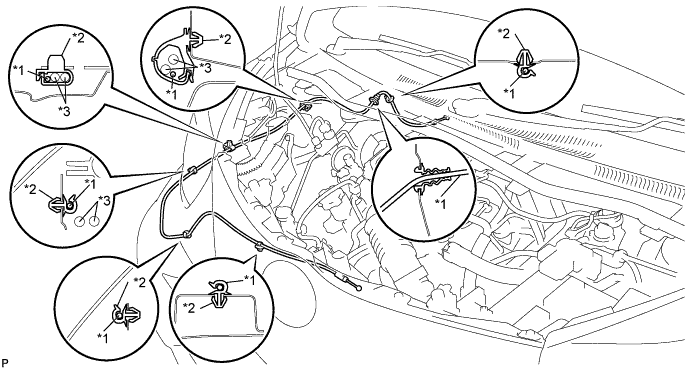
Area Part Name Area Part Name *1 Hood lock control cable *3 Washer hose *2 Clamp - - -
Pull the cable from the engine compartment and remove it.
-