HEATER ASSEMBLY REASSEMBLY

-
INSTALL HEATER WATER INLET HOSE C
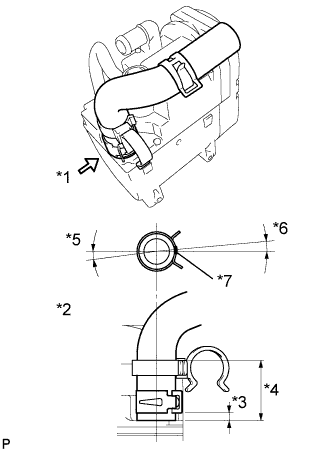
Text in Illustration *1 A *2 View A *3 5 mm (0.197 in.) *4 41 mm (1.614 in.) *5 -23° to 37°
(Clamp angle)
*6 -25° to 35°
(Clip angle)
*7 Brown paint mark
-
Install the heater water inlet hose onto the heater.
Tech Tips
Perform the installation with the hose clip and mark at the correct angle.
-
-
INSTALL HEATER WATER INLET HOSE B
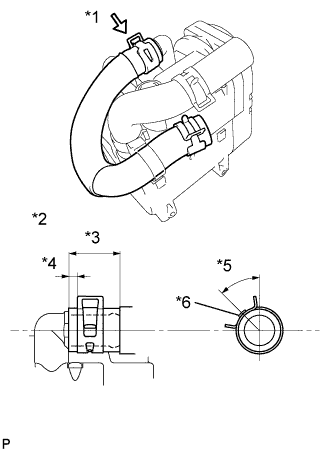
Text in Illustration *1 A *2 View A *3 30 mm (1.181 in.) *4 5 mm (1.197 in.) *5 15° to 75° *6 Red paint mark
-
Install the heater water inlet hose onto the heater.
Tech Tips
Perform the installation with the hose clip and mark at the correct angle.
-
-
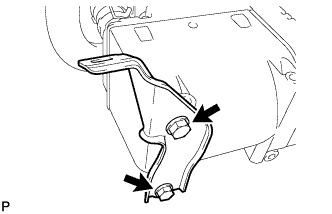
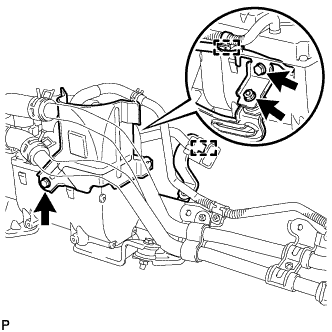
INSTALL HEATER BRACKET
-
Install the heater bracket with the 2 bolts.
- Torque:
- 5.4 N*m { 55 kgf*cm, 48 in.*lbf }
-
-
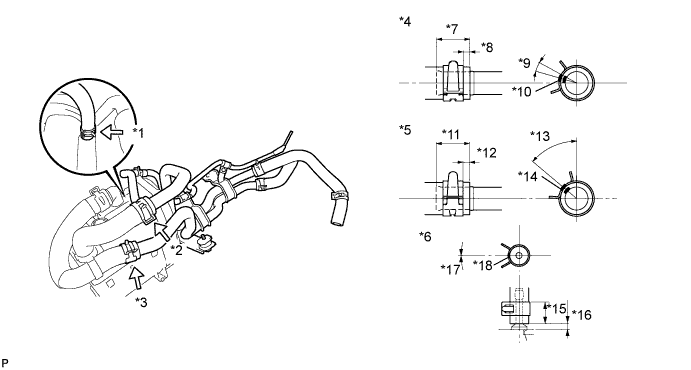
INSTALL HEATER WATER INLET PIPE A
-
Install the heater water inlet pipe onto the heater.
Tech Tips
Perform the installation with the hose clip and mark at the correct angle.
Text in Illustration *1 A *10 Pink painted mark *2 B *11 25 mm (in.) *3 C *12 5 mm (in.) *4 View B *13 50° *5 View C *14 Yellow painted mark *6 View A *15 16.5 mm (0.650 in.) *7 25 mm (in.) *16 2.5 mm (0.098 in.) to 5.0 mm (0.197 in.) *8 5 mm (in.) *17 -30° to 30° *9 -18° to 42° *18 Yellow painted mark
-
-
INSTALL HEATER BRACKET
-
Install the heater bracket with the 2 bolts and the nut.
- Torque:
- 5.4 N*m { 55 kgf*cm, 48 in.*lbf }
-
Engage the 2 clamps.
-